|
BULB LOG 30 --- 25th July 2007
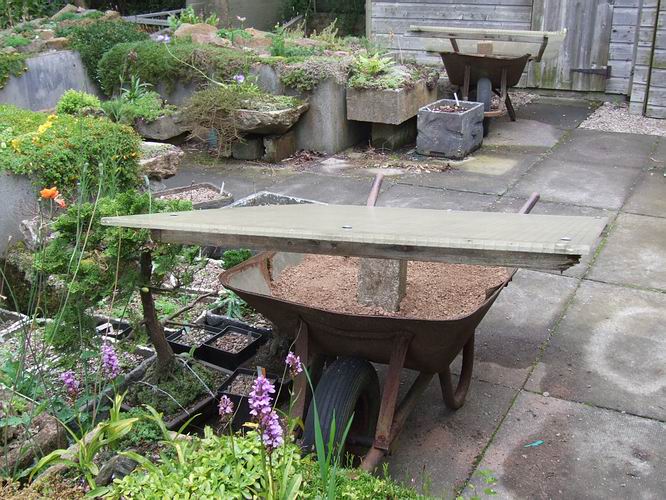
Drying out compost
I am still trying to keep a supply of dry compost for the big annual re-pot of all the bulbs but it is a bit of a battle against the continual stream of low pressure systems queuing up over the Atlantic to move across bringing yet more rain. I must say that the vegetative growth on the trees and shrubs is lush; they are obviously enjoying the constant supply of moisture. I have the gravel and sand covered to stop it getting any wetter but that also slows down how quickly it will dry out. I am measuring out my two buckets of sand and placing it in an open box in the frit house, turning it regularly to dry it, until it is suitable to mix. If the ingredients are too wet it is impossible to get a satisfactory mix of the potting compost - then once I have made the mix I need to dry it out further in covered wheel barrows before I can risk potting the dormant bulbs into it.
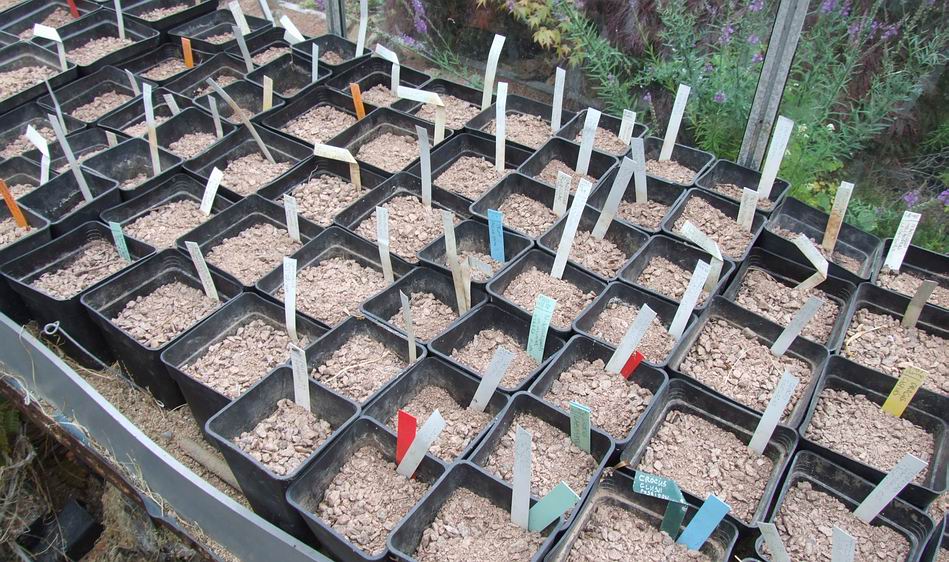
Repotting
To further aid the drying process and reduce the risks of the bulbs rotting in damp compost I am not top dressing them with gravel - I will do that later in the season.
I have checked a few pots I did last week and was relieved to see that the compost was suitably dry.
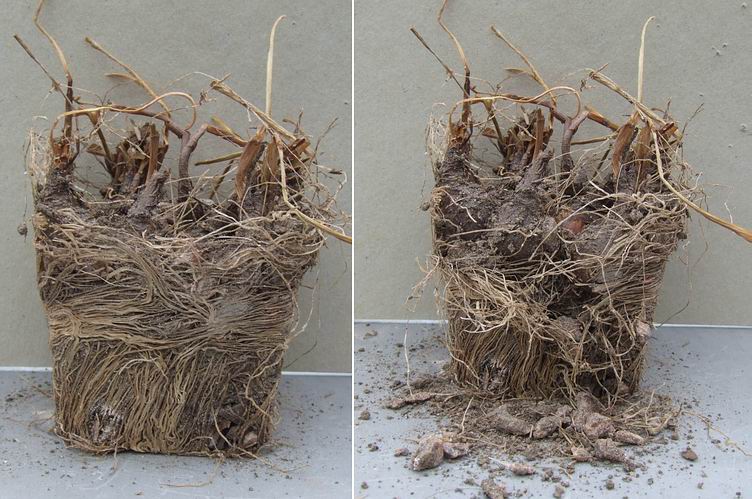
Narcissus bulbs showing roots
Here again is a good example of how the roots of a bulb will happily grow into the compost above the planting level so we should have no fear of not having enough compost below the bulbs. A good healthy root system like this usually results in a nice increase in the bulbs.
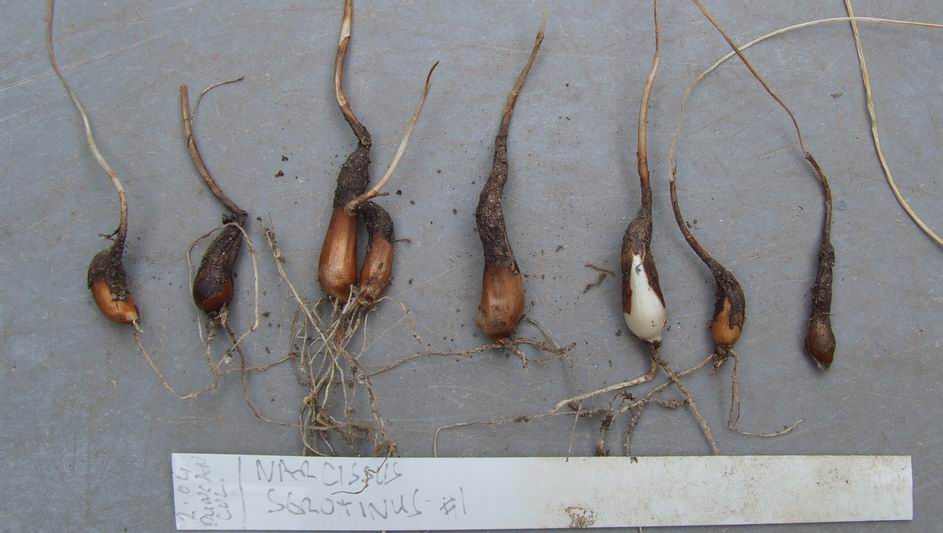
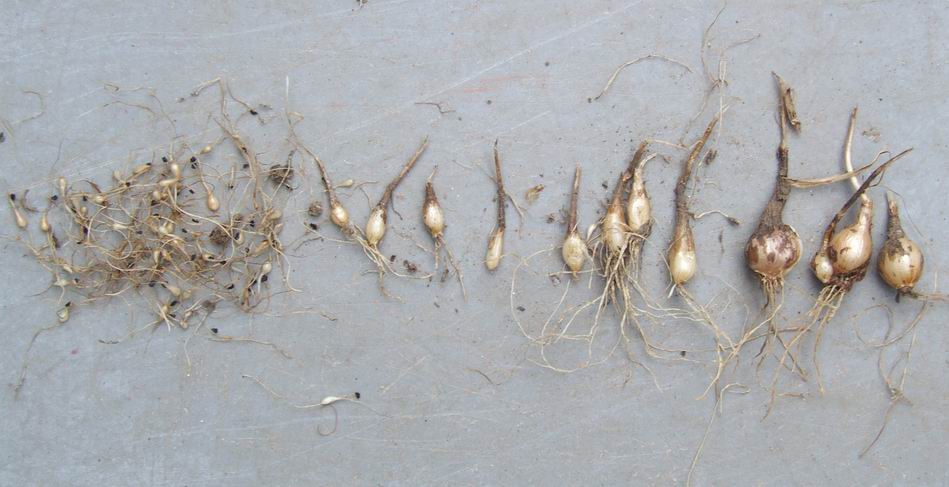
Narcissus serotinus seedling bulbs
Here are some Narcissus serotinus seedling bulbs, sown in February 2004, getting their first repot. Despite being sown half way down the pot they are still elongating to take themselves ever deeper into the compost.

Narcissus serotinus descending bulbs
Another pot of seedlings shows very clearly how, in each of the three years of growth, they have taken themselves a bit deeper. I found the young bulbs at the very bottom of the pots - we should take this lesson they are teaching us and plant them nice and deep. I really want to get it right with these Narcissus serotinus seedlings because this is the first opportunity I have had of raising this beautiful autumn flowering narcissus from seed.
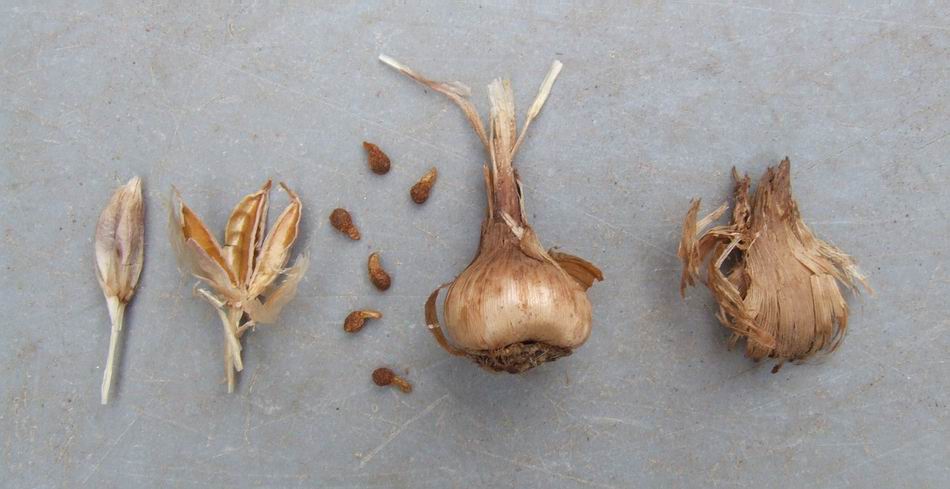
Leucojum roseum seed to bulb
Another pot of seedlings gives me the chance to take a picture showing the progression from seed, on the left, through first and second year bulbs to flowering sized bulbs on the right. Leucojum roseum or Acis roseum as I should now be calling it, will flower in two or three years from seed. These seeds were also sown deeply and you may notice that the bulbs have not elongated to the same extent as the Narcissus serotinus above, indicating that they do not need to be planted quite so deeply. It is only by observing the shape of your bulbs as you repot them that you will start to learn which bulbs like to be planted deeply and which are happy just half way down the pot - it is not so simple that a single rule will do for all.
Crocus alatavicus corm and seed
As I repot I like to take the opportunity to picture the corms and seeds for future reference. Here are the corms and distinctive seeds of Crocus alatavicus.
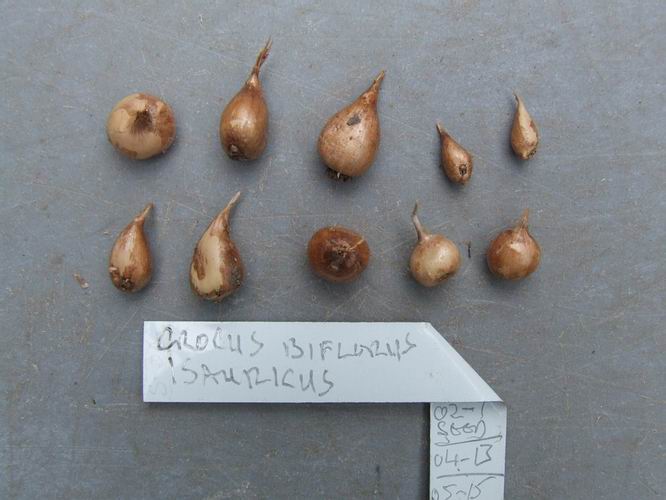
Crocus biflorus isauricus corms
I also record how the bulbs are increasing by writing on the plant label. I started with one corm of this Crocus biflorus isauricus gifted to me in 2002, I got seeds of it when it flowered and have been slowly increasing it since then. The last time I repotted it in 2005 I had 15 and this year I have 22 so I am making good progress. Repotting is the time when we learn how well we have managed the growing conditions of the previous season and I think of it like marking up my report card -plus, minus or could do better.
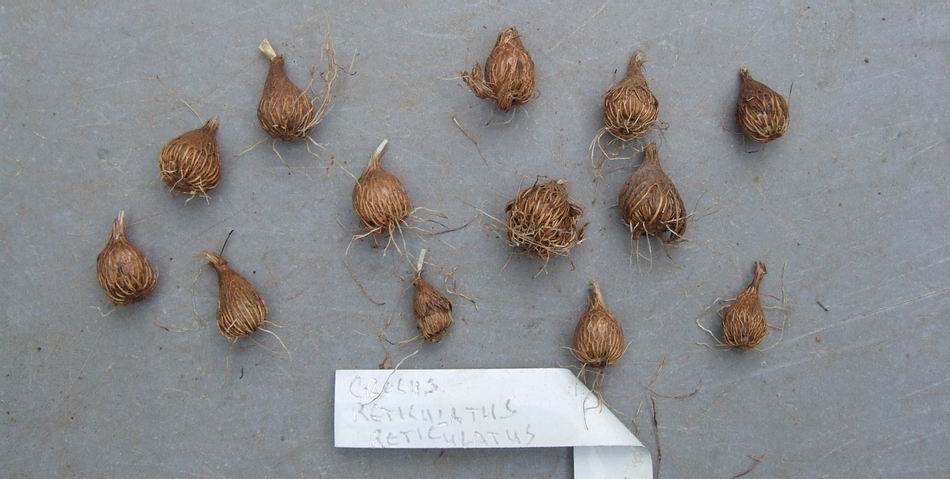
Crocus reticulatus corms
As well as checking the increase and health of the bulbs it is a good time just to enjoy their structures and with crocus corms the tunics are fascinating.
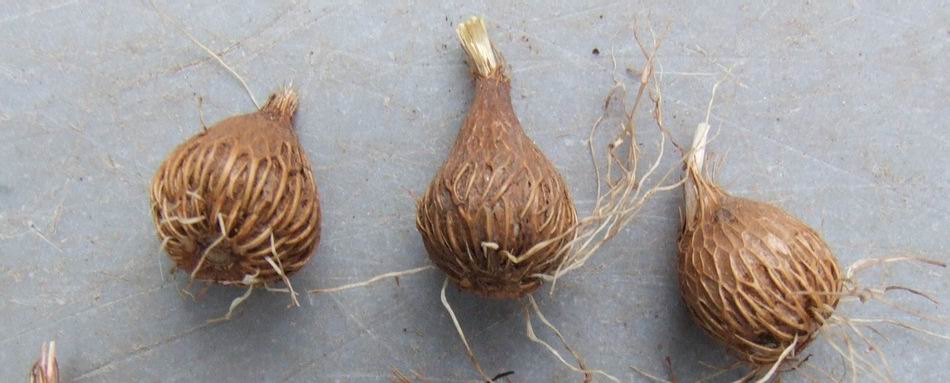
Crocus reticulatus tunics
Crocus reticulatus is very well named from the netted appearance of the corm tunic.
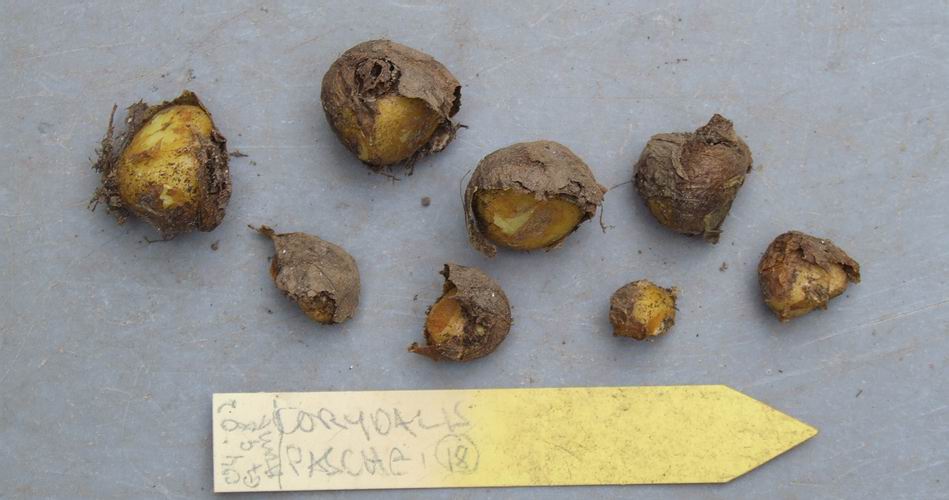
Corydalis paschei
A small pot of Corydalis paschei seedlings being repotted for the first time since being sown fresh from our own plants in March 2002 - the first one flowered this spring. It is better not to let many Corydalis bulbs get too hot and dry over the summer so, if you are in a hot part of the country and you are growing them under glass, give them some shade and an occasional light watering.
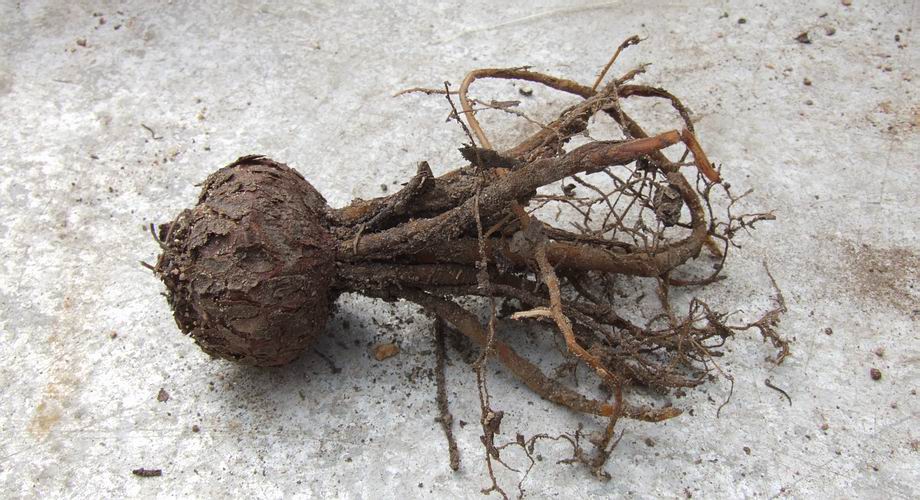
Cyclamen graecum
I have not discussed Cyclamen much in the bulb log as there are many great experts who specialise on them alone but I do grow a number of them. I have a long record of failing to get flowers on Cyclamen graecum and in the past have given many away to friends in the warmer south who stand a better chance of flowering them. Call me stupid but I cannot resist conquering this challenge and I continually sow more seeds in the hope that one day I will raise a form that likes cold North East Scotland. To get the best from your cyclamen it is important to try and keep the root system alive through the summer. You can see the plump roots on this Cyclamen graecum corm and if you let them die back the corm has to produce more before it can get on with its growth - it is much better to keep a little moisture available at the bottom of the pot so that the corm can be warm and dry but the roots can stay alive.
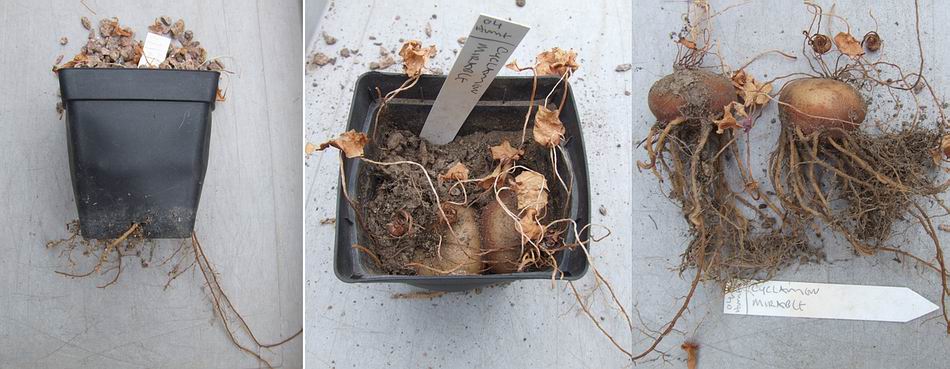
Cyclamen mirabile
Here is a pot of Cyclamen mirabile that I sowed deep, half way down the pot, in 2004 and are just now being repotted for the first time.
I now have two very nice corms one of which has two small seed pods but most importantly you can see that they still have their roots system. I always give my cyclamen a light watering when I repot them in late July or August and then make sure that they never dry out completely. Now I must get back to the repotting and marking up my report card for the year.
^ back to the top ^
|
