|
BULB LOG 34 --- 22nd August 2007
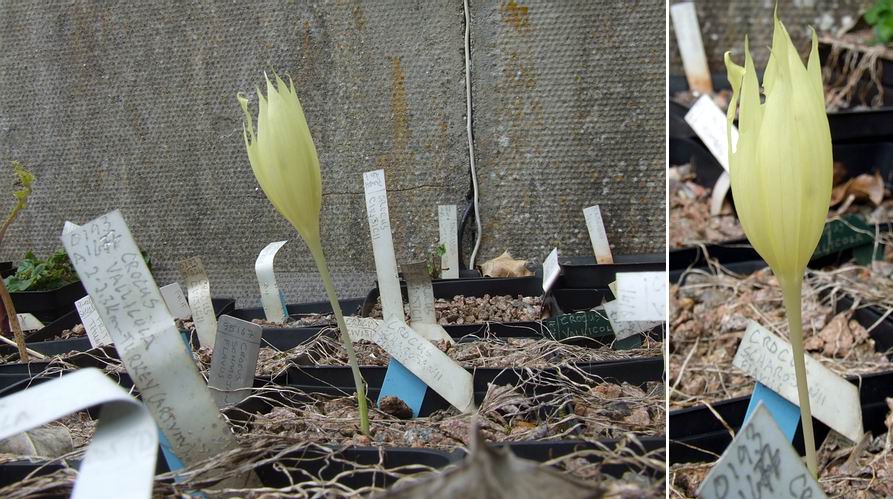
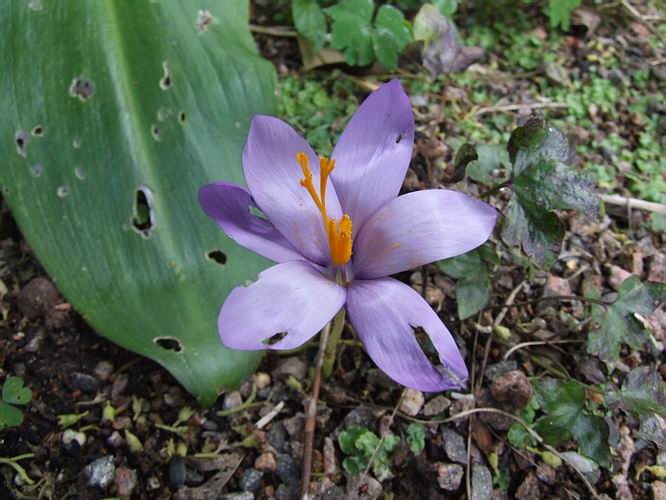
Crocus scharojanii flavus
The first Crocus flower of the new season caught me out, as it always does, by surprise. As you can see, if you look carefully at the picture, I have not even tided up the remains of the old crocus leaves in this open frame. You may also notice that the lovely flowers of Crocus scharojanii flavus have wispy (acuminate) tips which are not helped by the free form munching of a slug which has eaten chunks out of the flower. I am not keen on using poisons in the garden but I have been driven to apply some slug pellets this year. The mild winter followed by a cool damp 'summer?' have provided perfect breeding conditions for all the slugs and snails and we have thousands of them - I have even been finding the large common snails attached to the sides of the pots in the bulb house.
Crocus corms rooting
I did tentatively empty out one of the cool growing crocuses that I keep in the outside frame to see if it was possible to still repot them. The wet compost makes it very difficult to get the bulbs separated out without damaging the roots which are already growing. It is always difficult to know when to repot the cooler growing crocus such as C. banaticus, vallicola, and scharojanii because if it stays cool and moist they will start to form new roots very early, often before the old ones have died back. This is especially so with Crocus pelistericus and scardicus which if the conditions are cool and damp will be in perpetual growth and they will still have green leaves when the new roots start to form. As it is three years since I have repotted some of the crocus in this frame I must make arrangements to do them next year - I will place a cover over the frame in May to dry them out a bit and then repot them in June 2008.
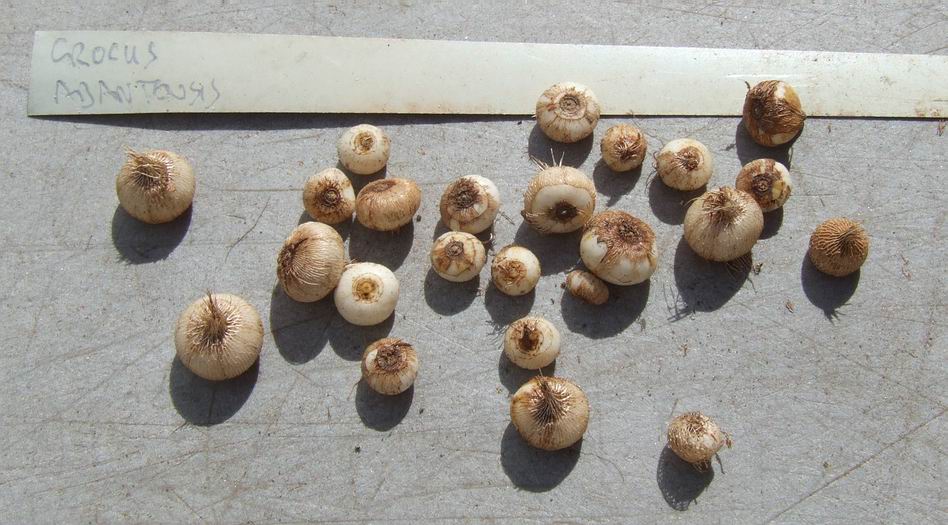
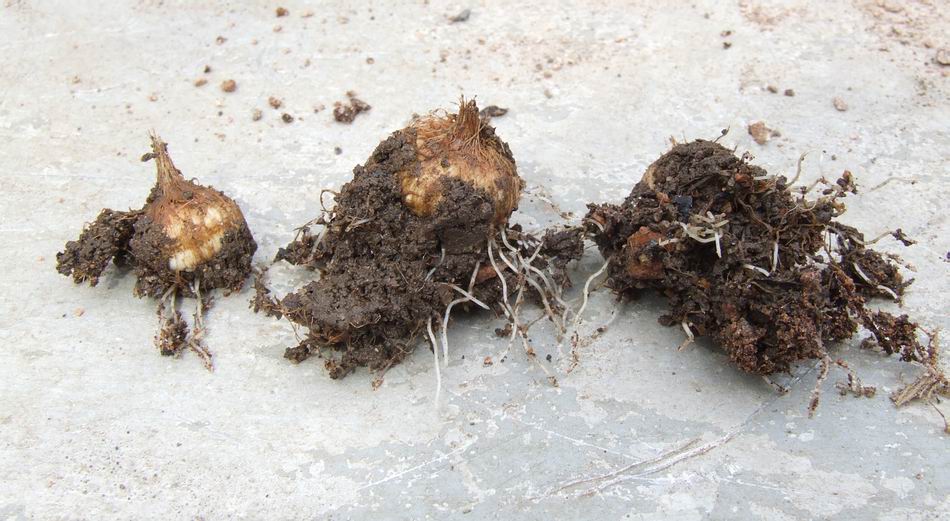
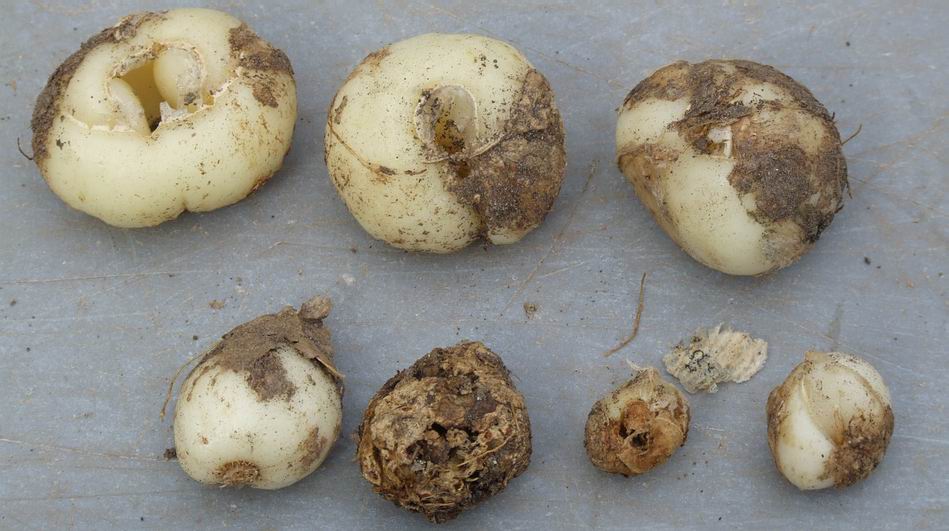
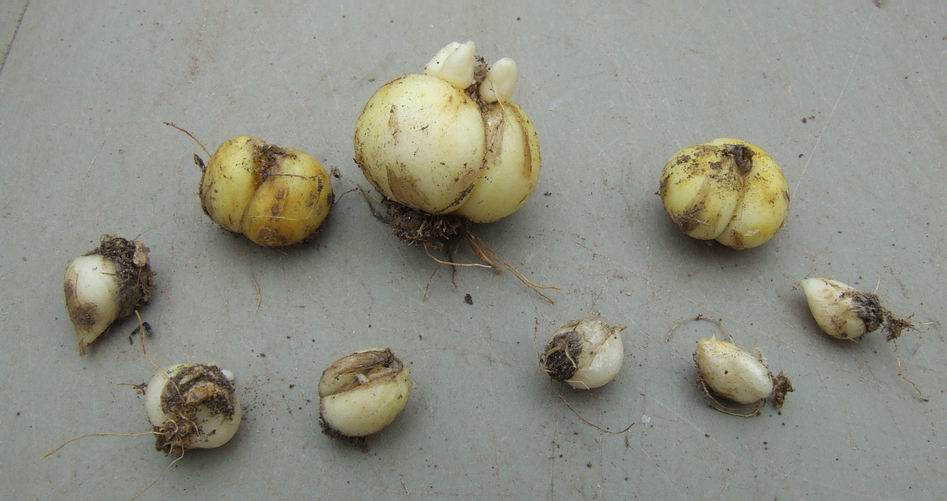
Crocus abantensis corms
As I wrote earlier, re-potting time is like marking up my report card of how well I managed the conditions for the bulbs. In some cases this year I have achieved the best results ever for some bulbs - these are the ones which obviously like slightly drier conditions as I have tended to be light on the watering over last winter as I had switched over to plastic pots and was worried about the bulbs being too wet. With many of the Crocus species I must mark my report card as 'could do better' since the corms are distinctly smaller than I normally expect. It is a joy that the crocus corms have reacted to being kept on the dry side by producing more smaller corms in place of a single flowering sized one - this gives me more incentive to get it right this coming season. Typically if your bulbs have broken down into lots of smaller bulbs instead of flowering sized bulbs then you have not watered and fed them sufficiently during the critical growing periods.
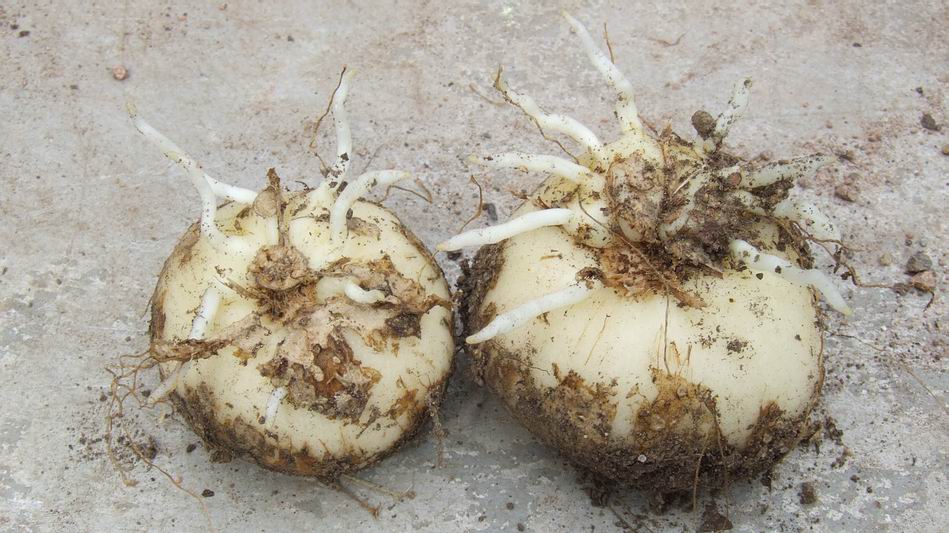
Fritillaria sewerzowii bulbs
As I work through re-potting the frits I am also finding some early rooters, such as these Fritillaria sewerzowii bulbs, which despite the fact that the compost they were in was all but dry has sent its roots out to explore. I think that with many bulbs it is the soil temperature that triggers the root tips to first emerge from the bulb and if there is moisture they will quickly grow - if it is dry they will extend very slowly until moisture becomes available.
Fritillaria stenanthera bulbs
Another pot of Fritillaria stenanthera bulbs confirms my belief that some bulbs are just short lived - whether it is because they are diseased or just genetically prone to succumb, I am not sure. Notice the two centre bulbs in the bottom row - the larger one on the left has just dried out to a husk and the right hand one is heading that way, from the bottom upwards. All the other bulbs in this pot are perfectly healthy so it is unlikely to be that the conditions in the pot were the cause.
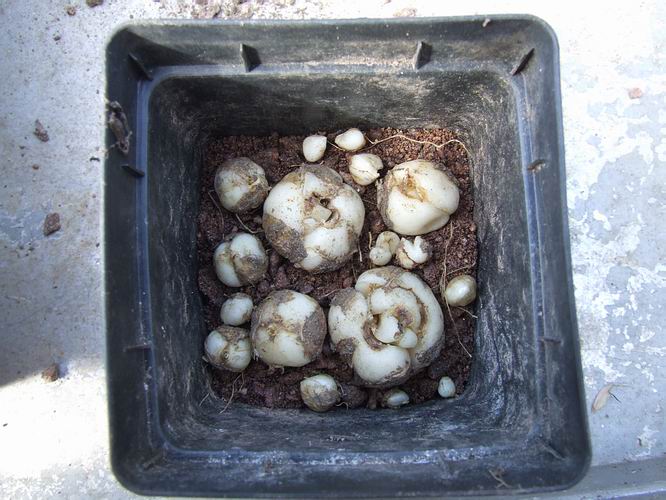
Fritillaria bulbs repotted
Some nice healthy Fritillaria bulbs planted back into fresh compost and I like to cram as many in as possible. Some people have been surprised at the number of bulbs I will grow in a single pot but I think they benefit from being packed in. I think that the layer of bulbs create a micro-environment within the pot that due to the large number of bulbs stays better drained meaning the actual bulb stays free from any excessive moisture. As long as you apply plenty water and supplementary feeding to make up for the increased competition of packing them in, you should have very happy and healthy bulbs.

Surrogate bulbs
What do you do if you only have a few bulbs that will not even fill a small pot? My answer is to use polystyrene packaging as surrogate bulbs to pack out the planting layer between the bulbs. This is a pot from last year with the compost from the top carefully tipped off to reveal some very healthy well grown bulbs and their surrogate companions. Make sure that if you are going to use this packaging material that you use polystyrene (styrofoam) and not some of the organic based, environmentally friendly alternatives, that break down on contact with water.
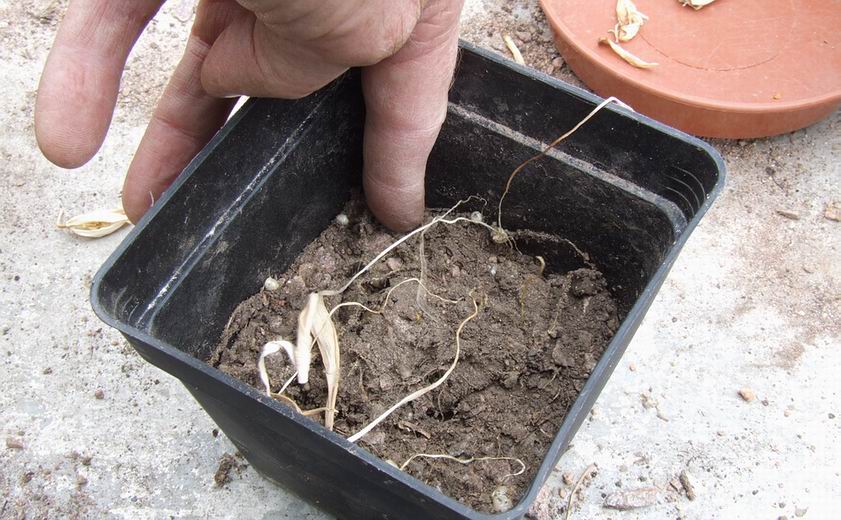
Depth of frit seedlings
Sowing seeds back in with the parent bulbs to save space is a practice that I have used a lot in recent years. The down side of it is that I have to handle the first year old seedling bulbs when I do the annual repot - I would not normally repot seedling bulbs until the end of the second or third year of growth. The advantage of having to repot them this way is that I get the opportunity to observe the depth they take themselves down to in the first year. With germinating fritillaries the seed sends a root down into the compost and the bulb forms towards the bottom of this root, placing the tiny seedling at a considerable depth in the pot when related to its size. It is important when you repot that you replant it at least the same depth.
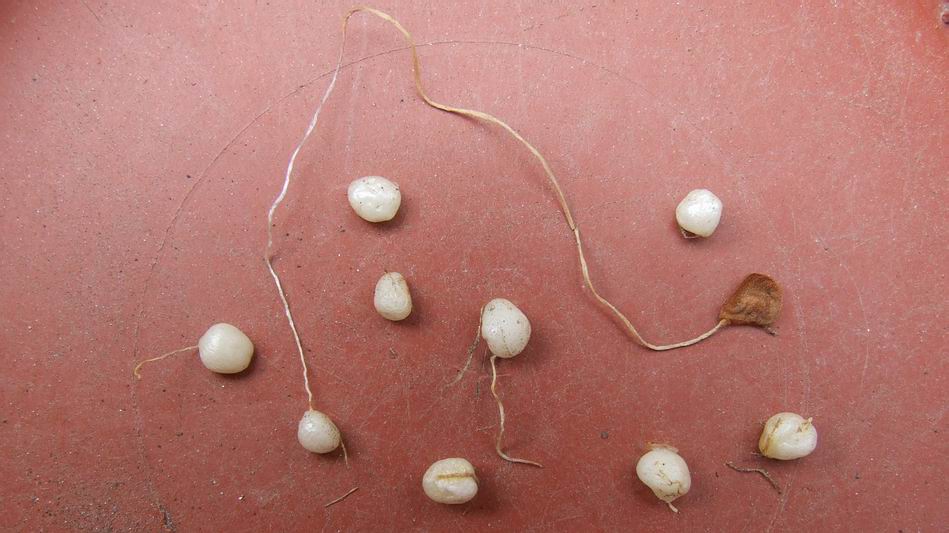
First year frit seedlings
Do not worry that because it is so small it will not be able to grow a leaf up towards the surface - look at how long the leaf emerging from this seedling bulb has grown.

Fritillaria pudica first repot
It is most interesting to record the depth that bulbs have taken themselves down to where the pots have not been disturbed since the seed was sown. This pot of Fritillaria pudica is being tipped out for the first time since it was sown in September 2004 so it has had three phases of growth in 2005/06/07. Not surprisingly I found the first (now flowering-sized) bulb, just below the surface as I have now come to believe that disc shaped bulbs tend to favour being planted nearer the surface. As I tipped out more compost I found four more bulbs a centimetre deeper so where do I repot them? I filled the small pot to almost half depth so these disc bulbs sat on the half way point when I would normally have the bulb planted well below half way.

Fritillaria pudica sown September 2004
Here are the typical contents of a pot of seedling bulbs from a seed exchange. Many of the seed exchanges give you a small number of seeds sometimes only five so if you get four bulbs to flowering size that is a good yield. If you can get two bulbs to flowering size that is all you need to ensure that you can get your own seed harvest then you can sow a nice big pot of seeds and also have some spare to send back to the seed exchange.
Fritillaria nigra bulbs
This pot of bulbs was one of the earliest frits I had passed on to me as Fritillaria nigra but it is a form of F. montana - the interesting thing is its mature bulbs always exhibit this yellow colour and, typical of many of the montana group, it also makes stolon-like offsets which you can see forming already at the top of the largest bulb.
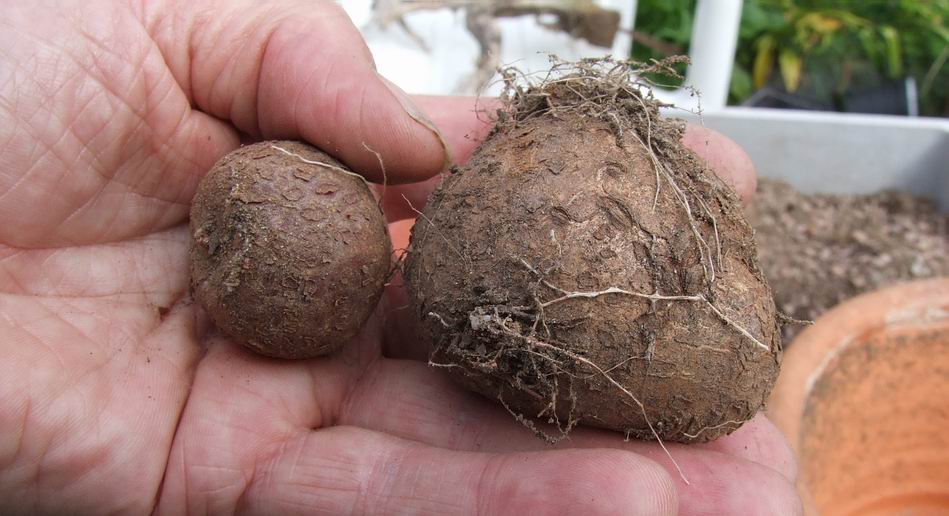
Tropaeolum azureum tuber
It is now time to re-pot our oldest Tropaeolum azureum tubers: the one the left is from the original P&W collection of 1989 and it has grown well every year apart from one when I got the watering regime wrong and it stayed dormant for an entire year. It is essential to let it dry out after it has set seed in the late spring - early summer then water it in September along with the other bulbs and never let it get dry or it will immediately go into an early dormancy.
Crocus speciosus
In the garden the first Crocus speciosus has appeared, it is always earlier than the other forms we have. I think it is of Spanish origin, we got it from the late Harold Esslemont many years ago. As you can see, it too is well chewed by the slugs and snails so I can see the night time activity in this garden for the next while is gastropod hunting.
^ back to the top ^
|
