|
BULB LOG 26 --- 28th June 2006
Here we are half way through year four of my one year bulb log, this is log number 182 with an average of say 1000 words and a minimum of 12 pictures per log gives a total of 182,000 words and 2184 pictures. Are you still with me?
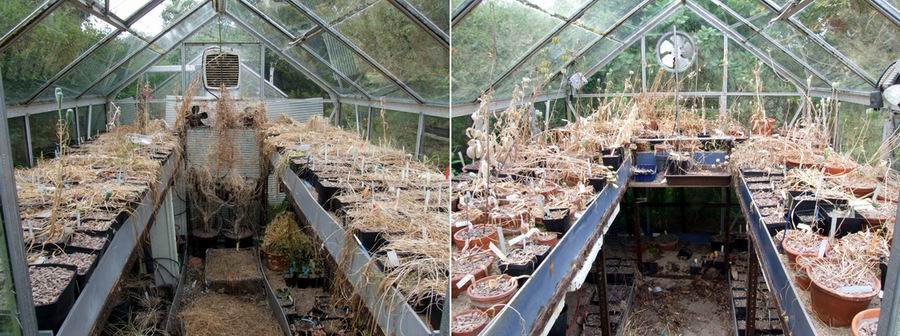
Bulb house and Frit house
Looking into the Bulb house and Frit house all the bulbs are now enjoying their warm dry summer rest but it is not a period of rest for me. We now have to try and repot as many of the pots as we can before the September storm. In an ideal world and if I were a magician, I would leave the repotting until the last day of August, wave my magic wand and have everything repotted when I wake up on September the first. There is no doubt in my mind that there are fewer rot and fungal problems if the bulbs can be left over the summer resting as they are, in last season's compost.
My thoughts are still on compost and just how I am going to overcome my shortage of loam? First I need to get in a tonne of 6mm gravel and I think that this year I will get it delivered in a giant bulk bag at the same time I will get a tonne of sharp sand. What purpose does the potting compost serve and what properties does it require? First and foremost it holds the plant upright in a pot - a silly statement but a relevant one. The critical properties of any potting medium are summed up in that old worn out statement 'free draining but water retentive' but what does it mean exactly? The 'moisture retentive' part could easily be achieved by blocking up the drainage holes - then the pot would really retain moisture but that is not what is required. What we want is a compost that, when watered, will allow most of the water to drain away and at the same time it must not dry out too quickly, so we need some way to store moisture.
Moisture can be stored in two ways; one by being absorbed like a sponge into something like peat or leaf mould but the more important one for our requirements is the ability of materials like gravel, sharp sand and loam to retain significant moisture on their surfaces. I prefer to replace the 'free draining' part of the old saying with 'air retentive' - so for healthy roots and plants our compost must be able to retain both moisture and air at the same time. This is principally achieved by the addition of sharp grit.
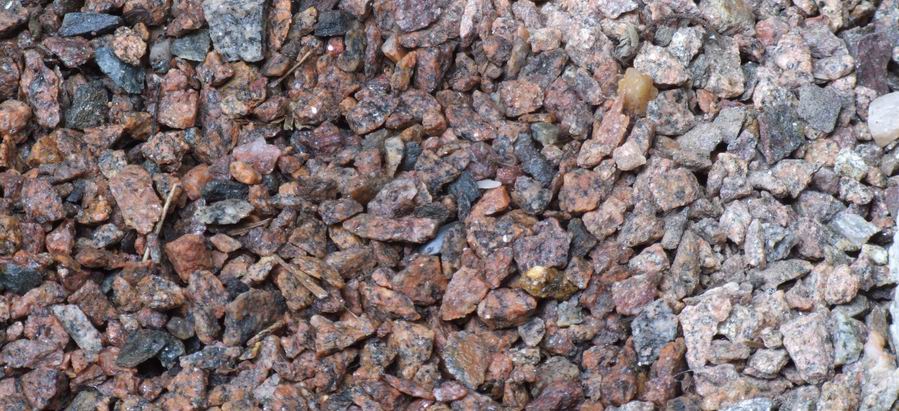
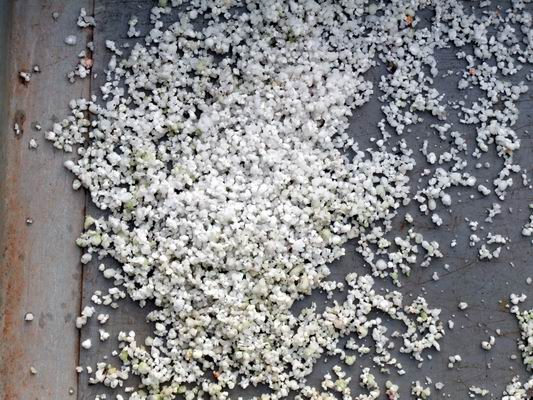
6mm gravel
While the surface of the grit can retain moisture, its irregular shape means that there will always be gaps between the particles for air to penetrate the compost. The gravel on the left of the picture has been covered and you can clearly see the moisture held on the surface.
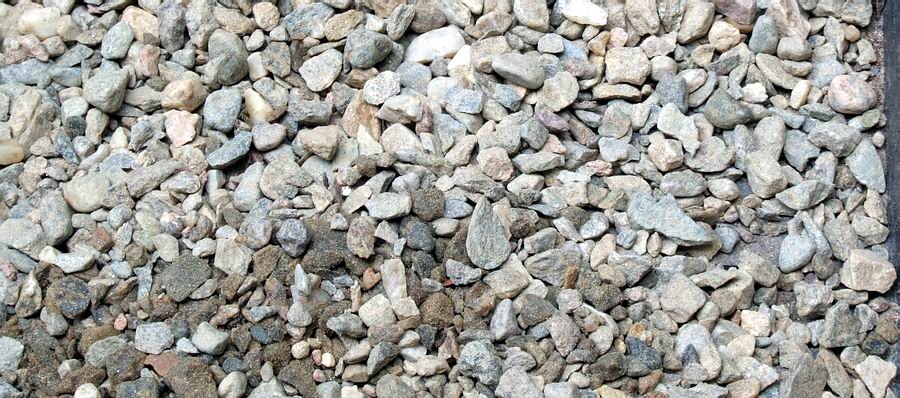
Pea gravel
My preference is for crushed and graded gravel as it is more efficient, being sharper and more irregular in shape than river or pea gravel. You can use pea gravel as pictured above if you cannot get the sharper type of material.
Another feature required of my compost is it has to supply the minerals and nutrients needed for healthy plant growth - nitrogen, phosphorus and potassium plus the trace elements. I add bone meal to the mix which provides nitrogen and phosphorus, the application of sulphate of potash will provide the potassium.
The trace elements have to come from the other ingredients of the mix and are normally found in sufficient quantities in any good loam and leafmould.
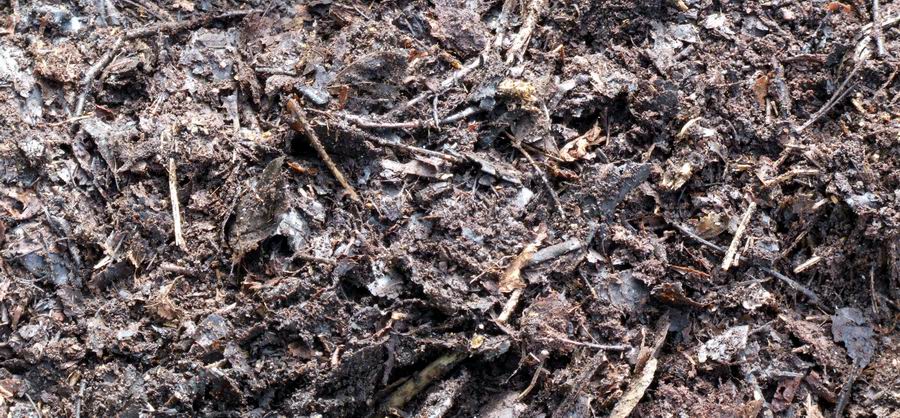
Leafmould
Many of those essential elements absorbed by trees are found in their fallen leaves and this is why good leafmould is such a valuable additive for potting composts, it is nature's way of recycling. (For a fuller explanation of my feeding regime check back to bulb log 7, 2005.) So, loam provides nutrition, and a degree of moisture retention, grit or sharp sand retains both moisture and air spaces in the mix and leafmould adds essential elements as well as holding moisture.
Perlite
I know a lot of people use products like perlite, an expanded volcanic rock, very successfully as it can absorb moisture like a sponge as well as providing good aeration of the compost but I hate the look of the white perlite particles in my mix and they make it very difficult to sort out the frit rice grains which look so similar. If I cannot find a source of loam (I know I could buy it but I am a cannie Scot) and I replace it with sharp sand, I will have to increase the amount of additional feeding I apply to the bulbs, probably by liquid feeding with a dilute feed every time I water and I will probably have to add some of the essential trace elements. Enough of my ramblings; this is my problem not yours.

Arisaema consanguineum
After a quick walk round the garden to see what is in flower in the way of bulbs Arisaema consanguineum with its lovely striped flowers marches onwards. The parent bulb must send out stolons as each year new flowering stems appear a short distance away from last seasons forming a line from the original planting.

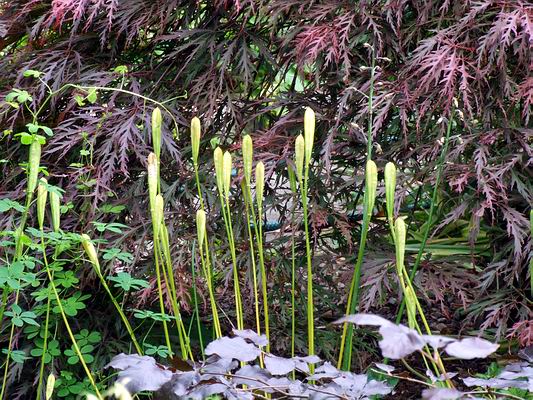
Arisaema consanguineum seedlings
Over the last few years I have showed you the fruiting stem of this group of Arisaema consanguineum lying on the ground untouched, then the berries germinating and now the seedlings are getting quite large and may even flower next year.
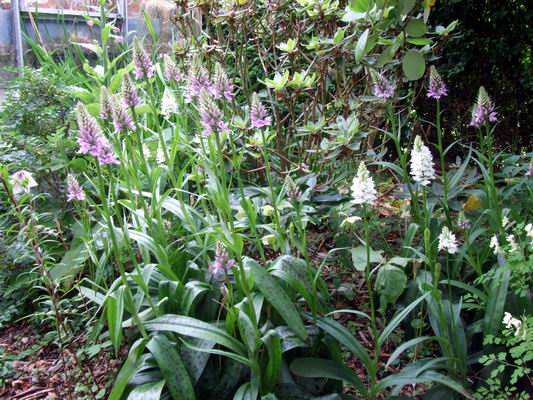
Dactylorhiza
Groups of Dactylorhiza all around the garden are not yet at their peak but are coming into flower. All of the most vigorous ones come as a result self sown seedlings found in the most unlikely places in the garden, troughs, old neglected pots, etc. This is a great example of how seed raised plants are much more healthy and vigorous than plants that are a result of many years of vegetative increase, where any weakness or disease is passed to all the propagated material.
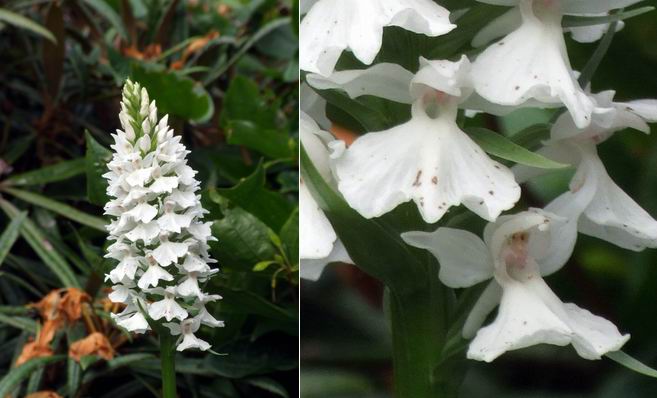
Dactylorhiza Eskimo Nell
With some distinct forms, like the much sought after white Dactylorhiza, Eskimo Nell, we have no option but to increase by division. This clearly shows as Eskimo Nell, while very beautiful and a lovely contrast to the pink/purple forms, never looks very healthy and I am always a bit afraid for its continued existence.
Erythronium revolutum seed capsules
So the moral of the story is, as always, collect and grow from seed whenever it is possible. These Erythronium revolutum seed capsules are just starting to show signs of turning colour as they ripen.
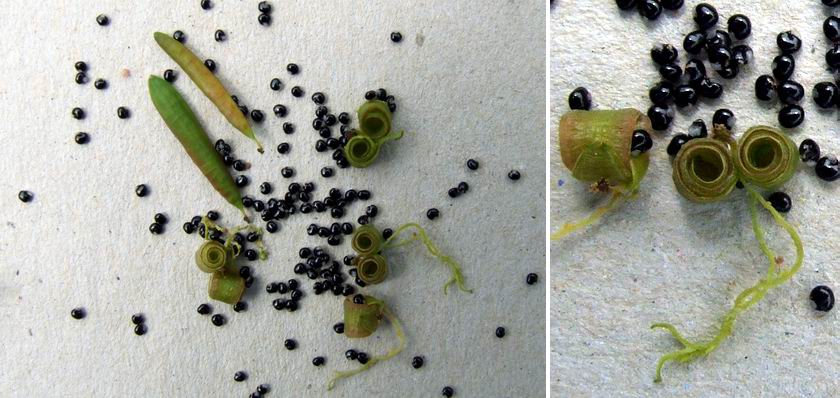
Corydalis seed
While Erythronium seed stays in the open capsules for some time and so can be collected at leisure, Corydalis seed has to be watched very carefully. The side cheeks of these capsules recoil violently like a strong spring when ripe, hurling the seeds
everywhere. I just caught these in the nick of time yesterday with each capsule recoiling between my fingers as I picked it off the stem - one more day and the seed would have all been scattered around.
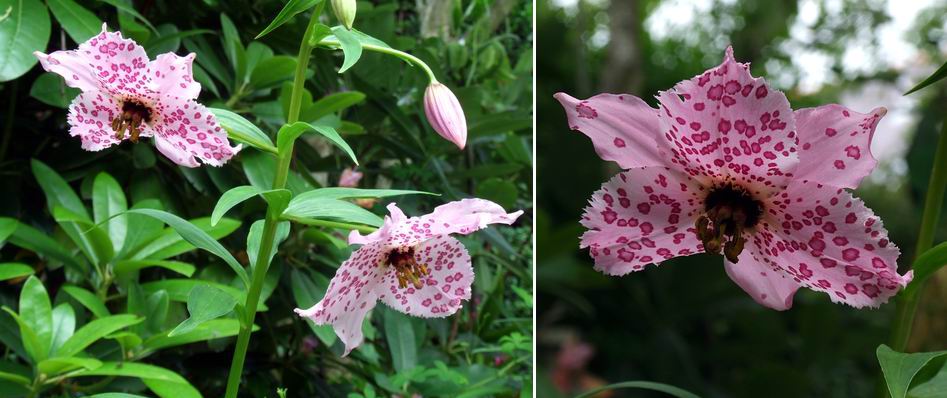
Nomocharis pardenthina
I have resisted showing too many pictures of the nomocharis as so many beautiful pictures of them have been appearing on the forum pages but I have to show you one that I will put a name to, Nomocharis pardenthina, as it is grown from recently collected seed and so should be the true species - first collected by Delavay in the Cang Shan range near Dali in 1883.
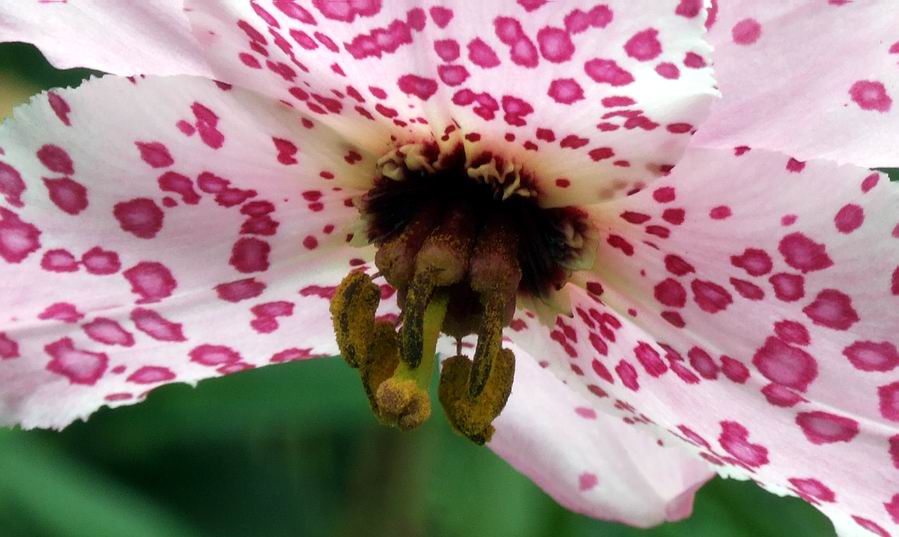
Nomocharis pardenthina flower detail
Note that the filaments are expanded in the lower part into a fleshy cylinder, typical for this species.
The pollen covered stigma means we should get a good harvest of seed to sow which will almost certainly result in some hybridisation from the many nomocharis of garden origin we have in flower.
^ back to the top ^
|
