|
BULB LOG 27 --- 5th July 2006
I am still thinking about my dilemma over the lack of our own supply of loam which for the last 25 years, has formed the basis of my potting compost. We used to have a lot of lawns which we sowed in the first place, then we gradually lifted a bit here and a bit there, to extend the growing beds. We always stacked the lifted turves to rot down to form a fibrous loam and now after all these years, each of which brought a greatly increasing demand for potting compost as the number of bulbs we grew in pots increased, it is all but used up. A few more thoughts have come into my mind since last week : one is to only use the loam mix in the bottom quarter to third of the pot, sit the bulbs on that then fill up the pot with sharp sand and grit topping off with a layer of grit as normal. I have done that on a limited scale in the past with a few sample pots so I can easily tip out the sand and see what the bulb is doing without having to disturb the roots which are in the loam based compost at the bottom of the pot.
My first thoughts are that this could work quite well but I think I would add bone meal to the sand gravel as well to keep up the nutrient levels in the pot. A 50/50 mix of sand and gravel should ensure the drainage is also good. A major problem I see with this method is that we have had a lot of rain recently and all the compost ingredients will be quite wet. The ingredients never mix so well when they are wet and they tend to form small balls as they tumble around in our cement mixer but that is not so bad as the effect of repotting bulbs this early into a wet mix. Moisture is the biggest enemy of most Mediterranean type bulbs in pots over their dormant summer months as it can cause rotting off. This would not be a problem if I could follow my ideal (but impossible) method of repotting everything on the last day of August.
Another thought which I have already applied to a selection of pots already done, is to simply reuse the same compost. I tip out the pot, clean and check the bulbs, removing all the old dried out roots, sprinkle a small amount of bone meal over the mix and replace the bulbs. So why do I bother to do that, why not just leave them for another year? Well I think it is important to check your bulbs for health and I enjoy seeing how they have fared since last year. If they are doing well I may not get them all back into the pot and if they are doing badly I must try and work out what is wrong and how I might rectify it. Reusing the old compost does solve the problem of excess moisture as it is nice and dry now. I am wondering about adding a small amount of leafmould to the reused compost to replenish the humus as well and I will run a trial with a few identical pots half of which will get the leafmould and half will not. Experimenting like this is the only way to find out if this method will work.

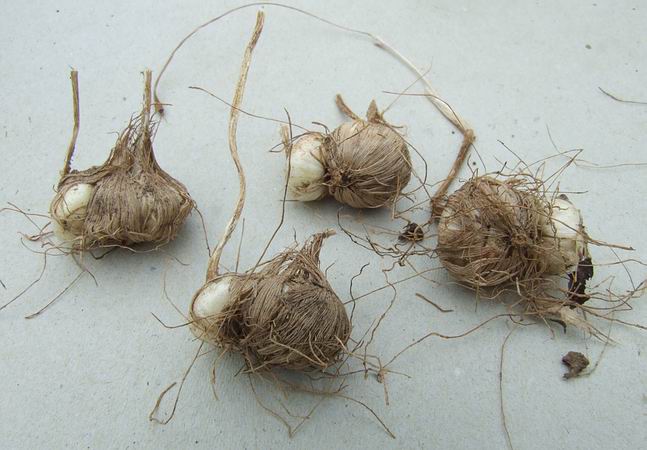
Narcissus romieuxii 'Craigton Clumper'
Who would believe that one 7cm pot could contain all these bulbs? They have increased dramatically since last year, forcing themselves into three layers as well as distorting the sides of the plastic pot. This is a homegrown seedling, raised from our own pots of Narcissus romieuxii, that we selected out as it showed promise. It is a good free flowering form with large nice flowers and it increases well by division of the bulb. As you can see in the picture, I have called it 'Craigton Clumper'. (Note from Maggi: And they said of them when they died: how they adored alliteration.)
Tecophilaea cyanocrocus
Another potful to get the recycled compost treatment is Tecophilaea cyanocrocus, which also increases by offsetting. Each mature corm will form at least one offset which normally takes another year's growth before it will flower but sometimes they can be flowering sized.
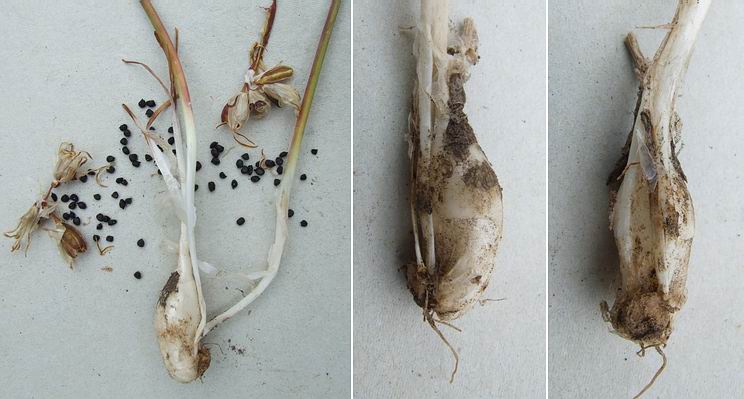
Tristagma leichtlinii
Also from South America is Tristagma leichtlinii which has an interesting bulb structure where the leaves arise from the top of the bulb and the flowering stems come from the base. It flowers each year for us and often it has set good seed.
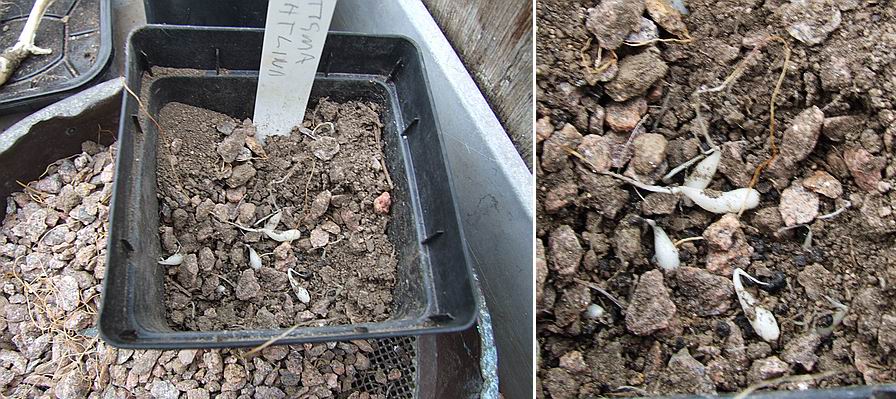
Tristagma leichtlinii seedlings
Here are last year's seedlings which I sowed half way down the pot and you can see the healthy small bulbs forming beside the black remains of the seeds. One year I surface sowed the seeds and lost most of the seedlings to slugs and extremes of the weather as the tiny delicate bulbs were only covered with 1cm of grit.
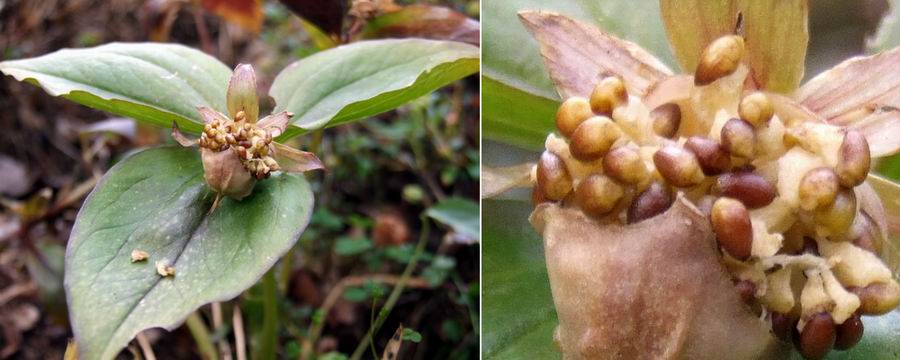
Calochortus uniflorus seed
I promised to show the stem bulbils of Calochortus uniflorus when they developed and they can be seen here, quite clearly, towards the base of the stem, nestled in the lower leaf axil - this is sometimes just under ground. Bulbils are still formed even though the same bulb has set a goodly amount of seed and with up to four flowers per stem that should give us a good rate of increase.
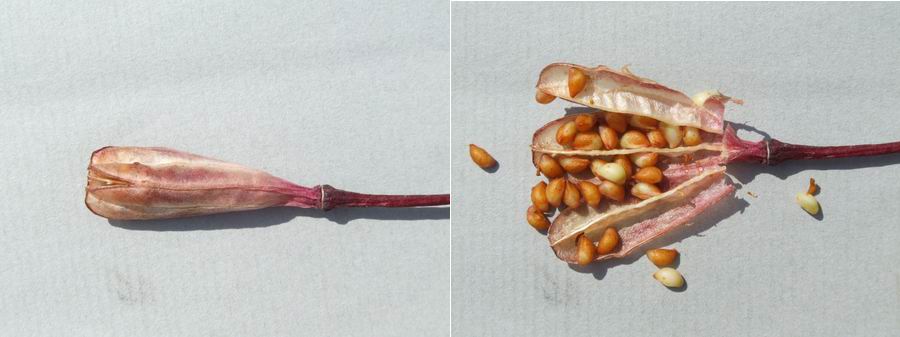
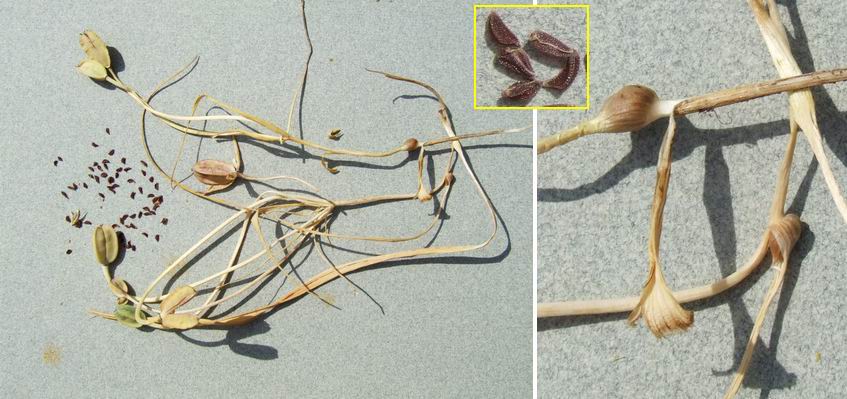
Erythronium elegans seed pod
As well as repotting to think about, I have watch for the ripening seeds - the erythronium seed pods are just starting to open. Look how this Erythronium elegans seed pod, on the left, has split just a short way down to the shoulder of the pod - this is how erythronium pods distribute their seeds. They do not split all the way down as other plants do but rely on the wind and animals knocking against the dry rigid stems to hurl the dried seeds out of the top of the pod like a catapult, scattering them by as much as 2 meters. This is not the most efficient way of seed dispersal and it may be one reason why Erythroniums mostly have a restricted distribution. If we presume it takes 7 years for an erythronium to flower from seed, before it could move another 2 meters, then it would take 3500 years to advance a kilometre. I have split the capsule on the right to show all the seeds contained in the three sections each of which has two sides.
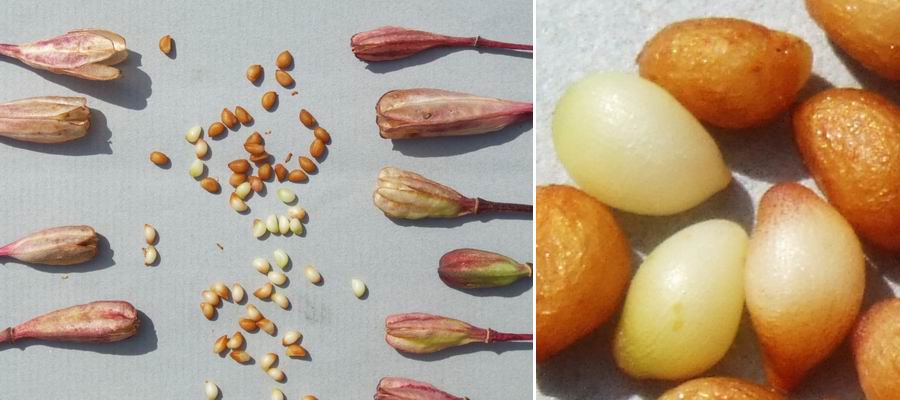
Erythronium elegans seeds
I am pleased to see all the pictures of seeds appearing on the forum as they are well worth having a close look at. Here is another selection of Erythronium elegans seeds.
Erythronium klamathense and montanum seeds
The seeds of Erythronium klamathense (left) were quite dry when I found them I am lucky they had not been shed all over the bed, as I want to grow these in a pot. Erythronium montanum seeds (right) mature and ripen more quickly than any of the other erythroniums. Despite being the last to flower their seeds are often among the first to ripen, this is obviously an adaptation to the short growing season in their high altitude habitat.

Erythronium montanum seeds
A close look at Erythronium montanum seeds shows that they are closest in shape to the seeds of the Eastern American erythroniums and the dens canis group and so could be the closest relative to this group. Another shared feature is that the bulbs of E.montanum also form chains of the old retained bulbs, like E. japonicum and dens canis.
Erythronium taylori seeds
A first for me is my own garden seed from Erythronium taylori, a recently described relative of E. tuolumnense.
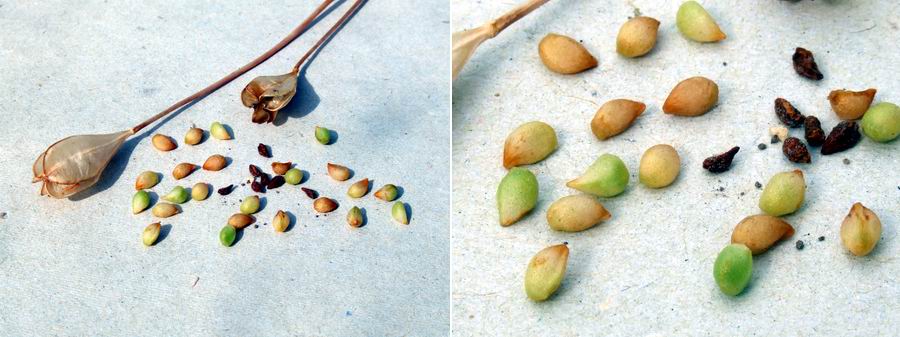
Trillium hibbersonii seeds
I only just found the seeds on Trillium hibbersonii in time to rescue at least some of them to grow on in pots. The capsules disintegrate so quickly, one day they do not look ripe and the next, the seed is shed. Trillium seed have a sweet treat to encourage insects to distribute them.
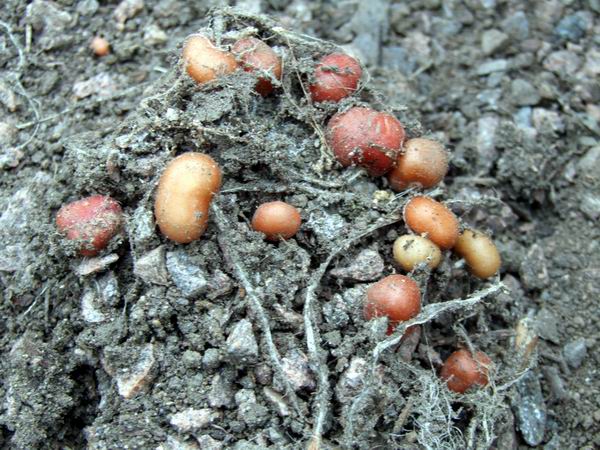
Tropaeolum azureum year old corms
Last year I had the best ever germination from our Tropaeolum azureum seeds and these are some of the one year old corms right at the bottom of the pot.
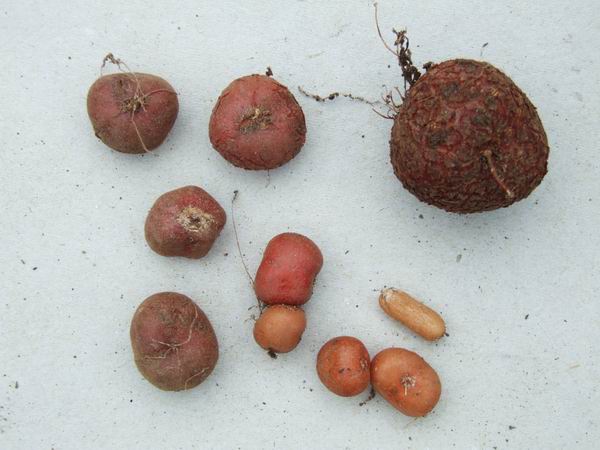
Tropaeolum azureum corms
A selection of one, two and three year old Tropaeolum azureum corms: notice how the skin become increasingly fissured and cork like as the corm gets older. The small torpedo shaped corm is a secondary corm that sometimes forms on the stem of the first year seedlings, I have never found this to occur in future years of growth.
^ back to the top ^
|
