|
BULB LOG 26 --- 29th June 2005-
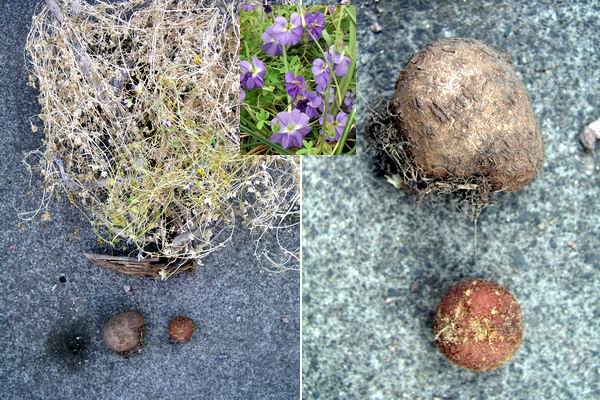
Tropaeolum azureum corm
Half way through the year and the repot is starting to loom. For many years we struggled to work out how to grow Tropaeolum azureum so it would grow and flower every year and not sit dormant for long periods. The method that I now use is to repot it every second year and I do this very early, even as the growth still has a few signs of green showing. The reason I do this is that the corm sometimes starts to root very early as the foliage is dying back and if you disturb the rooting process at all then the corm will remain dormant. Now it is repotted it will sit in a shady spot in the bulb house and I will water it in September and just like all the other bulbs it must not dry out or it will retreat to a prolonged dormancy.
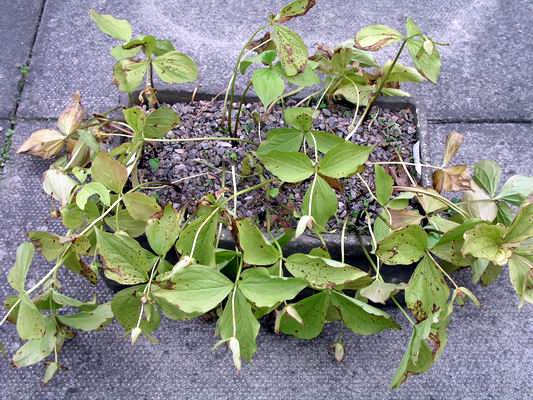
Trillium grandiflorum flush
If I am going to lift and split trilliums for any reason I also like to do it as the foliage is just starting to show the first signs of going past its best.
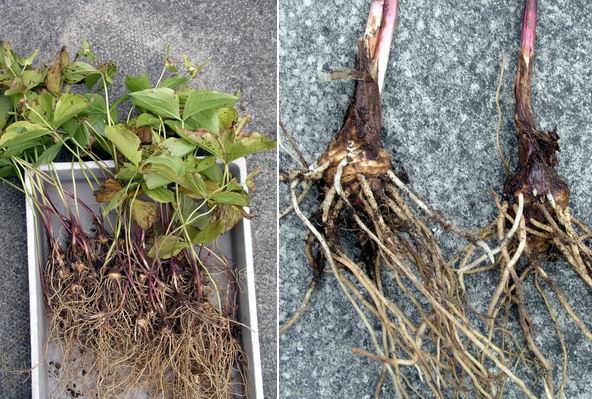
Trillium rhizome
When the flowers have faded the new roots will slowly start to emerge and these are essential to the plants' healthy growth next season. In the close up on the right you can just see the white, newly emerging roots appearing above last season's roots. My theory and practice is that it is better to damage the old foliage growth than it is to damage the new roots, so by handling them early, before the roots get too long, there is a lesser chance of long term damage to the plants. The roots last for two years - most of the roots visible emerged at this time last year and they will slowly wither and in the course of the next twelve months are be replaced by these new emerging roots. It annoys me to see some sellers sending out 'trillium noses' without any roots in the autumn and winter months. To me this is almost equivalent to taking a cutting from a Rhododendron and sending it out without any roots as a new plant. Yes, trilliums can be propagated by dividing large multi nosed rhizomes but it should be done now
and they need to be nurtured until the root growth starts - then they are viable trilliums.
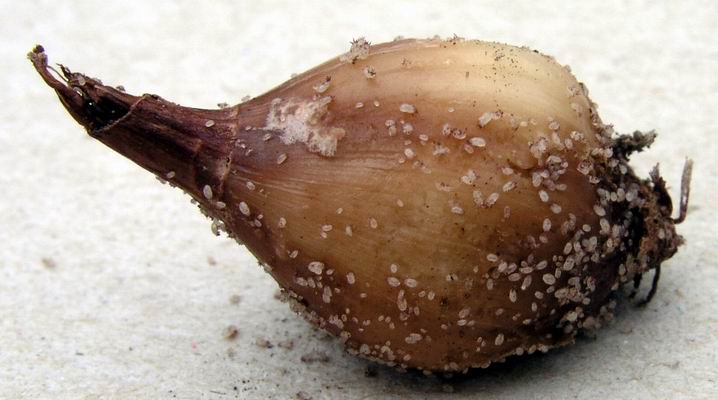
Narcissus bulb with mites
I discovered this Narcissus bulb in a pot; it had a darker outside skin and looked wrong so I gently removed the outside skin to discover with horror a mass of tiny white mites - aagghh horror! We must always stay calm in these situations and have a think.
Having thought for a while over a cup of Darjeeling I came to the conclusion that these mites were not the cause of a problem but the result of a problem. I have often noticed similar mites feeding off rotten leaves of other plants and so decided to investigate further.
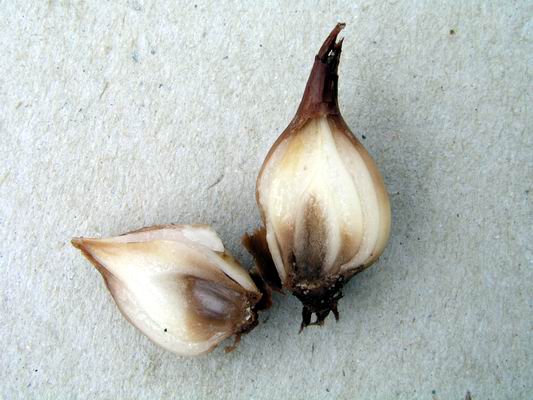
Narcissus bulb cut
When I cut the bulb in half I found what I feared, that a rot had entered the bulb through the basal plate, effectively killing it. This type of rot is a recurring problem with many Narcissus and I think it is down to bad growing conditions; not always the growers fault as the climate is a big factor and we have had some very erratic periods this year with cold wet conditions making it very difficult. The good side of this story is that only one bulb from the pot was affected, the rest are perfectly healthy.
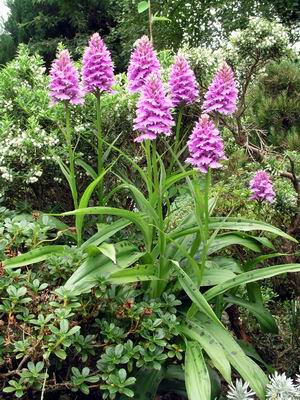
Dactylorhiza clump
The healthiest and most vigorous of all our Dactylorhizas are without question the self seeded ones that we get. They self seed in the most unlikely of places and would seem to have a preference for undisturbed ground. Troughs are a favourite spot and I do not think we have a trough that does not have a number of orchids growing in it, excepting the most recently replanted troughs. The other places we find them is growing through cushion or mat plants, again this offers the orchid seeds undisturbed ground essential for the early stages of germination and it may also be that these environments have a ready source of the mycorrhizal fungi required for the seed to thrive.
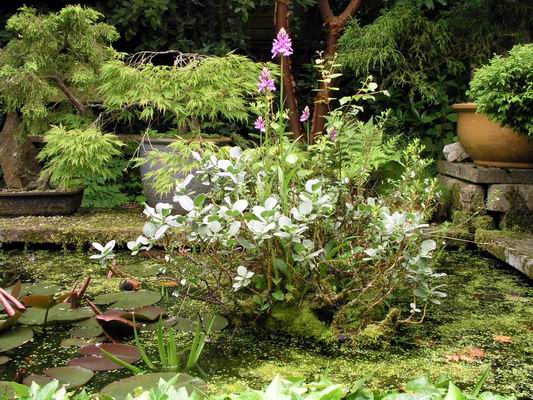
Island pot with orchids
The most unusual place that they have self seeded is in a pot in our pond which we set up as an island 75 percent submerged in water all year round and originally planted only with Salix lanata. Several Dactylorhizas have appeared over the years and continue to grow- Pernettya and birch are among the other plants seeding into this water logged environment.
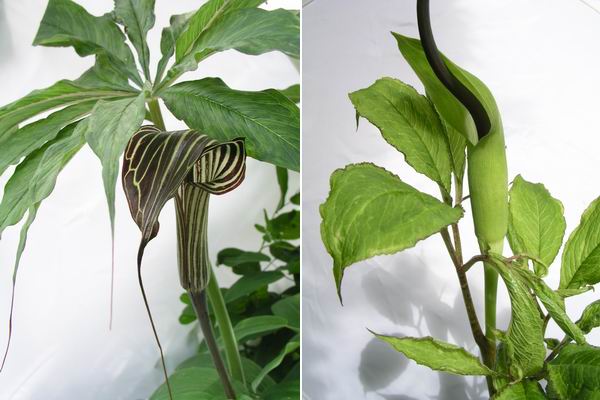
Arisaema ciliatum and tortuosum
Now, for a change, two Arisaemas that I do know the names of ciliatum (left) and tortuosum (right) both raised from our own garden collected seed from our original plants that were purchased as single corms. I have found that when Arisaema corms are young or not growing well, they tend to be either male or female but when they are mature and healthy they produce both male and female flowers on the same stem and so produce seed.
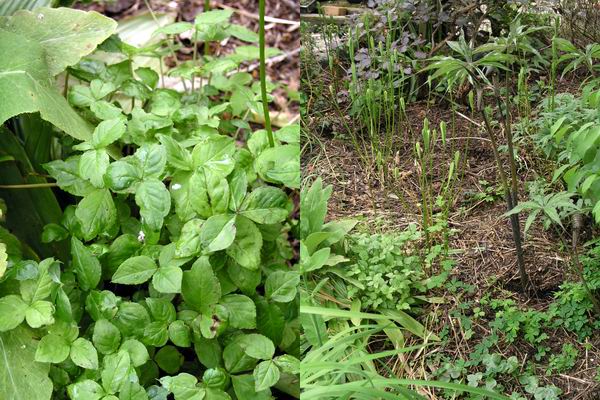
Arisaema ciliatum seedlings
Our original plant of Arisaema ciliatum seems to spread, along a line, by stolons as it marches slowly through a plant of Uvularia - we now have nine flowers. Two years ago I did not collect the lovely red, ripe seed but let it fall to the ground; now it has germinated making a mass of seedling plants which you can see above left and in the lower left hand side of the picture of the bed.
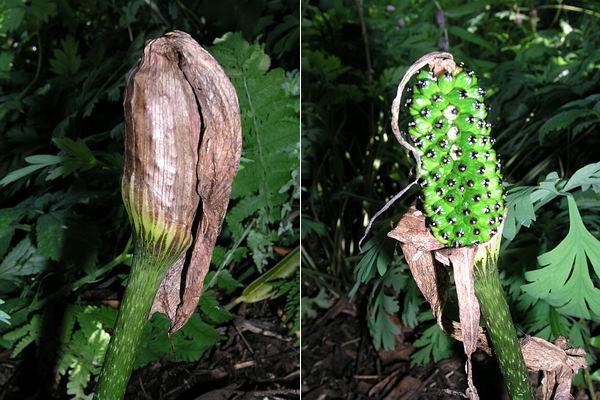
Arisaema seed head
Arisaema griffithii is also setting seed. I often find that the withering flower wraps around the forming spike of berries, I like to carefully tear it back to reveal the seeds as I worry that it may cause rot if the weather turns cold and damp.
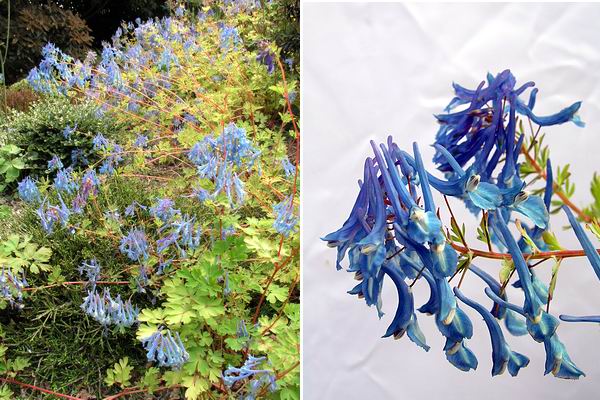
Corydalis x Craigton Blue
I have shown you Corydalis x Craigton Blue many times before and here I go again. The lovely scent of honey rising from this planting is wonderful and attracts a steady stream of small honey bees as well as Maggi who loves scented plants. The first flowers opened over four weeks ago and they will continue to show colour for at least another four making it very good value.
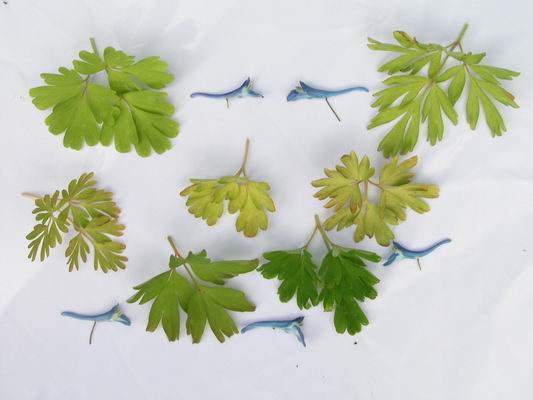
Corydalis elata x flexuosa
The name x Craigton Blue refers to a group of seedlings that arose between Corydalis elata and C. flexuosa. Above on the top left is Corydalis elata with C. flexuosa top right and below are some of the x Craigton Blue showing the variation in the leaves - the flowers vary slightly in the shade of blue. It is interesting to note that I have only noted seed on these plants once some years ago when there was a massive seed set on C. elata resulting in this crop of plants. I sowed some seed in pots but most did not germinate so I spread the compost on the garden the majority of the seeds scattered themselves in the gravel area in front of the bed and every year since then I notice more germinating. I believe that these are not new seeds but are some of the original seeds that have lain dormant all these years and are sporadically germinating.
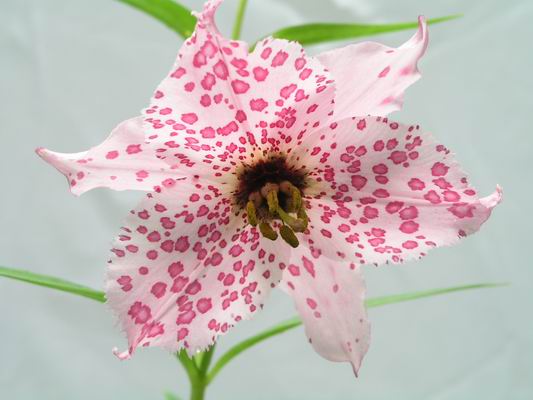
Nomocharis pardanthina
The last of the Nomocharis are flowering with this lovely spotty one being close to N. pardanthina and what we used to call N. mairei before it was sunk into pardanthina. As I have often said all our nomocharis are raised from garden seed and all show signs of hybridisation so we cannot apply species names to them. Even though they are hybrids they continue to set viable seed and in two to three years we get a new crop of these most beautiful lilies. You have to continually raise them from seed if you want to retain them in your garden as the bulbs are generally not that long lived, they are very susceptible to virus, it is best to sow some seed every year to ensure that you are never without this desirable bulb.
^ back to the top ^
|
