|
BULB LOG 24 14th June 2005
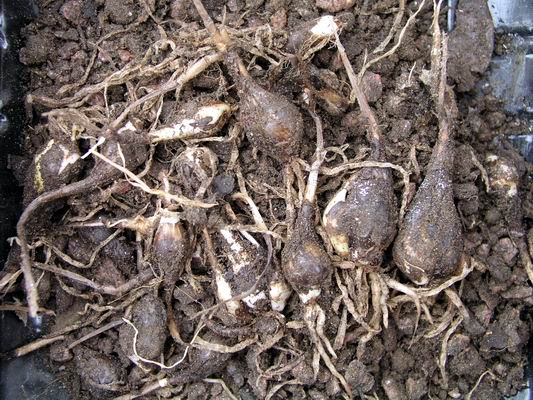
Sternbergia sicula bulbs drying
In the last log I talked about drying out bulbs that may be too wet. I was concerned that these Sternbergia sicula bulbs may be sitting in wet compost in their plastic pot. Once the growth has died back there is nothing to use up this surplus moisture and it is amazing how long the compost will remain wet. Especially down at the bulbs where the old outer layers of the skin can be very wet - this is where rot can start and could then infect the basal plate and kill off the bulbs. I took the precaution of spreading them out for an hour in the sunshine which dried off all this excess moisture then just tipped them back into the pot to rest until they are repotted in July/August.
The ideal time to repot a bulb is the day you are going to apply the first storm. I would like to wave a magic wand on the 1st September: repot all my bulbs and give them the first storm on the same day - as this is not possible we have to start repotting in June to get through as many as we can.
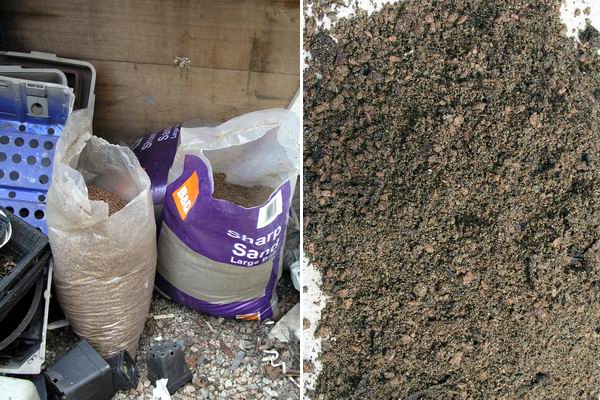
Sand and gravel mix
When growing bulbs (or any plants) you have to be always thinking ahead. Our supply of loam from our stack of rotted turf will run out this year after lasting us 20 years - we used to have a lot of grass - so I have to decide what we will use in its place. I may have to buy in bags of a premixed loam-based compost but I am reluctant to do that so I am going to experiment on a loam-free mixture.
Compost ingredients
My new experimental mix will be of sharp sand, 6mm granite gravel and leaf mould to which I will add bone meal. Using a small container for measuring quantities by volume I can make small sample mixes to test. I started with two parts sand, one part leaf mould and one part gravel.
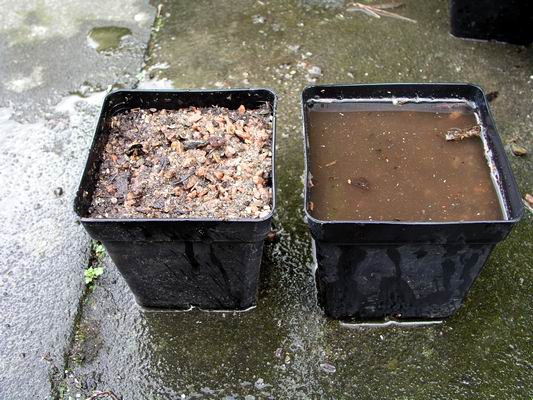
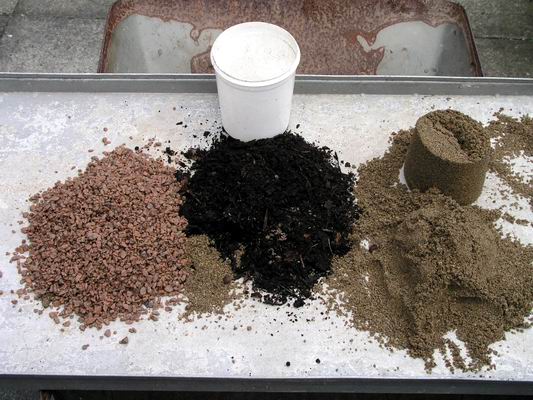
Testing drainage
The first test for any compost mix is a drainage test. Flood the pot with water and watch how long it takes to drain away. Do not rely on the result of the first time you flood the pot because if the compost is quite dry the surface tension can slow down the drainage so make the test three times allowing the water to drain between each flood. The pot on the right was my original 2 sand, 1 leaf mould, 1 gravel, mix which does not drain well enough so I made up a 2,1,2 mix. I am looking for a mix that will drain away a flood in 10 to 20 seconds.

Rhodohypoxis
I next want to test how the bulbs will perform in this loam free sandy mix. I will do some trials when I do the major repot but I am anxious to get as much information as possible. I had a look around for a likely test subject and came up with Rhodohypoxis - not ideal as they already have a root system but it will give me some information on how they grow on in my new mix. I have two samples as near identical as I can get one is planted into our long standing successful loam based mix and the other is in this new sand mixture - now I watch and wait.

Rhodohypoxis test pots
Both pots will receive identical treatment and I will see how they compare. I will also do some tests on the nutrient levels present in the two mixes - I may have to add other nutrients or trace elements to the sand mix, time will tell.
Narcissus cyclamineus seedpod
This is one of the poorest years we have ever had for seed on our bulbs due to the weather when they were flowering. However Narcissus cyclamineus has set a good quantity of seed and it is ripe now as you can tell from the yellowing of the capsule. If you do not collect it at this stage the pod will open and shed the seed around.
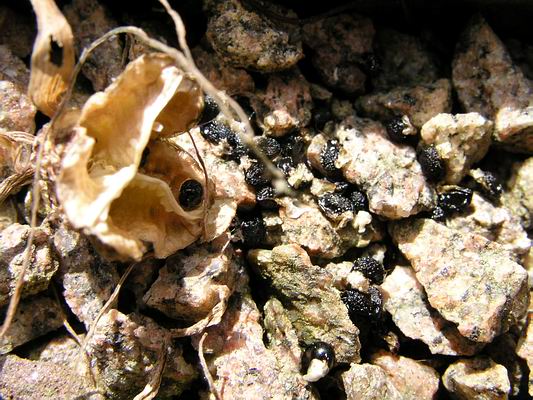
N. cyclamineus shedding seed
This is one that I missed and you can see the seed has shed out on the gravel. Notice how it is all in a small area where it has spilled out of the capsule as it fell over. This is not an efficient way for a plant to shed seed, the seedlings would all be in competition with each other as well as with the parent. Nature is a better designer than that so there has to be another factor in this seed dispersal story and that is insects.
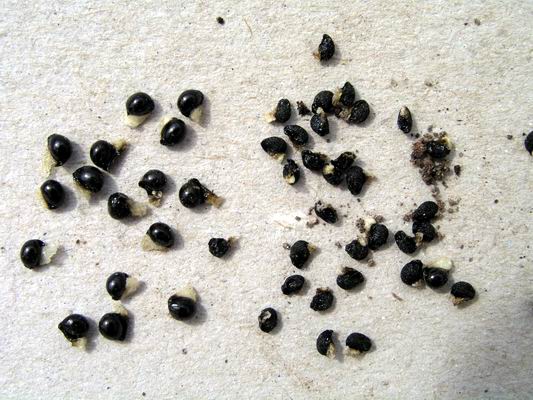
N. cyclamineus seed
The small white appendage on each seed offers a sweet treat to ants which will carry the seeds off and so disperse them away from the parent plant. They are also most likely take them underground where the young bulb will have a much better start in life - so follow this principal and plant your Narcissus seed at depth (about 5cms) when you sow it. Also notice that the nice plump seed on the left is fresh from a capsule while those wrinkled ones on the right were collected from the gravel where they have been exposed to the elements for some days.
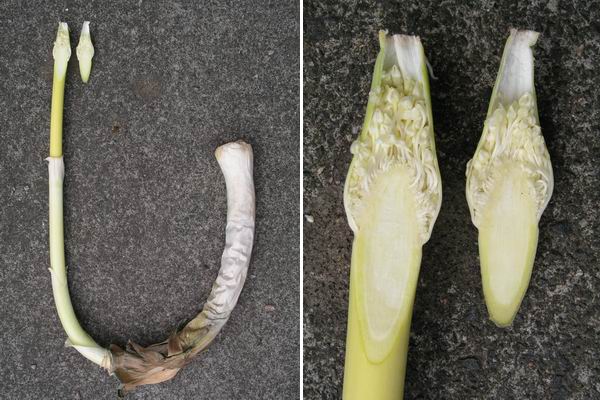
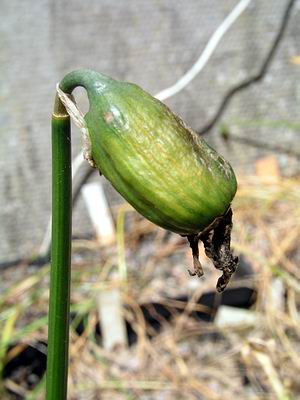
Bulb survival growth
Bulbs are incredible survivors - they have evolved to be self sufficient in extreme conditions and they can survive and attempt to reproduce from their own store of food. This leek, a primitive form of a bulb, has sufficient food and moisture stored to push up a flower stem without any outside source of food or water. To aid them in this survival growth, bulbs form next year's flower buds before they go dormant. As you can see, where I have sectioned the bud at the end of the leak, the flower is completely formed. Your bulbs that have gone or are just going dormant now will, if they are flowering sized, have a miniature flower that will sit and wait until next spring then it will push up and flower. They plan ahead as well, they take advantage of this season's surplus in case next year the rains do not come then they will attempt to flower using up their store of food and moisture - real survivors. Another lesson that we should take from this is that we cannot expect our bulbs to do well every year as the ch
anging weather conditions suit some plants better one year and a different group another year and so it is in nature.
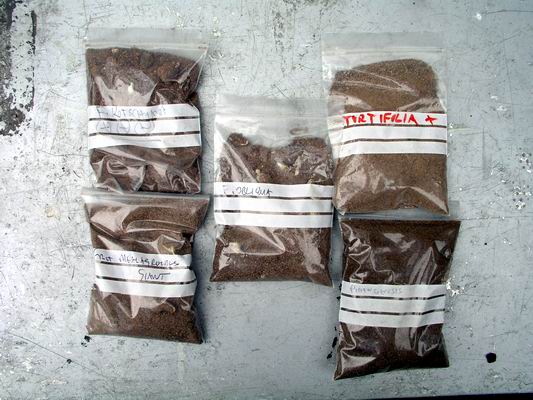
Frit bulbs in sand bags
You may remember that last year when I was repotting the frits I found some bulbs that had rotted to varying degrees. I cut these up into small pieces taking care to remove all the rotten parts and then I placed the pieces into just moist sand in ziplock plastic bags. These bags have been kept cool (approx 5C) in our bulb fridge and inspected occasionally. Today when I looked I have found that some of them have responded well by forming several new growth points on each section.
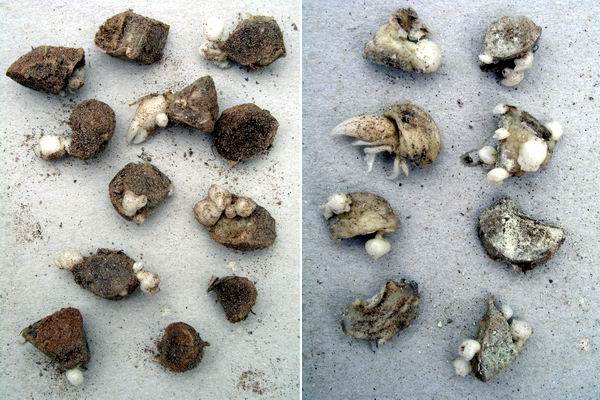
F. kotschyana and oblique
There is no doubt that species that produce rice grains and or offsets will respond best and those species that do not increase that way are slower to form bud points. F. kotschyana makes lots of offset bulbs and, on the left,you can see it has responded well and F. obliqua, right, which produces fewer offsets normally, has also done well. So if you find some of your frit bulbs have rotted but there are some healthy sections of scale, then you know what to do. You can also use this method on healthy bulbs to try and speed up the rate of increase. I have placed these back into the bags with sand just now but I will pot them up as normal in July/August, planting the sections complete and treating them like normal young bulbs.
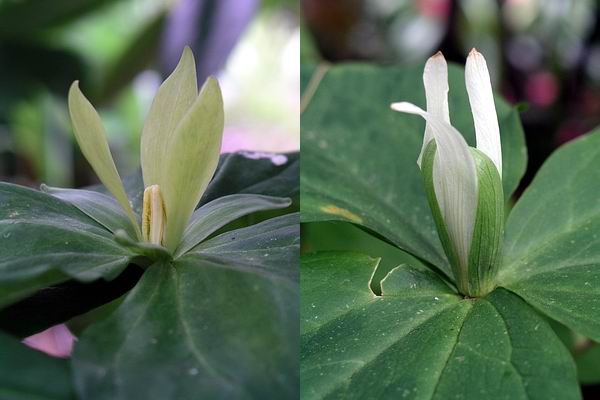
Trillium luteum and albidum
Under the trees and shrubs a few trilliums such as luteum (left) and albidum (right) are still holding on in this cold season that we are having.
^ back to the top ^
|
