 |
|
| Home Recommend This Site To A Friend |
|
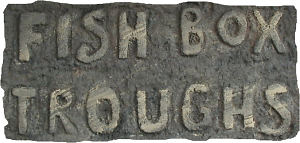
Polystyrene fish boxes make wonderful containers for growing plants. I cannot remember where or when I first saw them in use but they have been used in many nurseries and gardens for raising plants. I remember John Aitken had a polystyrene box which he had painted grey, planted as a trough in his garden near Aberdeen. The Aberdeenshire Group had put on a display featuring a small raised bed at a local horticultural show for two years and it was time for a change. Troughs would be a good idea but they would have been too heavy to transport so I started to experiment with fish boxes. After a few prototypes I found a method of producing a convincingly realistic looking lightweight trough that could be transported to shows. Fish boxes come in many sizes from small ones that hold a kilo or two of fish to large strong boxes capable of holding 50kg plus of large fish such as salmon.. I suppose I am lucky living in a fishing port where there is an endless supply of these boxes being disposed of around the fish houses. They would normally be crushed and go to a landfill site so every one I rescue for a new life as a trough has to be good primary recycling policy. Another source if you are not near a port is your local fishmonger or supermarket: they will usually save you some if you ask nicely. Polystyrene boxes are also used to pack fruit and flowers but these are not always suitable as they are made of a more expanded form of polystyrene and are not strong enough to take the weight when filled with compost. GETTING STARTED I start by cutting off the narrow strip from the rim of the box, then, using cuttings from the lid or another, broken box, I fill in the four rectangular drainage slots at the ends cutting any surplus off flush with the box. I do not glue these and provided you cut the inserts to be a tight fit they will stay in place. If you want to use an adhesive then PVA glue is the best; it is also suitable for mending any broken boxes. I have mended several boxes by gluing them with PVA using string to hold them until the glue is dry then proceeding with the next stage. ROUGHENING AND CARVING Once I have done the carving with the hacksaw blade I use the stick to round off some of the inside edges of the cuts to better imitate real carved stone. Then with a medium sandpaper I lightly rub all over paying particular attention to the top and corner edges to get a weathered stone look. Next I turn my box upside down and make two drainage holes in the base by pushing the stick through the bottom. THE SECRET WEAPON AND NOW FOR THE PAINT I have found it best to use a combination of three different colours: light sandstone, chocolate brown and black. This gives the best effect to date. I apply the paint quite thickly in strips and blobs resembling army camouflage with the white of the box showing through; the black is placed on the deepest cuts and the other two colours at random.(fig 4) Using a stippling motion start to blend the colours. By experiment you will be able to detect that you get a different effect by blending from black into one of the colours than you get by blending the colour into black. The idea is to blend the paint until it is a nearly uniform colour but, like real stone, is made up of several hues when viewed closely. The overall tone can be as light or dark as you require depending on the mix of the three colours. If you want to be different, or to encourage children, you could use bright colours, the painting need only be limited buy your imagination. Once the trough is complete I pass a piece of material to act as a wick through the drainage holes which I cover with perforated zinc or plastic mesh and hold them in place with a small nail pushed into the box. This wick helps the excess moisture to escape from the trough especially if it is placed directly on the ground. NOW READY FOR PLANTING We have found many plants like Asiatic Primulas, Meconopsis delavayi and dwarf Trilliums do exceptionally well planted in bulk in their own trough. By keeping groups of these plants together it also improves their seed production. LONG-LIVED AND INDESTRUCTIBLE Planted boxes are strong enough to be moved provided you use some care. They should always be lifted evenly from the base; this will require two people for all but the smallest size. Never try and slide them by pulling on a side as this will always result in a breakage. If you are sliding them in and out of a car then place them on a sheet of newspaper and push them from near the base. I hope that this will encourage more of you to try and make your own troughs. There are many alpine and rock plants that thrive better in a trough than in the garden or alpine house. They also make very popular and attractive subjects for displays and with three RHS Gold Medals and the Farrer Trophy for the "Best exhibit of rock garden or alpine plants at any RHS show in 1999" as well as the Trophy for the "Bext Exhibit in Show" at the Caledonian Society Show at Ingliston in 2000, the S.R.G.C. has used them well. ^ back to the top ^ |