|
BULB LOG 2nd January 2008
Welcome to the first bulb log of 2008 where the Aberdeen weather could not be worse with low cloud and fine drizzle that soaks you in seconds - the light level is very low and not suitable for taking any photographs. I will start the year off with a bit of a rant and a suggestion.
The rant is that old favourite about botanists or taxanominists changing the names of our beloved plants. I have no problems when the changes are fully justified but all too often the changes seem to be splitting hairs. Taxonomy is a difficult discipline and I always think it is like the tail wagging the dog as we try to create a set of parameters to describe and separate one species from another - not an easy task. My suggestion is that before a botanist makes any change to a plant name the reasons for the proposed change should be presented to a jury of their peers who would have to be convinced of the argument before it can be published.

Cement trough
With that off my chest now I will show how I make cement troughs using simple methods that any one can do.

Take two boxes
All you need is two cardboard boxes of different sizes so that the smaller one fits inside the other.

One box inside the other
The smaller box should be of the same proportions so that when it is placed inside the lager box an even spacing is left all around. The width of that gap between the two boxes will be the thickness of the trough walls. If the boxes are not quite the same proportion you can even out the gaps with more cardboard or polystyrene, packed in the large box ,as I have done above. Center the smaller box inside the big one and draw around it so you can see where it sits when it is removed - this is important for positioning the drainage holes in the next step.

Place polystyrene for drainage holes
I use some 2-3 cm thick polystyrene and cut four small squares these are placed well within the line drawn around the small box. Do not place them too close to the line or the drainage holes may then be under the sides and not in the base. The thickness of the polystyrene will also be the thickness of the base of the trough.

Boxes ready to start
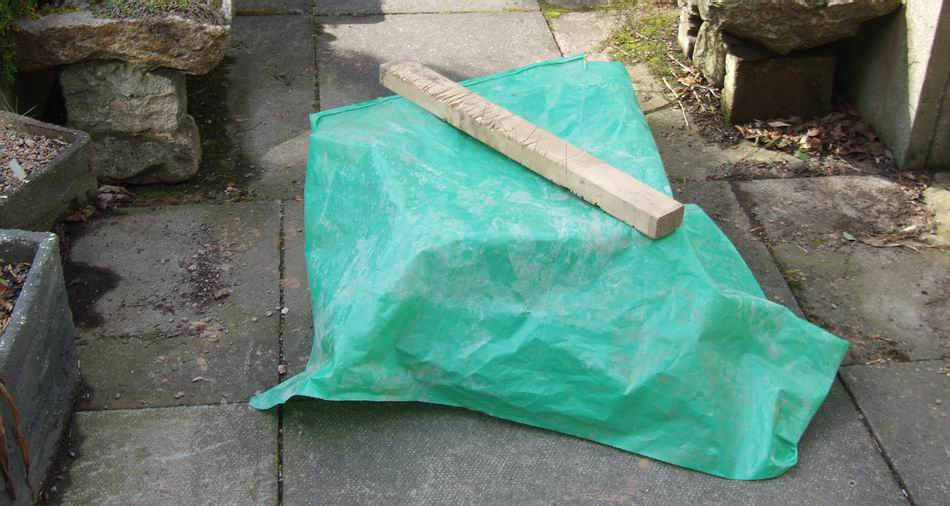
As a final measure I like to tie some strong string around the larger box to strengthen it a bit and I always use a bit of board to provide a flat surface to work on.

Sand cement mixture
The mixture that I use is a ready-mix mortar of sand and cement available at most DIY stores - one bag is enough to make a small to medium sized trough like this.
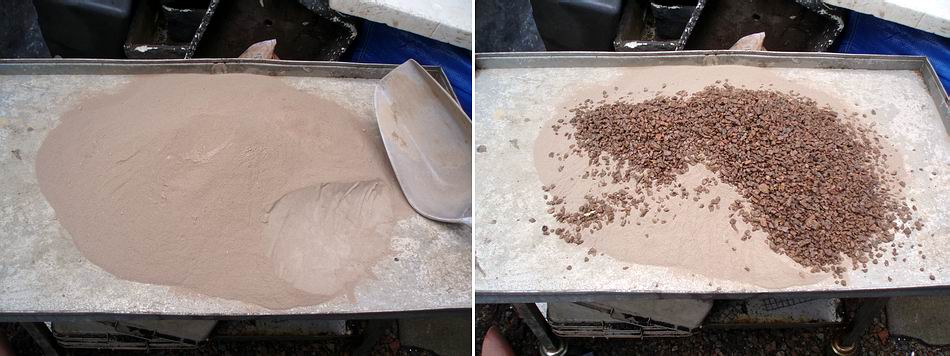
The mix
I like to add some 6mm grit to the mix to give some added texture to the finished trough.
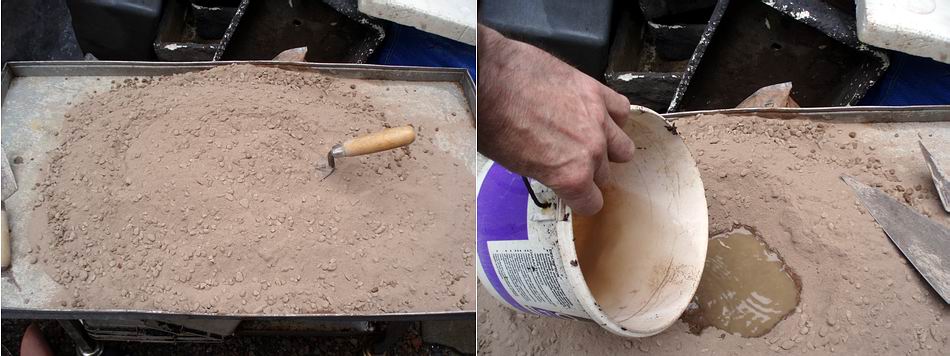
Add water and mix
First I mix the grit in to the dry mixture and this also helps mix the sand and cement that can start to separate out as the bag is moved around. Make a small depression in the centre of the mix and slowly add water mixing it well in as you go. The aim is for quite a dry mix so add enough water in to allow the cement to bind but not enough to make the mixture too wet and fluid to handle.

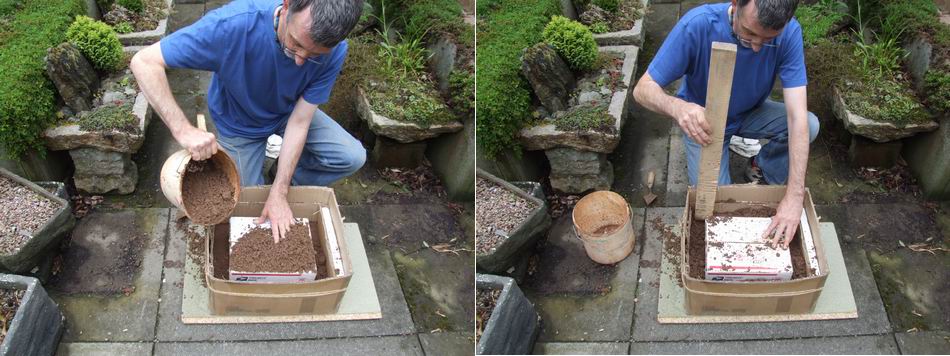
Securing the polystyrene for the drainage holes
Now place the lager box on the working board and hold the small bits of polystyrene over the marks while you secure them with some of the cement mix - repeat this until all four are in place.
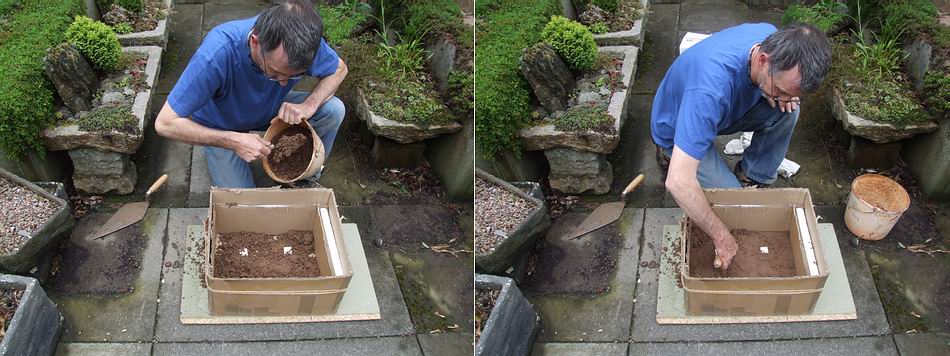
Building the base
Continue to add the mixture until all the base is evenly covered to the level of the polystyrene. Make sure that it is well firmed so that there are no air pockets but also take care not to displace the bits of polystyrene.

Placing the smaller box
Once the base is level place the smaller box on top of it - I add a few bricks to weigh it down and strengthen it. If you do not have bricks you can also fill it up with gravel or sand when it is in place.
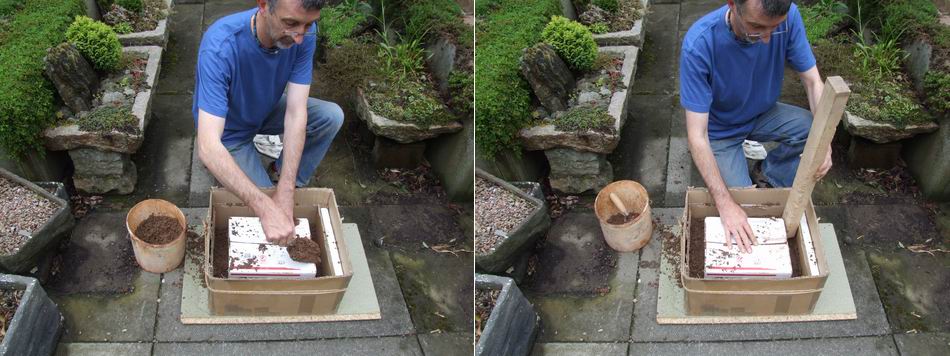
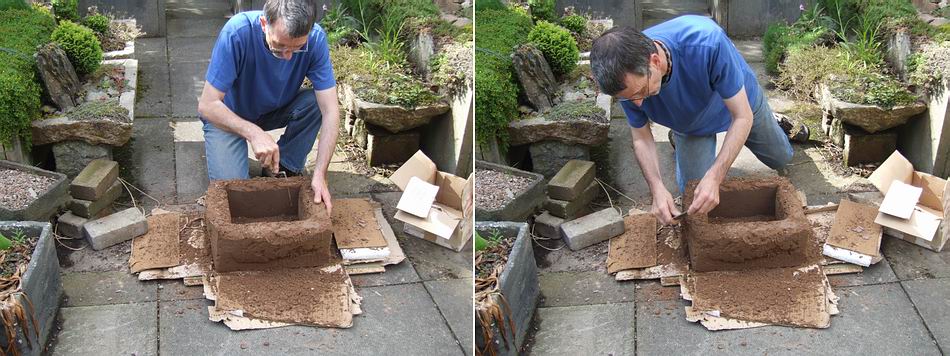
Forming the sides
Now start to add cement evenly all around the gap a few centimetres at a time and firm it down as you go with a suitable stick.
Sides
Once the fist few layers of cement are in the box will not move and you can build quicker but always working around all four sides bringing them up evenly and firming as you go.
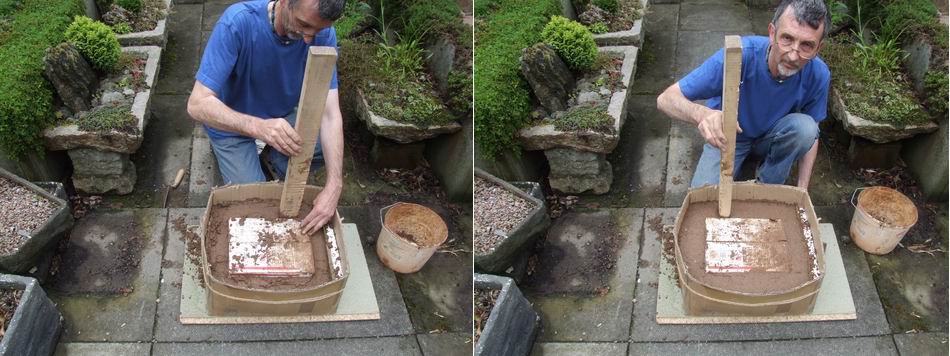
Level the sides
Bring the sides up until they are level with the inside box and do not worry if the sides of the outside box bulge out that is normal and the string will prevent them breaking. If you want a very shallow trough you do not have to build the sides up to the level of the inside box my point is that you should not build them above that level.
Cover and leave for a day
Now you just cover your box and leave it for at least a day do not try and move it at this stage because you will more than likely crack it.
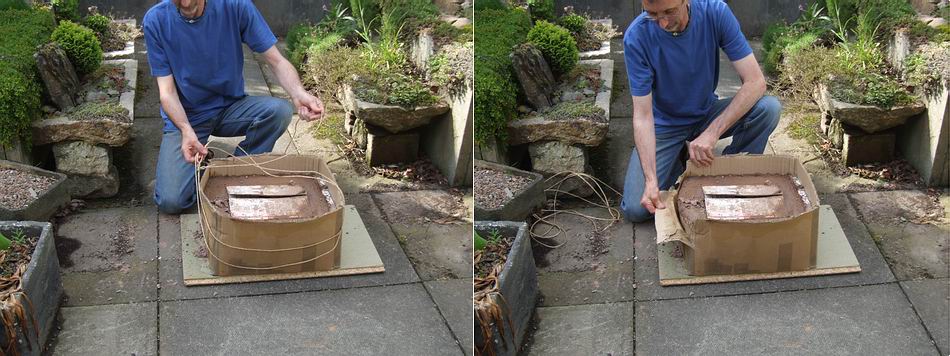
Remove the outside box
After 24 hours the cement should have started to set and you can start to carefully remove the outside box. It will peel away without difficulty as it has absorbed a lot of moisture and tears easily.

Expose the sides
Now all the sides are exposed, I still do not advice trying to move it yet.

Shape the outside
Now for the fun bit - with a trowel or other sharp tool start to carve the outside - the mixture will still be soft and it is easy to reduce the width and carve it to simulate a real stone trough.

Remove the inside box
If you think the cement is firm enough you can also carefully remove the inside box - if you are not sure cover it up and leave it for another day. Covering it up is important as it slows down and evens out the drying process so you do not get the outside drying quicker than the inside. As the trough is still soft and easily damaged take great care as you remove the inside box.
Continue shaping
Now you can continue shaping both the outside, inside and top edge.
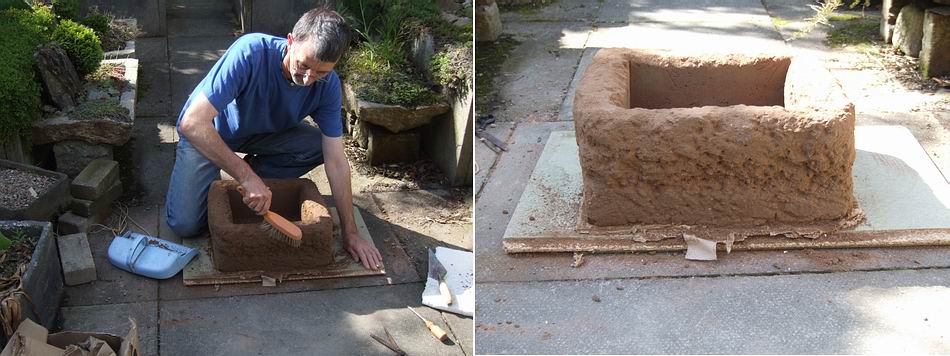
Leave to dry
A hard brush is useful to get rid of the loose material and also creates a pleasing water worn finish. When you have finished carving cover it up again and leave for at least a week to dry.
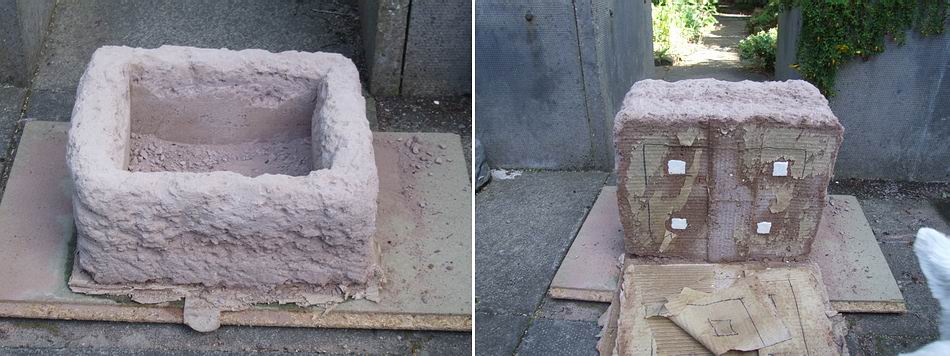
Turn it over
After at least a week it should be safe and to move it also it should be hard enough to turn it over and reveal the polystyrene in the base.
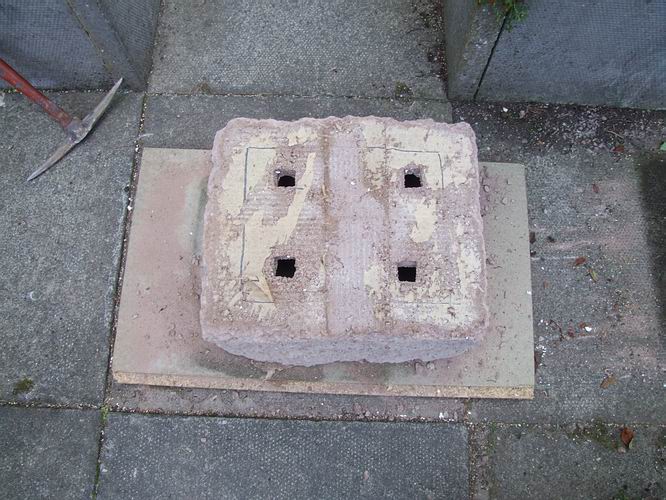
Remove polystyrene
Now all you need to do is to remove the polystyrene from the drainage holes.
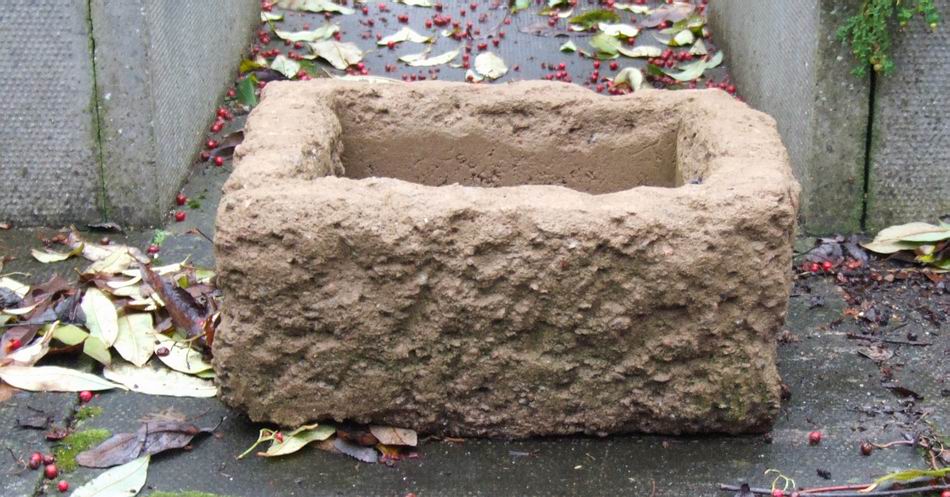
Weathered and ready to plant
I like to leave the new troughs in a shady damp place for a few months to weather and allow the excess lime to leach out - but if you are impatient you can plant it up right away.
Hopefully the weather will improve and I will get some bulb pictures for next week.
^ back to the top ^
|
