|
BULB LOG 38 --- 19th September 2007
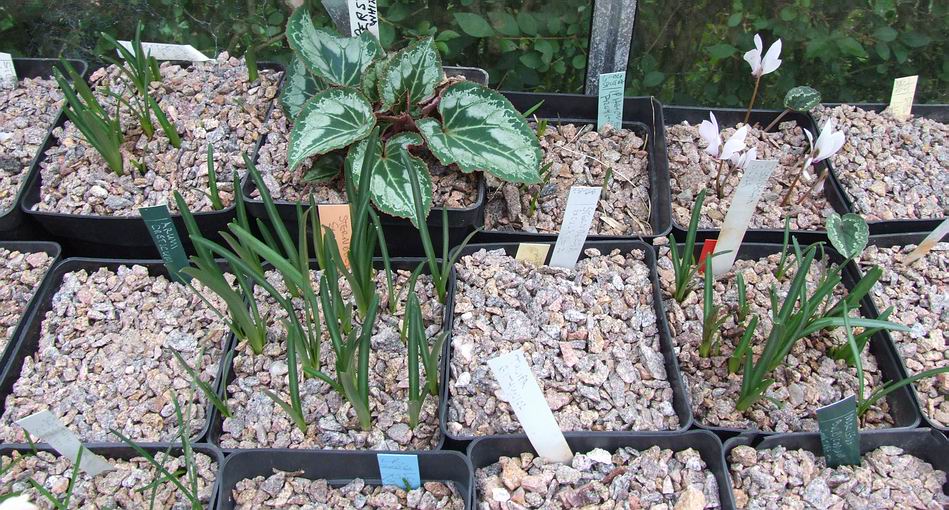
Bulb house plunge
Some interesting points have been raised and discussed on the Bulb Log feed-back pages in the Forum, about the benefits of plunging pots. Firstly I should have said that I still have a soil warming cable in the layer of sand that the plastic pots are sitting on. This is only to help protect the bulbs from freezing through if we get a prolonged period of freezing weather - I do not want it to come on at any other time as the last thing I want is to encourage the bulbs to flower too early. The other point was regarding the swing in temperatures within the pots and there is no doubt that pots that are plunged to their rims in a deep sand plunge will hold a more stable temperature than plastic pots sat on a shallow layer of sand. However I do believe that as the plastic pots are stacked tightly they will act as a single thermal mass - not the most efficient one I agree but better than a single pot standing on its own. Another comment was that the bigger the pot the more stable the temperature would be and that is
also true but my experience tells me that bulbs do not like to be over potted. It is more difficult to control the moisture levels if a big a volume of compost surrounds the bulbs - they tend to sit too wet and so are more exposed to the risks of wet rots. The secret to growing bulbs well is trying to find a regime and conditions that best suit your local climate and also serve the needs of the bulbs - this is not always easy as the climate is never the same from year to year. I keep hearing people say that the weather is not as good as normal - what is normal? It is never twice the same - we can work out the average temperature and rain fall over a period but that does not make it normal.
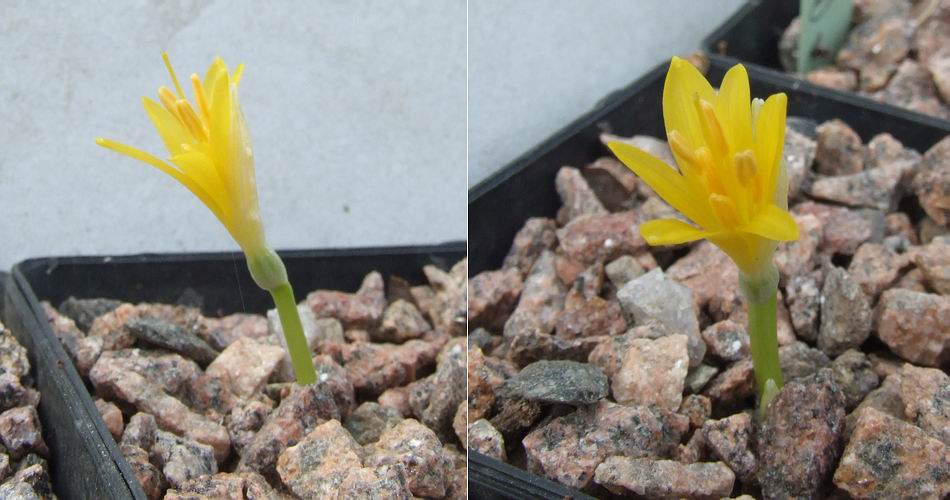
Sternbergia greuteriana
Once again the tiny yellow flower of Sternbergia greuteriana appears well ahead of any leaves - a second flower spike is just visible at the base of the flowering stem. This I believe is the true, correctly named plant but I have seen a number of other sternbergias wrongly attributed to this species.

Sternbergia sicula
Talking of wrongly named Sternbergia; here are the leaves of so called S. sicula. On the left is the one most commonly seen and I have long believed this to be wrongly named as S. sicula. Notice that the leaves on the right are much narrower, a darker green with a distinct silver stripe down the centre - this I think is the true Sternbergia sicula while the left hand one is a small and narrow leaved form of Sternbergia lutea. I will show the flowers later when the open.

Cyclamen mirabile
A tiny flower rises from deep in the compost where I sowed seeds of Cyclamen mirabile in 2004 - it first flowered last year. Unlike the ones I showed last week there are no signs of the leaves yet and I am wondering if the depth that the corm is planted at effects whether the leaves and flowers appear together or not ? Talking of planting depth, while I was looking at my Sternbergias and lamenting the fact that I do not have a very good flowering record with them, I wondered if I should try planting the bulbs nearer the surface. I think the lack of flowers is partly due to our cooler climate so if I plant the bulbs near the surface perhaps they will be warmer and flower better. It is amazing how these things suddenly come to mind - I will try this next year.

Narcissus leaves
Since applying the first storm, leaves are appearing in many of the pots, especially the narcissus but I will not water again for another week or so. I water into the pot in proportion to the amount of leaf showing so if you have lots of well developed leaves and your temperatures are high then it may be necessary to water selected pots. As our temperatures are pretty cool now I will not water but will wait until the beginning of October when I apply the second storm. I have still not watered the Fritillaria house but will be doing so this week.
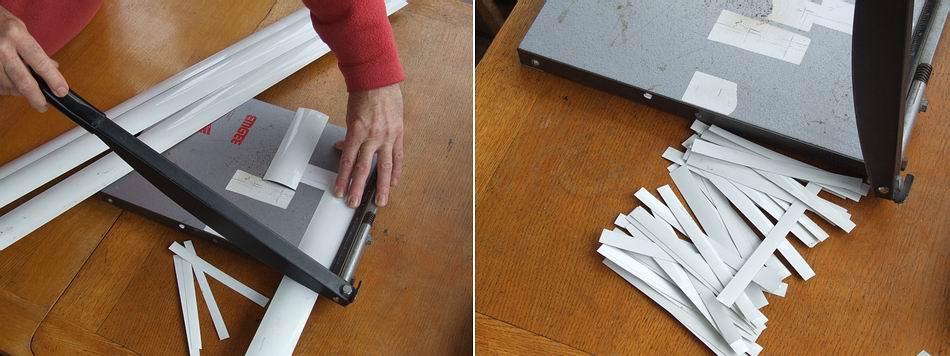
Cutting labels
The other ongoing task of the moment is sowing all our seeds and that of course requires labels so I thought that I would remind you how I make our labels. I have salvaged old Venetian blinds as the aluminium slats are ideal for making plant labels. Using a paper guillotine I cut them into lengths of 15cms and each section makes 4 labels of just over 1cm in width.

Old venetian blind labels
They are very adaptable and you can make labels of any size within the parameters of the slats. Using a hole-puncher I can make holes which mean that a label can be attached to a plant by string or a plant tie.

Plant labels
The labels are very adaptable and I like to bend the top over so the name is easily readable without bending your head to the side - this is a requirement for any plants at our shows. I can also make long labels for the garden and the bottom can be bent at right angles helping to anchor them into the ground so that they are less likely to be pulled out by a bird. The plant name and other details can be written in pencil, engraved with a small electric engraver or you can stick on the dymo type plastic lettering. The big advantage is that they last for donkeys' years and do not go brittle like the plastic ones.
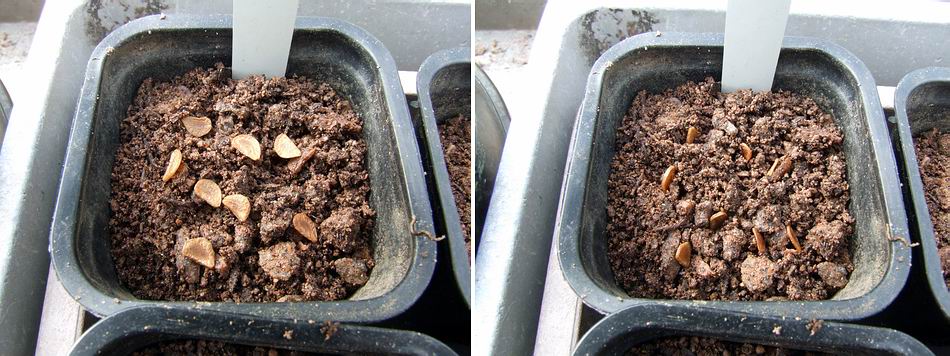
Sowing fritillaria seed
I am now sowing the Fritillaria seeds that I received back in January and as these ones are in small quantities and are species that are new to me I will take the time to space out each seed as well as turning it on its side in slipping it just into the surface of the compost. When I sow my own seeds which are larger quantities I just spread them roughly over the surface.

Frit seed in plastic bag
A very useful side effect of keeping Fritillaria type seeds in plastic bags is that when you empty them out the good seeds fall out readily but the infertile seeds remain in the bag, stuck to the sides by static electricity. I should add a note of caution the if you are storing seeds in plastic bags you must be sure that all surface moisture has been removed or you are liable to be left with a bag of rotten seeds. However once the surface of the seeds are dried they store better in plastic as they do not desiccate the same.

Seed pots
A group of seed pots now ready to be top dressed with gravel then placed outside to take the rain for a few weeks.
Crocus time
Yes it is that time again as the first autumn crocus flowers are starting to appear and I hope to have a peak of flowering next month.

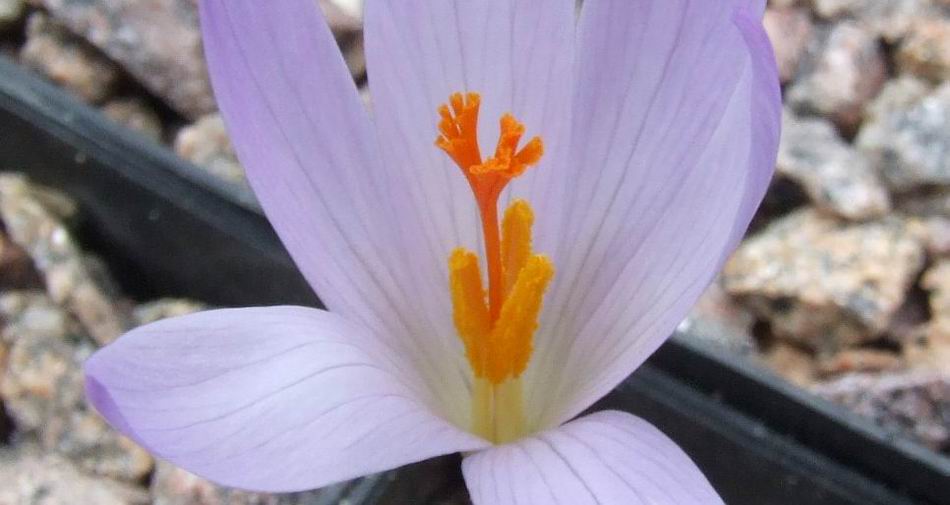
Crocus banaticus
An early flower on this pot of Crocus banaticus seedlings is a welcome sight and while I love to see a nice group of flowers when there is just one you take the time to look at it rather than being distracted by the mass appeal of a whole bunch of them.

Crocus vallicola frame
The first of the Crocus vallicola flowers have appeared but not so many as last year, I do not think they liked the warm April we had which caused them to go dormant two months earlier this year.
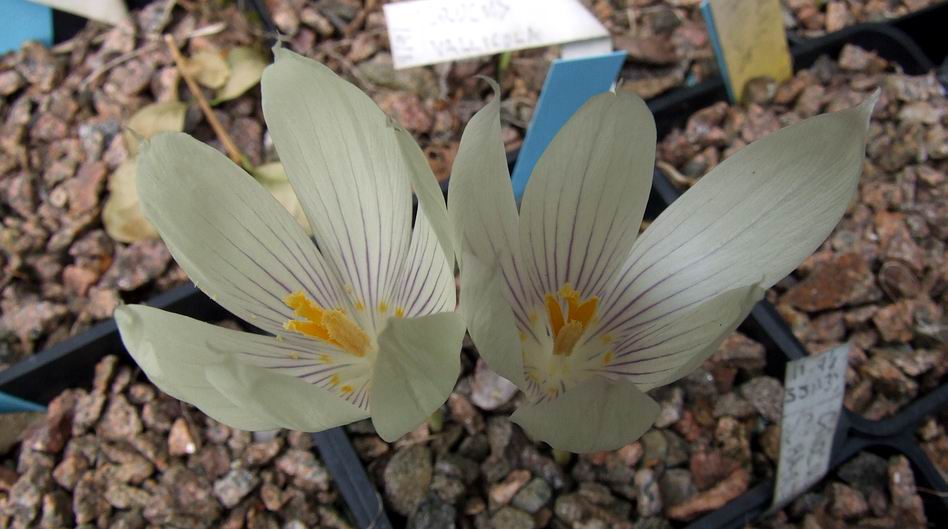
Crocus vallicola
Even though this has not been a vintage year for bulbs in Aberdeen I still have plenty to look forward to. The nature of bulbs as great survivors through all sorts of adverse conditions is what makes them such good subjects to grow as they nearly always give us a second chance to get the conditions better next time. Whether it is a mass of small cormlets, a pod of seed or a sulking bulb the survival mechanism of bulbs is good news for growers. The beauty of these Crocus vallicola flowers make me all the more determined to improve my skills and find a way to make them happier in our garden.
^ back to the top ^
|
