|
BULB LOG 28 --- 12th July 2007

Break down of sand
Do you remember the boring picture of my sand which I showed a few logs ago? Now I have managed to dry some of the sand out a bit and can pass it through a sieve to ascertain what percentage of grit there is to fine material. Here is a much more interesting picture - the sand is roughly 50/50 grit /fine sand: a perfect mixture for my needs - I love sand.
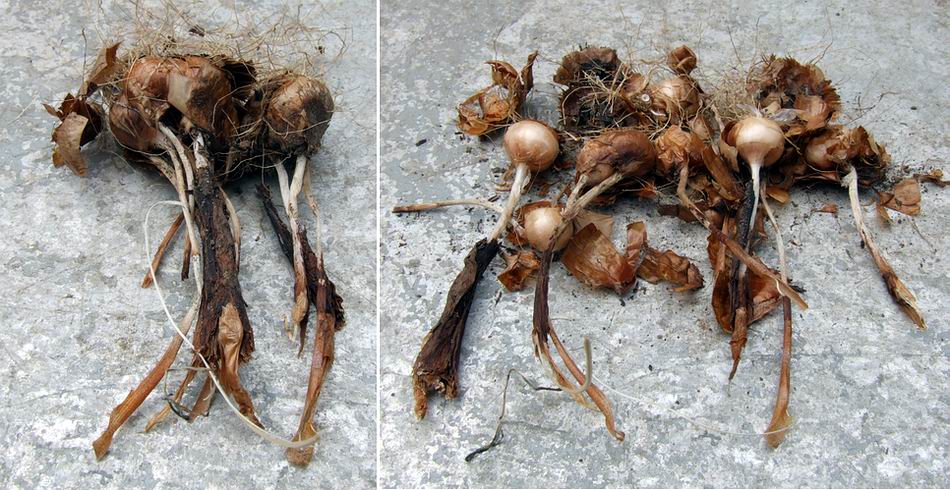
Cleaning crocus corms
Work on the re-potting is advancing whenever time and weather permit and I have done a few crocuses that were not re-potted last year. These have quite a lot of tunic remains covering the corm. The question is whether it is best to leave them on or take them off? Depending on the tunic type and the amount of build up, I may do either- in this case I have cleaned them off by gently rubbing the corms between the palms of my hands - this removes all loose and flaking tunics but leaves the innermost ones intact to protect the corm. My worry is that in our conditions the remains of too many tunics can hold excessive dampness and lead to rotting of the corm in our inclement summers, which is why I mostly remove them in this way.
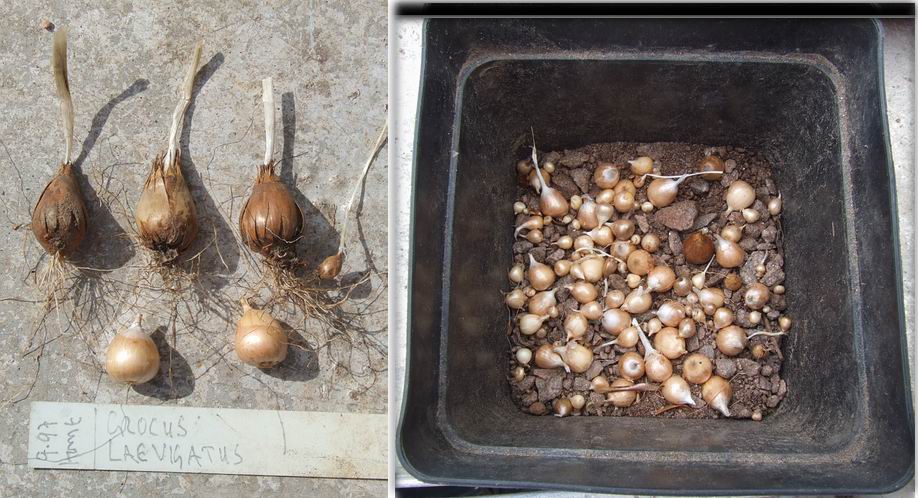
Crocus laevigatus
The corm tunics are an important diagnostic feature used in identifying the species so it is always wise to make a note of the tunic type of any crocus whose identity you are unsure of. Then when it is in flower and you are looking up the books you know what type of tunic it has. Crocus laevigatus has a very distinctive tunic but I have cleaned these up by rubbing between my hands before re-potting them into my new sand based compost mix.
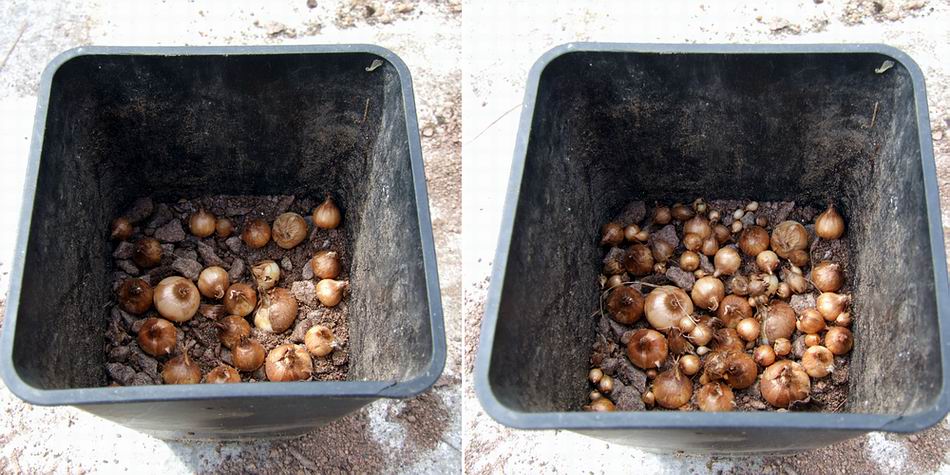
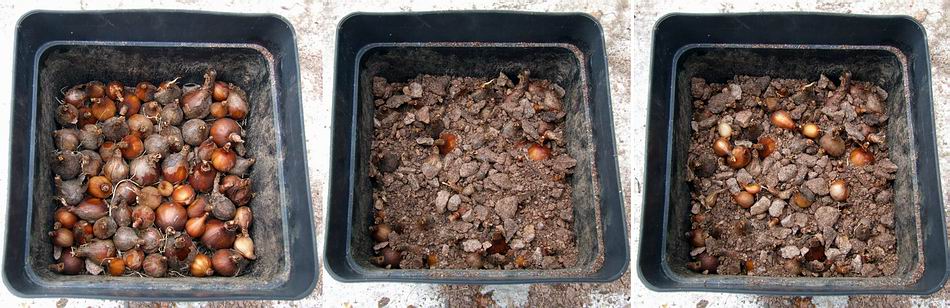
Potting crocus corms
When potting I place all the bigger corms the right way up and spread evenly around the pot, see left above, then I just tip the smaller ones in. It dose not matter if they land upside down as they will easily grow on and right themselves by next year.

Croydalis maracandica
This is one of the corydalis types that have a corky tuber that just gets larger each year and forms a hollow centre. I use a small paint brush to clean it off removing old compost and some of the old flaking skin as well - this allows me to see the growing points better. Also this year two small offsets have separated from the top - the first time this has happened in the 10 years or more I have been growing it.
Mixed up pot of narcissus
Another common problem is mixed up pots of bulbs - this is a pot with two species of Narcissus growing in it : N. romieuxii and N. rupicola ssp marvieri. I have been happy to grow them together for the last few years but now they have more than filled their shared pot it is time to separate them out.
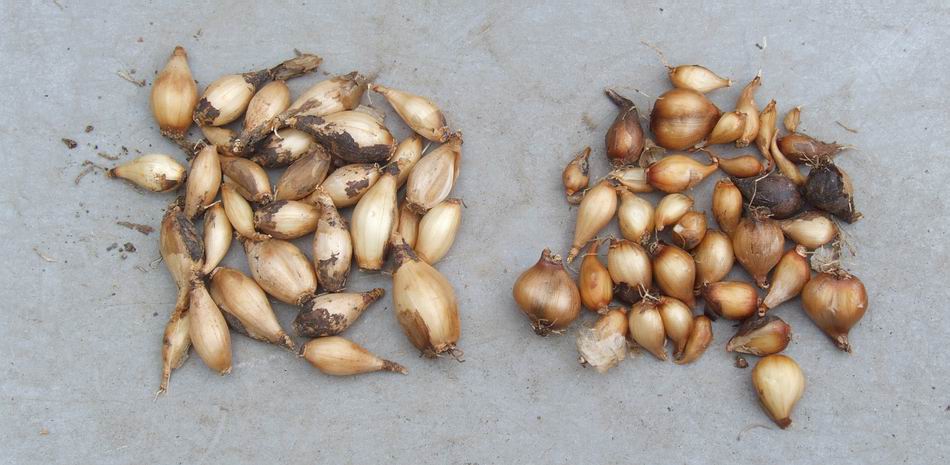
Separated out narcissus bulbs
I think I have managed to make the split, as the two species have slightly different bulb shapes. Except some of the smallest offsets which can look very similar especially when the romieuxii ones, on the right, elongate from the very bottom of the bulb. I am confident that the N. rupicola on the left are all rupicola but I may have left one or two in with the romieuxii - what do you think?
Potting narcissus bulbs
A nice pot full of Narcissus bulbs - as you can see I cram as many in as possible - then I add a little compost just leaving the tops of the bulbs showing and then tip in any smaller ones before filling the pot up with compost.

Bad result for narcissus
I do not want you to think that I always get it right because I do not - I have my failures as well. This is a pot of N. rupicola which I had noted on the label, last year when I last re-potted them, that there were dark marks on the bulb skins that looked suspicious.

Not much left after cleaning
I was right to be suspicious as the bulbs have virtually all rotted away as you can see from the remains left after I had rubbed them gently between my palms. Obviously the black marks were a form of rot which has attacked the bulbs - this time I threw it all out in the dust bin.
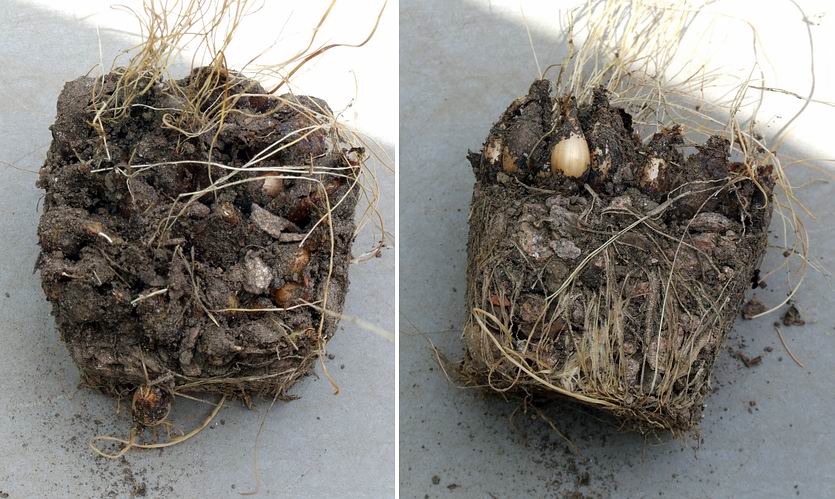
Narcissus too wet
Rot is always a problem if the bulbs are too wet during their summer dormancy - as these narcissus I have just tipped out of their pot are. This is one of the pots that has held on to too much moisture, despite not having been watered since April. I left the bulbs sitting in the sunshine for an hour to dry off all the surface moisture before re-potting them.

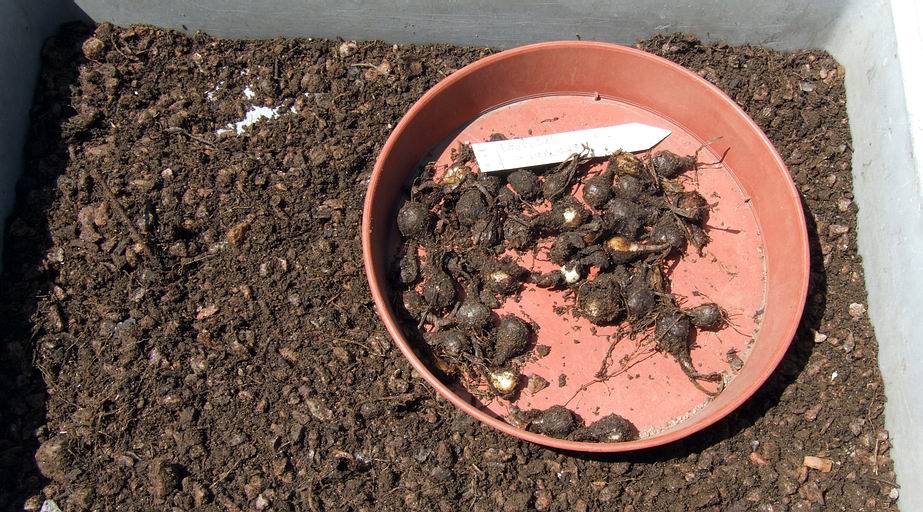
Not such a good result
Here is another failure due to too much moisture - these bulbs rotted off last summer before they got a chance to grow in the autumn. This is why I need to get my new compost mix as dry as I can before placing the bulbs into it because dormant bulbs going into a moist compost mix which is then heated up in the summer sunshine creates perfect conditions for many types of fungal and bacterial rots to form and attack the bulbs.

Not repotted last year
Here is good pot of narcissus bulbs that was not re-potted last year. While they are perfectly healthy they are slightly smaller than I would expect if they had been re-potted and enjoyed the benefit of the extra nutrients and minerals in new compost. I still believe that in an ideal world it is best to re-pot bulbs every year but, alas, time does not permit.

Perfect narcissus bulbs
Another pot of perfect narcissus bulbs, well no, I have to admit it these are galanthus bulbs. Yes I have come out and owned up to growing some snowdrops in pots and the garden and this is the time I like to re-pot them as well. I do not buy into the moving them in the green argument which in my mind is deeply flawed as I have discussed previously in the bulb log.

Erythronium tuolumnense seeds
Just for a change from bulbs here are the seeds of Erythronium tuolumnense, a species that is not noted for producing seeds very freely in cultivation. Most of the forms that are readily available are reluctant to set any seed and a few of them produce the odd seed but, now my plants raised from wild-collected seed are mature, I get seeds from them every year.

Erythronium multiscapoideum seeds
It is possible to identify nearly every species of erythronium from the seeds. I should rephrase that as I am sure that with an electron microscope and a good data base it is possible to identify most plants from their seeds but I mean just by eye or with a 10x magnifying glass. Or even better a digital photograph taken at a reasonably high resolution so you can see them in beautiful detail on your computer monitor.

Erythronium seeds stored in dry sand
This year I am making a trial of storing some of my Erythronium seeds in dry sand in zip lock plastic bags - the method I have used successfully for narcissus and crocus seeds - more on this next week.
^ back to the top ^
|
