|
BULB LOG 38 --- 20th September 2006

Reworking trough
Over the years of the bulb log I have shown you various pictures of this trough and its mass of self seeded Dactylorhiza orchids. I suppose I should qualify the self seeded bit by telling you that the first one to flower several years back, arrived by its own devices. When it first flowered I partially snapped the stem when the seed was ripe bending it over so the seed would shed into the trough, resulting in over 100 seedlings.

Dactylorhiza self seeded
As you can see above, the seedlings range in size from tiny to nice large flowering sized tubers and I would suspect that the small ones are seedlings from subsequent years. If you have ever tried to sow Dactylorhiza in a pot in the way we do with most other seeds, I can assure you that you are not going to succeed. The seed seems to prefer to be scattered in old established troughs where there are other low growing plants; this is where we find most of our seedlings. I think it is a combination of low nutrients and little disturbance in the very early stages of germination that allows the seeds to succeed in these conditions. We also find Dactylorhiza self seeders in normal seed pots of bulbs (that we do not repot for the first three years) as well as appearing around the garden, mostly popping up through a mat or cushion forming plant.

Dactylorhiza tubers
Whenever I lift a group of Dactylorhiza tubers I can tell immediately if they are healthy or not by their smell. Healthy tubers have a strange smell of wet horse which is not present in unhealthy and infected tubers. I believe that this is the smell of the mycorrhizal fungi that grows in a symbiotic relationship with many plants, including orchids, which help them absorb food in low nutrient conditions.
I am convinced that spores of these fungi are present in most soils but it seems to thrive in conditions of low nutrient levels. I am also of a mind that the recent problems we saw of devastating attacks, on both the leaves and tubers of Dactylorhizas, were caused not so much by a direct assault on the Dactylorhiza, but by an attack on the mycorrhizal fungi. The other symptom that I noticed when handling unhealthy Dactylorhiza tubers was that they lacked the thousands of fine 'hairs' all over their surface, you can just make them out in the enlarged section above, these hairs I think are the fungi. The fungi not only helps the plants to feed it also fights off other fungal attacks so if it gets killed or weakened the orchid will also suffer, happily I smelled the typical horsey smell as soon as I stuck my fork into the above trough.
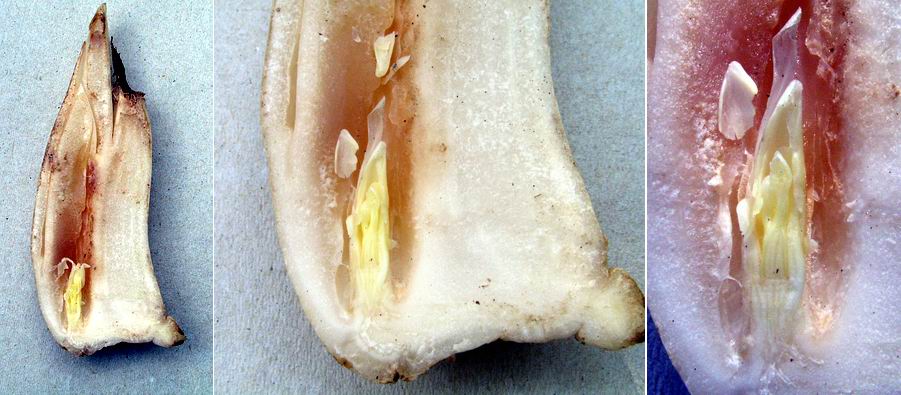
Erythronium bulb
At the recent Bulb Workshop I took at Pitlochry, I publicly cut an Erythronium bulb in half (Shock horror!) to show its structure. Depending which text you read you will find erythroniums variously described as having a bulb or a corm - so which is it? Well the first thing I have to say is that the term bulb and corm are used to comply with the human need to compartmentalise everything into neat sections- nature does not work that way. We see this all the time in plant taxonomy where the taxonomists struggle to bend and twist their own rules as they attempt to put genera and species in a neat order that will suit the human world. A true bulb, like a narcissus, is made up of a basal plate with modified leaf bases forming the scales, while the bulk of a corm is a compressed stem. True bulbs add more layers each year and split into separate bulbs when they are big enough, while corms are replaced every year by one or more new ones - then we have so called bulbs, like fritillaria, that also renew themselves each
year. The simple fact is that many bulbs, and I use that as a general term, have characteristics of both a true bulb and a corm at the same time and so are difficult to classify in the man made order of play. The thing about them is they are all fascinating like this erythronium bulb where you can see the great mass of stored food surrounding the tiny but complete embryo flower, stem, and leaves waiting for next spring to burst through the ground and flower.

Soaking erythronium seed
As I am about to sow my Erythronium seeds I will start by soaking them for a day or two in water to help them rehydrate. Above are the sample packets that I took across to the workshop to show the difference soaking has on the seeds and how it will make a big difference to the germination rate in the first year. Having to write, lecture or take workshops about a subject is a great way to learn more yourself. After a few days in the packet I discovered the soaked erythronium seeds above had not only swelled up to about twice the size of the dried ones, which I had expected, but they had also used up all the air in the sealed plastic pouch, forming a vacuum pack - fascinating.

Cyclamen africanum and mirabile seedling
The first flower on our Cyclamen africanum is out now and the first flowers are appearing on a pot of C. mirabile which I only sowed in 2004. This is the quickest I have ever flowered cyclamen from seed and I put this down to the fact that this was my first experiment at sowing cyclamen seed at depth. Like I recommend with Narcissus and Crocus, among others, I sowed these seeds below the half way mark on the seed pot and they have been left alone since then and now they are all producing their first flowers.
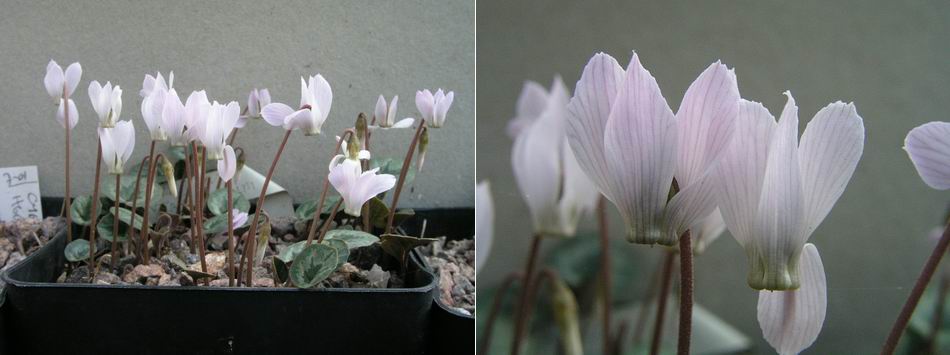
Cyclamen intaminatum
The tiny Cyclamen intaminatum is also flowering and my favourite forms are the ones with the pink lines on the petals, especially when they also have well marked leaves also showing a hint of pink.

Crocus vallicola
Our pots of Crocus vallicola in the frame continue to delight with their subtle variations not only in colour and shape but also in flowering time.
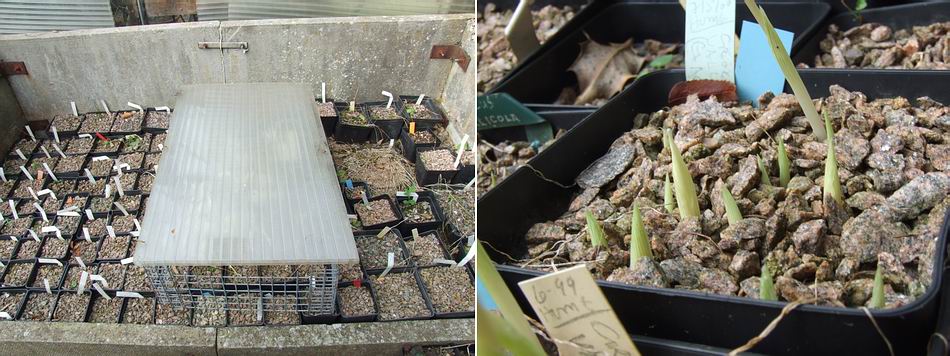
Crocus vallicola cover
A simple cover helps protect the delicate flowers from the wind and rain as well as encouraging more insects to pollinate them assisted as always by me and my trusty paint brush. The pot on the right is only now showing shoots some three or weeks after the first flowers opened and we have other pots that have not yet shown any signs of growth. This extended flowering period is another good reason to increase your stocks by seed and not to rely on a single clone.

Crocus vallicola acuminate tips
The wispy, acuminate, tips of the petals are part of the charm of this species and in some individuals they remain entwined to form a globe around the style and stamen.

Colchicum montanum going over
In the bulb house the pot of Colchicum montanum is going over as you can see on the right and I must beware of botrytis setting in on the fading petals when the conditions turn cool and wet. The best thing to do is, once the have lost their colour, to pluck them off with a sharp upward tug while placing the fingers of your other hand either side of the base to prevent pulling the bulb up.
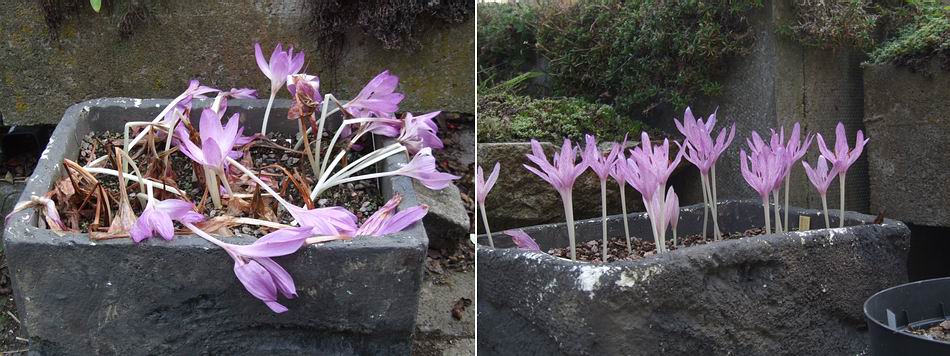
Colchicum in boxes
Outside one box of colchicums goes over and another comes into flower. There is not the same need to remove the fading flowers out side as they do not seem to get botrytis in the same way, they just break down and rot in a healthy fashion.

Colchicum byzantinum album
All over the garden we have a wonderful mix of colchicums producing lovely scenes like these Colchicum byzantinum albums seen here in front of a fading tessellated hybrid. Note the small amount of pink at the very tips of the petals; this is a typical feature of this form.
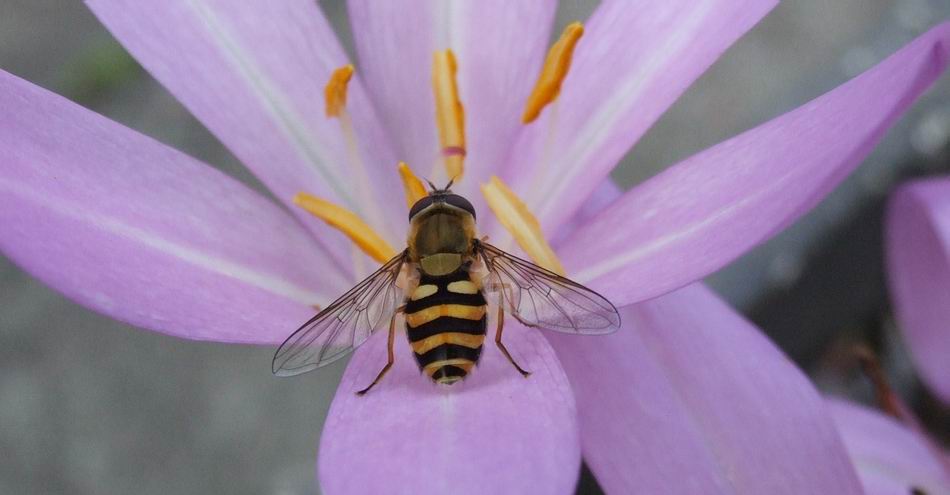
Colchicum and hoverfly
And finally, yes I know I showed one last week, a picture of one of the thousands of hoverflies that are attending to the colchicums and crocus flowers, they are just so photogenic.
^ back to the top ^
|
