|
BULB LOG 28 12th July 2006

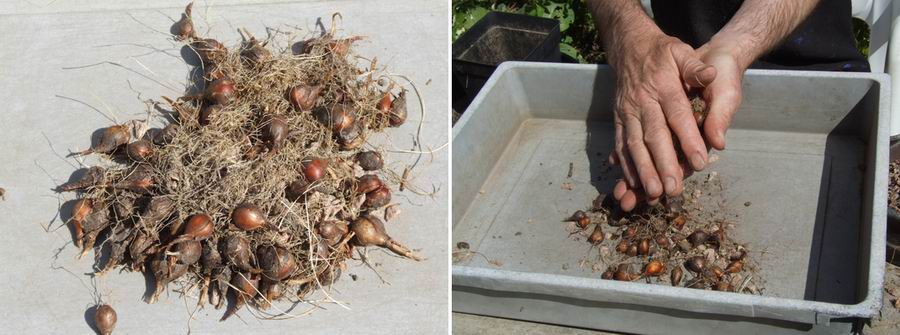
Narcissus bulbs in 7cm pot
Now I am into repotting mode, working my way through as many pots as I can. Who would believe that all these Narcissus romieuxii bulbs could have come out of a 7cm pot? The bit of paper below the bulbs is cut to the size of the pot rim and, when you take into account that the pot steps down in size at the rim and then tapers towards the bottom, it is almost impossible to believe that they all grew in there. There is no doubt in my mind that the bulbs do best when they are crammed into as small a pot as possible - they hate being over potted with too much compost around them to get cold and wet.
Repotting Narcissus bulbs
First I tip off the gravel topdressing then the compost down to the level of the bulbs which can now be removed from the pot.
Cleaning Narcissus bulbs
A good shake will remove most of the compost from the remains of the dried out roots. Then I roll the bulbs gently between my hands which cleans them beautifully, removing all the dried roots and any flaking tunics.

Clean Narcissus bulbs
I am now left with a pile of debris and some nice clean bulbs ready for replanting.
Yes, I am reusing last years compost just now, partly because as I have already explained, I do not have much loam left and I have still not yet got in a new supply of 6mm gravel but more because everything is wet after some very heavy rain fall. It is too early to pot the bulbs into a moist compost as this will increase the risk they would face of rot attacking the bulbs while they are dormant.
I always suffer some losses to these rots but have to balance this with having enough time to get the job done but this year all the compost ingredients are very wet.
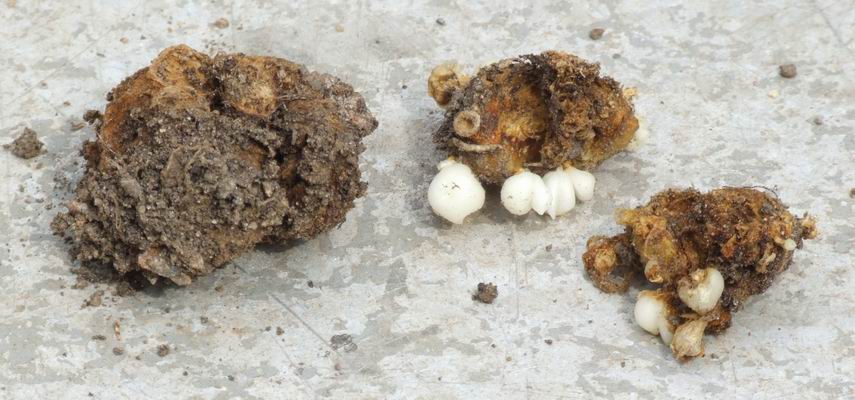
Rotten fritillaria bulbs
These Fritillaria bulbs rotted off last summer after being repotted into moist compost; luckily one has produced a number of bulbils on the rotting scales, a very useful survival mechanism.

Reusing last years compost
The compost looks terrible when it is completely dry like this, all dust and gravel, but I potted a sample and gave it a good soaking and when I tipped it out it looked very good, having absorbed the moisture, the structure was fine for another year. I fill the pot to the level that the bulbs will sit on then sprinkle a small amount of bone meal on that level - this will replenish some of the nutrients and provide some nitrogen and potassium for the early growth of the bulbs in the autumn. Then the bulbs go in and the pot is filled with more of the old compost before getting a layer of grit to top it off.
Rescuing narcissus seed
While going through the frits I discovered some Narcissus waterii seed which I had forgotten to harvest and that had shed into the sand plunge and some of the adjacent frit pots. As this is a special form of N. waterii collected in the Atlas Mountains, I was keen to grow it on in a pot so I carefully had to collect the seeds with a pair of tweezers. While trying to pick the seeds from the sand and gravel I get a practical demonstration of how well they can work their way deeper and deeper with every prod - I wish I had remembered to collect it before it was shed.
I am often asked when is the best time to sow bulb seeds and my normal answer is to sow it in late August/September - a typical response to which is that "nature does not wait it sows the seeds immediately". We have to look at the whole equation when observing nature and yes, in the wild, seed is shed directly into the ground when it is ripe: that I can agree with, but it is the conditions that the seed spends the next few months in that is critical. Typically the seed of these Mediterranean type bulbs is shed into a Mediterranean summer - hot and dry - the cool moist conditions that make up an Aberdeen summer are very different to that. Many of the seeds would succumb to rot and fungal attacks before they ever get a chance to germinate if left outside in cold damp conditions. If however you have dry compost and the space to store the seed pots dry under glass then you can sow them now and this is perhaps the ideal way. My compromise of storing Narcissus and Crocus seed mixed into dry sand in plastic bags un
til late August/ September when they can then be sown and placed outside to take the weather has proved very successful for me over many years.
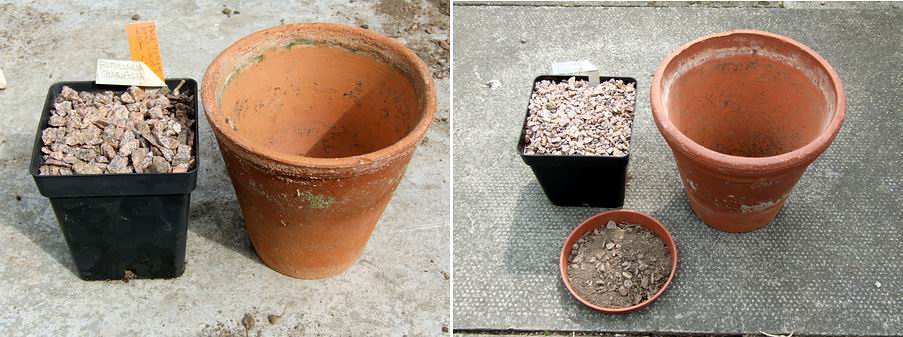
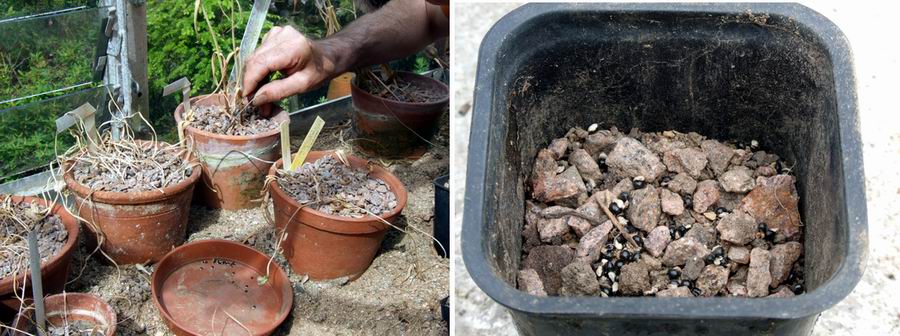
Round to square pots
This year I am moving all my fritillarias into square plastic pots. I was very interested to discover that the volume of compost required to fill the square pot on the left was exactly equal to what came out of the larger looking clay pot beside it, and there is very little surplus compost left over from the bigger clay pot on the right just the small amount on the saucer. I should emphasise that when I am reusing the compost I do not mix it; I do one pot at a time, taking care not to mix the compost from different pots. As so many frits make small rice grains if I were to mix the compost from species to species I would get in a terrible mix up.

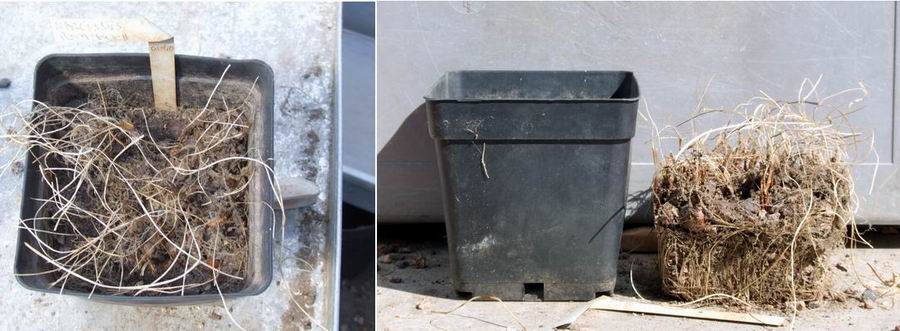
Fritillaria root system
Fritillaria root systems are never that extensive; I do not think they need it in cultivation and I also think that they can absorb moisture directly through the scales that make up the bulb, so reducing the need for deeply probing roots. Despite that observation it is nice to see the remains of a healthy root system when I repot the bulbs.

Fritillaria roots above bulbs
I am often asked when I say "plant the bulbs in the bottom third of the pot does that leave enough room for the roots and are the roots able to grow above the level of the bulb?" You can see the answer here - yes the roots will have plenty of space wrapping around the pot and they can easily grow to levels above the bulb if they require.

Fritillaria pudica bulbs
On the left are some Fritillaria pudica bulbs just tipped out of the pot - notice the remains of two bulbs that have rotted off. This is almost certainly due to being repotted at this time last year into slightly moist compost. Two bulbs have succumbed to a rot that luckily did not spread all through the whole potful. On the right are the same bulbs cleaned up and placed into their new square plastic home in the same nice dry recycled compost, that should prevent any rots occurring this year.
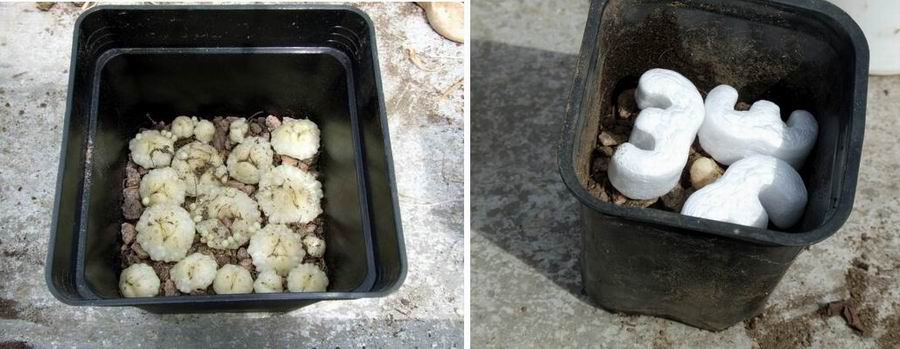
Fritillaria bulbs in pot
It is ideal to be able to pack the bulbs in like those on the left but if you only have a single small seedling bulb(right) or a small number of bulbs which do not fill even the smallest pot what do you do? I use polystyrene packaging as surrogate bulbs. It looks strange but it definitely has a beneficial effect on the bulb which will grow better surrounded by this layer of packing than it would on its own in a pot of compost.
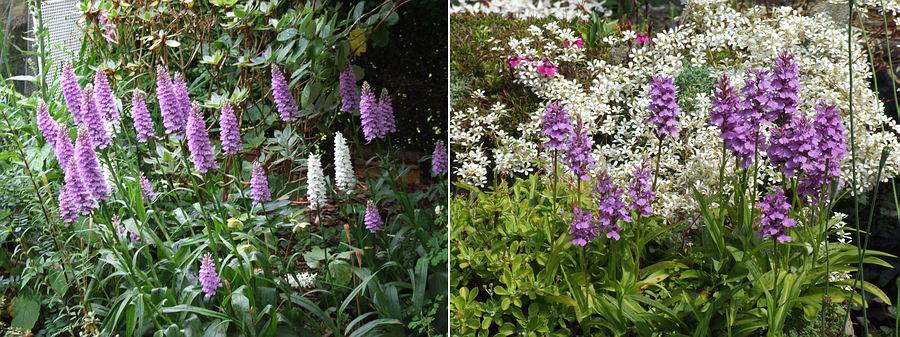
Dactylorhiza
I will finish this week's log with a picture of some vigorous Dactylorhizas that self seeded in our garden looking very strong and healthy (on the left). Having been spilt and moved a few years ago they now need to be split again which I will do in the early autumn - watch this space. On the right is another self seeded group growing in a trough which I threatened to remove and plant in the garden last year; I must also get them moved this year.
^ back to the top ^
|
