|
BULB LOG 49 --- 6th December 2006
In this weeks' log I have reworked an article I wrote some years ago on growing bulbs from seed. It pulls together much of the information I give you throughout the year in the bulb log.
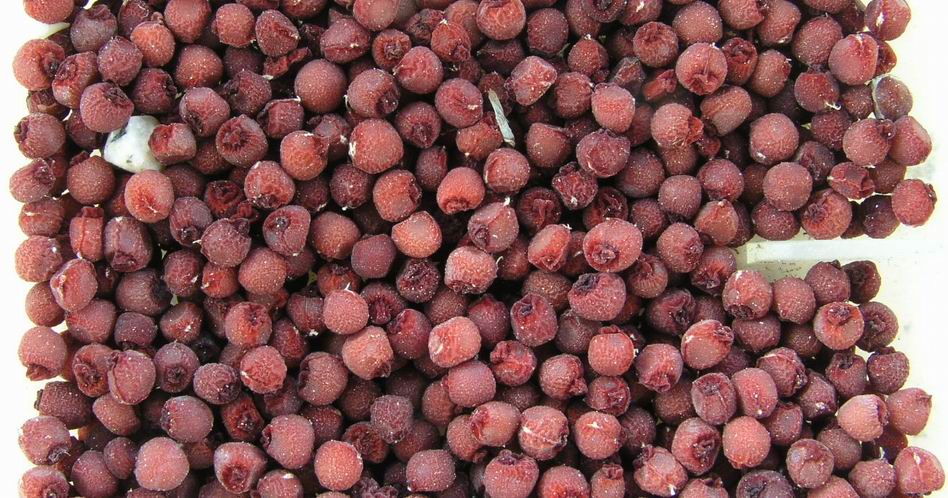
Crocus seed
Growing bulbs from seed greatly reduces the cost per bulb and means you also have a lot more to play with.
You will get a good selection of forms, often showing considerable variation which I find highly desirable. Many bought bulbs are often clonal and usually represent a form that multiplies itself freely; this can sometimes be at the expense of flowering. Plants that concentrate their efforts on vegetative multiplication do not always spare the energy for flowers. It also gives you the opportunity to select your own favourite forms that you can multiply clonally if you wish; it is nice to have a pot full of bulbs that are just that bit different from everyone else's and if you enjoy showing, it might just take the judge's eye. I also like to see a pot of bulbs showing the variation in a species, providing this is not too extreme, I find it more interesting than a pot full of a single clone.
By having a good selection of individuals which should have differing levels of resistance to different diseases you are less likely to lose the lot, if a problem strikes, than if you had a quantity of a single clone. Also you will have raised bulbs that are more suited to your growing conditions, as any that are totally unsuited will have died off at an early stage. It is much less painful to lose a first year seedling or two than to lose a flowering bulb bought at great expense which then decides it does not like your cultural methods.
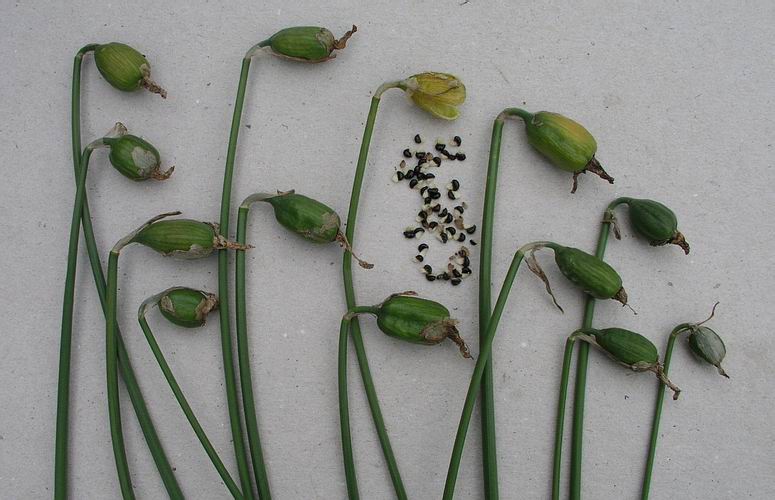
Collecting Narcissus seed
You should also collect and sow some seed of all your own bulbs on a regular basis to ensure that if they are unfortunate enough to get struck by a disease or a virus you will always have healthy young stock coming on.
Much is written about not letting your bulbs set seed as this weakens the bulb; this is nonsense. A bulb that is setting seed will grow from four to six weeks longer than the same bulb would if it was not fertilised, this extra growing time more than makes up for the energy the plant needs to produce the seed. It is very important that we all collect and circulate as much seed from our cultivated bulbs as we can. We never know when
wild sources of seed will dry up, either by extinction of the plants in the wild or by legislation forbidding seed collection, so we must look to preserve as wide a range of cultivated material as possible.
When to sow
I believe that bulbs have a built-in clock that is passed on to the seeds by their parents, and this more than any outside element or condition triggers them into growth. Each bulb has an annual window of time in which it will grow, within this window outside conditions such as moisture or temperature can also play a role in when growth is initiated.
I know that some people say you should always sow everything fresh as this is what happens in the wild but this does not take into account the very differing conditions found between a summer season in a garden when compared to the those of the plant's natural habitat.
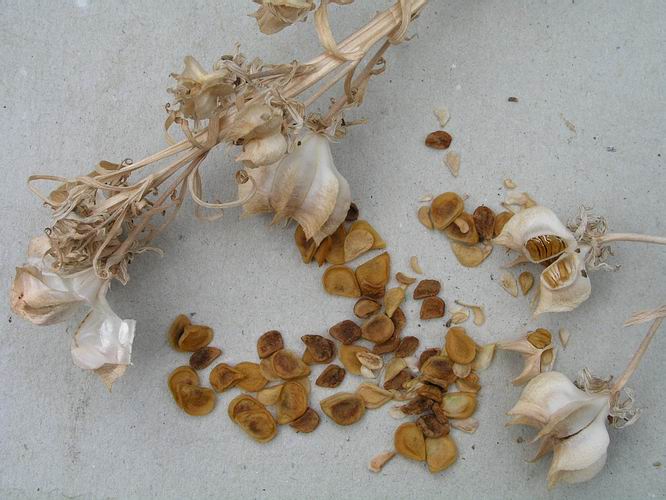
Fritillaria pluriflora seed
Fritillaria seed should be sown at the beginning of September and watered well, just like the mature bulbs. You can successfully sow Fritillaria seed up to late November and possibly December. If I receive Fritillaria seed after December I do not sow it until the following September, as germination in the first season would be poor, if at all, because you have missed the time window for Fritillaria and there is every chance that the ungerminated seed would rot off in the long period of unfavorable conditions of a Scottish spring and summer before the next time window comes round. The North American fritillarias are an exception to this and I know people who have had a good early germination following a January/February sowing - I am convinced that the American frits are very different breed to the old world frits.
Crocus and Narcissus should, ideally, also be sown in August or September although the time window seems to be wider in these genera and they are less susceptible to the ungerminated seed rotting off in the spring and summer months. If you get them from seed exchanges in January and February sow them immediately.
Seed of summer growing Lilies such as LL. nanum, oxypetallum, etc and Nomocharis species should not be sown until the end of January. I have made the mistake in the past of sowing them in the autumn and they germinated in a mild period before the onset of winter giving me great problems of how to take the tiny seedlings through a winter; needless to say I was not successful on that occasion. This is how gardeners must learn; I do not think a dead plant is wasted if I have learnt something in the process. I have also had reports of the American fritillarias germinating in the autumn if the conditions are mild so the rule should be to sow these seeds when the temperature drops and winter comes.
STORING SEED
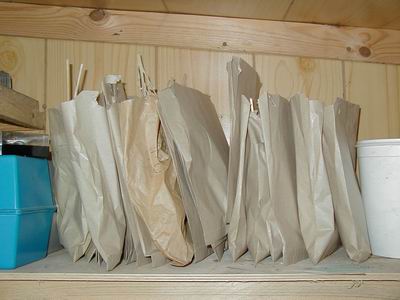
Stored bags
I used to think that Erythronium seeds were best sown fresh but now I prefer to store them in paper bags through the summer.

Soaked and unsoaked erythronium seed
I then give them a good soak overnight in water with a tiny smear of soap, just enough to break the surface tension, and this rehydrates them making them nice and plump again and improving the germination.
We have discovered the following methods work well for storing seed.
Fritillaria and Lily; allow the seed to dry naturally then it can be kept for at least three years in paper packets kept in a dry environment and at a cool constant temperature well away from any sunlight.
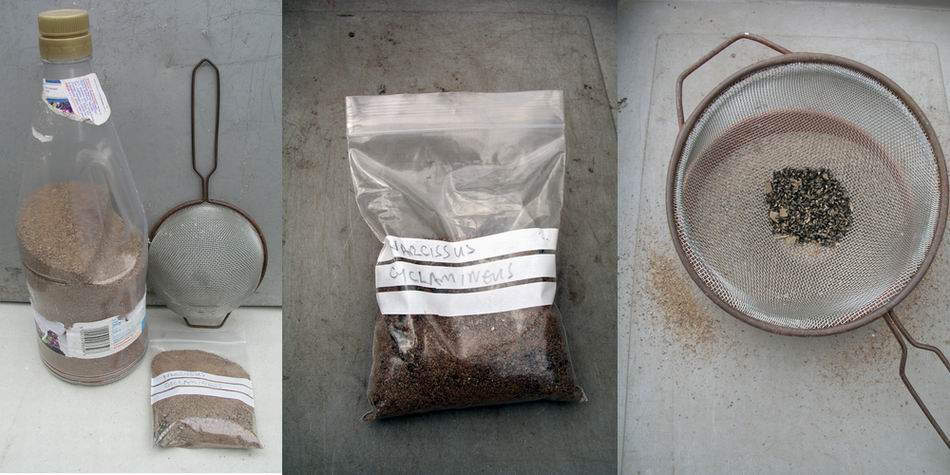
Storing narcissus seed
We store our Narcissus seed in almost dry fine sand that has been passed through a kitchen sieve. The seed and sand are placed into a zip lock plastic bag which is stored in a dark place that is not subjected to large temperature fluctuations, a tin box in a shaded shed. When we are ready to sow the seed we pour the contents of the packet back into the sieve and the sand passes through the mesh leaving the seed ready to sow.
We have found that all bulb seed, other than the papery Lily type, store better in sand, they seem to prefer this to being surrounded by air.
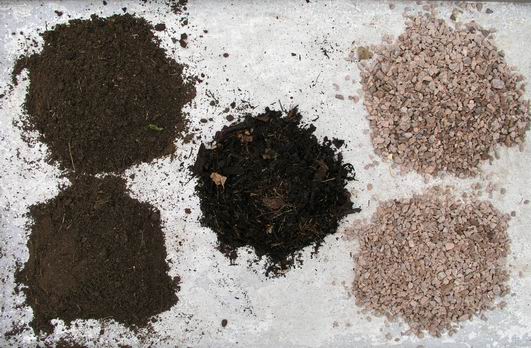
mix 2-1-2
Compost
A well-drained compost is needed and we use the same formula that we use for all our container grown plants.
By volume: two parts loam, one part humus and two parts (3 to 6mm) gravel this gives us a good open compost, if your loam is heavy you may need to increase the amount of gravel to obtain a good porosity. We use leaf-mould for the humus part but peat or equivalent can be substituted. We use bone meal as an added feed.

Sowing frit seed
Sowing
We use square plastic pots of various sizes for all our seed sowing; they make much more efficient use of the space available.
To surface sow frit and lily seed fill the pot to about 2cm from the top and scatter the seed evenly on the surface then fill the pot to the top with a layer of (3 to 6mm) gravel.
I know that the traditional advice is to sow seed thinly but with bulb seed you can get away with and in fact sometimes get better results from sowing it quite thickly. We often have pots that resemble a lawn on germination because we sow so thickly; bulbs do seem to enjoy company. Polystyrene fish boxes are very useful for sowing very large quantities of seed in and we grow Erythroniums, Trilliums and Lilies in these until they reach flowering size without the need to repot.

Sowing seed at depth
We are achieving excellent results by sowing seeds of Crocus, Cyclamen, Narcissus, Tecophilaea and Trillium, among others, at depth. We fill the pot no more than half way up with compost then sow the seed, add more compost then top off with grit; we get much better results this way. I learnt this from observing the seeds that shed into the sand plunge in the bulb house, they always seem to do better than the ones that we sowed and I wondered why?
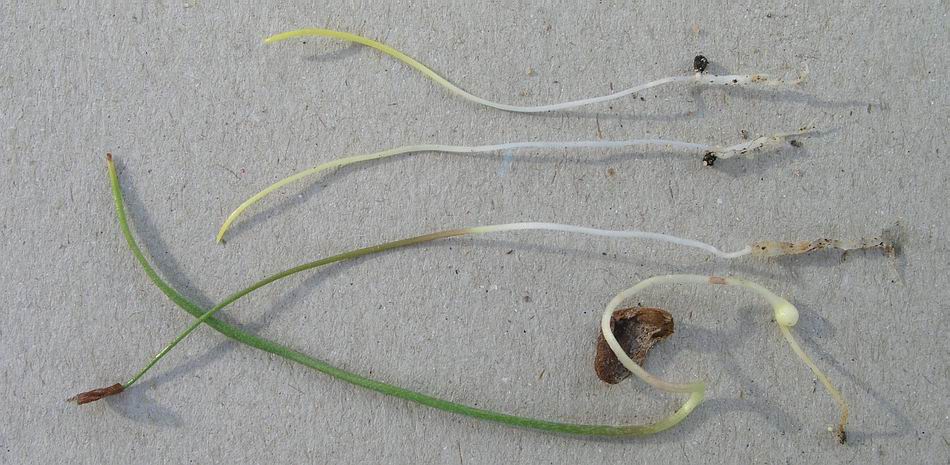
Frit and narcissus seeds germinating
If you compare the way Fritillaria seed and Narcissus seed behave at germination you will find that in Fritillaria the growth tip pushes down into the compost and the bulb forms at the end of this tip where as in Narcissus the bulb forms beside the seed and the roots penetrate the compost. The Narcissus bulb then in subsequent years forms contractile roots that gradually pull the bulb down to its preferred depth.

First year narcissus sown deep
Sowing the seed around 5 cms down not only saves it from having to pull itself down but also places it in a much more stable environment less likely to dry out or be attacked by pest or disease. The first year bulbs above were sown deep and are much bigger than they would have been in they were sown on the surface and only covered with some gravel.
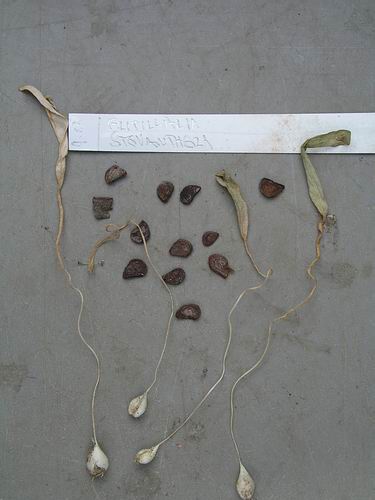
1st year Frit seedlings
Look how deep these fritillaria bulbs have taken them selves in their first year of germination: learn this lesson from the bulbs and never be afraid to plant them that bit deeper - they will be able to get their leaves up to the surface.

Seed frames Nov.
After sowing
We place all our bulb seed pots on a sand bed in an outside plunge bed which is left open in all weathers until germination starts to occur. Some Crocus and Narcissus species can start to germinate in the winter before the year ends and you need to look regularly at the seed frames to check for growth. Once a pot has started to germinate it needs to be covered to protect the fragile young growth from the physical effects of the weather and any prolonged periods of frost.
A good flow of air should be maintained to prevent any fungal disease attacking the growth. If the seed coat is stuck to the end of the cotyledon do not worry, this is quite normal and you are only going to do harm trying to remove it.
Also watch out for slugs, they can devour a whole pot of precious seedlings in no time, we have to admit to using slug pellets in the seed frames.
As spring arrive and the seedlings are in good growth we apply a sprinkling of sulphate of potash to the surface of the gravel and then water it in. Some of the potash, a white powder, will remain on the gravel and each time we water a bit more will wash down to the roots.
It is important to keep the seedlings growing for as long as possible in their first year, constantly watering and feeding until the shoots show signs of yellowing.
Once the young bulbs start going into their dormant period, keep the frame covered to prevent excessive moisture, but do not let them dry out completely. The tiny young bulbs have not yet built up a big enough store of energy and moisture to take them through long periods of drought.
The frames are kept covered as required through autumn and winter with occasional openings during light rain to keep the compost always moist.
Second and third year
The same procedure is followed for the next few years with plenty of watering and feeding in spring while the plants are growing and holding them just moist during the dormant period. It is important to remember that the seedling bulbs will be starting to root from September on, even though you may not see any growth above the surface for six months or more, so a good soaking at this time is essential. Always be on the look out for slugs and aphids, which not only weaken and damage the plant but can also spread virus.
We use any available systemic insecticide spray to protect the plants and have never found one that causes any problems to the bulbs.
Repotting
We usually do not start to repot seedlings until the end of the third growing year.
Many bulb seeds will germinate sporadically, especially if they have been stored, so if you repot too soon you could lose the ones that will germinate in their second or third season.
If you have sown Narcissus, Crocus, etc on the surface they may be the exception to the delayed repot rule: there is a big advantage in getting them down deeper into the compost as soon as possible- it is much better to sow them deeply in the first place.
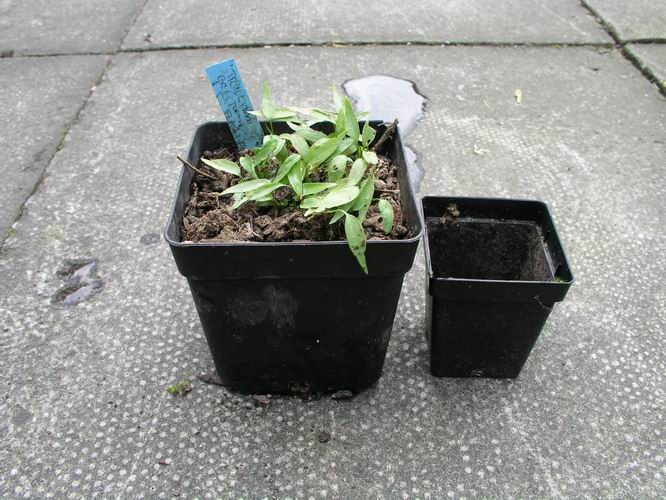
Potting on en masse
If you do have a good germination you can repot them en masse with minimal disturbance to the roots into a larger pot.
We repot seedling bulbs in August/ September once we have finished repotting all the mature bulbs. The ones that are due to be repotted are allowed to get slightly drier which makes sorting them out that bit easier. Tip them out and carefully sift the compost until you find them all, shaking the compost in a tray as if panning for gold will bring the young bulbs up to the surface. Remember you could have one, two and three year old bulbs in the same pot. Repot them into a fresh batch of the same compost mix increasing the pot size or making two pots from one, as you think necessary.
Once the bulbs have reached this stage we either move them on to a covered bulb frame or bulb house as they now require more protection or plant them into the garden if they are suitable. It is a strange fact that seedling bulbs seem to be hardier when they are young than when they are at, or reaching, maturity.
Some Narcissus and Crocus will flower in three years from seed as will many lilies but it is normal to have to wait until year five to seven for Fritillaria and Erythronium.
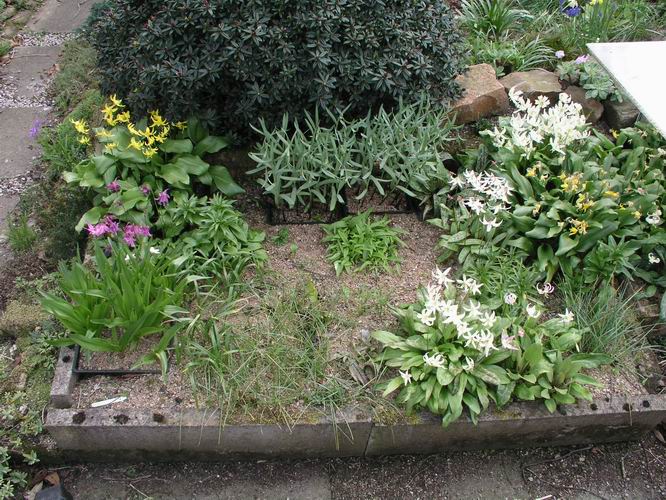
Mesh baskets in sand plunge
Most bulbs that we plant in the garden are grown in plastic mesh pond baskets for ease of relocating and splitting in future years. We also have several open plunge beds where we grow Erythroniums, Trilliums, Fritillaria, Crocus, Corydalis, etc in square mesh pond baskets; these beds act as a half way house between the bulb-house or bulb-frame and the garden. It also allows us to lift and split the plants on a regular basis without having to disturb other plants growing in our densely populated garden.
By growing bulbs from seed it also gives you that extra few that you can try out in the garden and we are increasingly surprised at how many of these, which we always grew under glass before, can survive and sometimes thrive if the correct conditions can be found in the garden.
At the moment we are spoiled for choice with the great variety of bulb seed available through the SRGC Seed Exchange as well as the exchanges of our sister societies. Also there are many specialised commercial seed lists, offering mouth-watering gems both from cultivated stock and wild locations, advertising in our journal.
So there has never been a better time to start growing bulbs from seed.
^ back to the top ^
|

