|
BULB LOG 04 ---- 26th January 2005
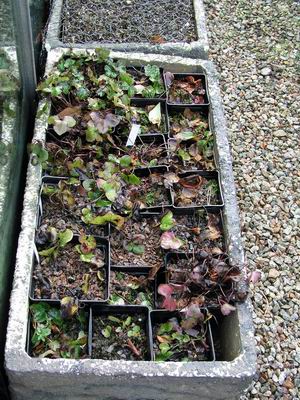
Hepatica fish box
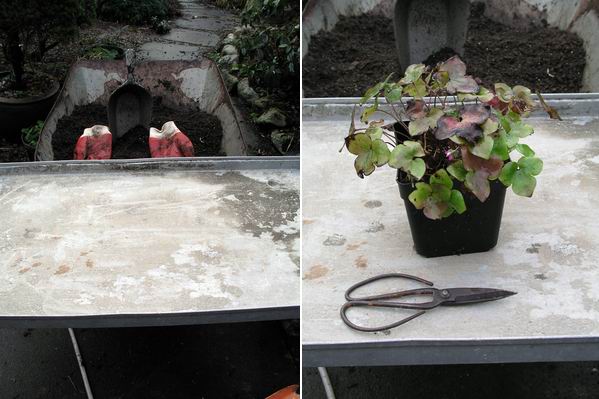
Just to show that I do still grow plants other than bulbs in pots, here is one of the three 'fish box troughs' with our seed raised hepaticas. As I mentioned in the last log I always think that I have plenty of time to do all the winter jobs as spring is a long way off, then I suddenly realise that spring is nearer than I think and I am panicked into a frenzy of labour. Yesterday I started to re-pot all these hepaticas.
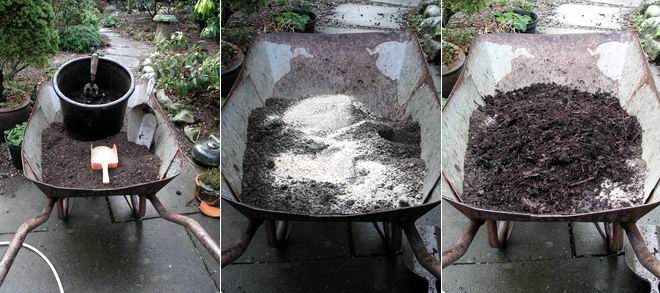
Compost mixture
The link to bulbs is that I recycle the spent bulb compost from last summer's repotting and use it for growing on the likes of these hepaticas.
I put one bucket of the old bulb compost into the barrow, spread a mug full of bone meal on top and then add a third to a half of a bucket of our leaf mould. I usually do all our compost mixing in our cement mixer but for small amounts like this it is sometimes more convenient to do it by hand.
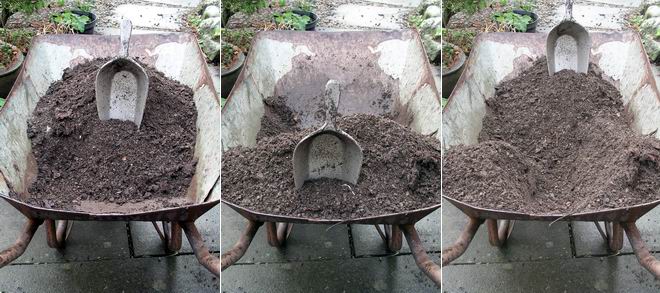
Mixing 1
I have found the best way to mix by hand and be sure of an even distribution of the different ingredients is start by scooping from the bottom, turn all the material to the front of the barrow, then turn it all to the back of the barrow.
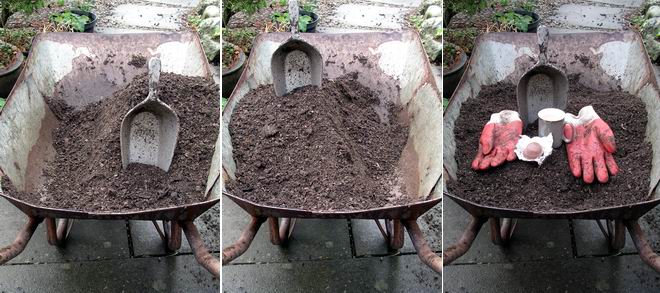
Mix 2
Now scoop all the mix from the right side and pile it on the left and then the reverse, left to right. Finally one more turn to spread the mixture evenly over the barrow will give you a nice even mixture and it is time for a cup of tea and a chocolate biscuit.
Tray on barrow
I have a number of old aluminium trays, recycled from a bakery, that are extremely useful when repotting. I place one of these trays over the handles of the barrow where it makes a very useful potting bench - now with the aid of as pair of scissors I am ready for the Hepaticas.
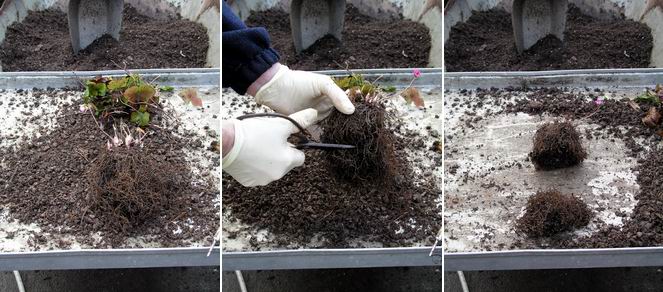
Root trimming
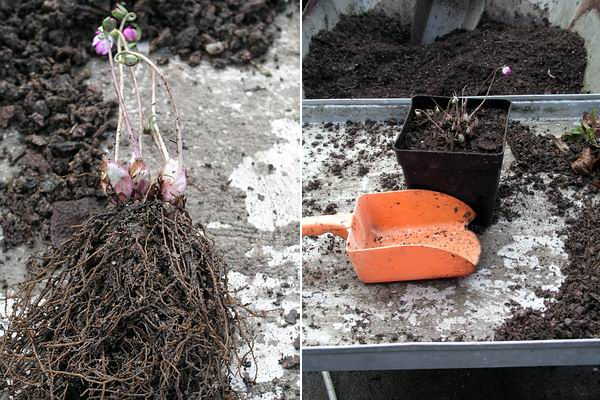
I tip the plant out of its pot and remove all the old compost by gently combing out the roots, I trim the roots back, removing about a third of their length. I should state that Hepaticas tend to make long straggly roots and the first time I cut them back (in their second or third year) I may cut them back by half or more of their length. This cutting back encourages a nice bushy root system that makes the plants much more suitable for pot culture. The plant above has had this treatment for several years and you can see the nice, well-branched root system. Now I remove all the old leaves by gently pulling them down and back on themselves, this removes them cleanly.
Divide and repot
If you have a particularly good form and you want to increase your stock of it then you can also divide the plants at this time. The plant can be carefully pulled apart into individual noses, trying to ensure that each has as much root left on as possible - these divisions are then potted on individually. Finally the plants are replanted into the same size of pot and top dressed with some gravel. This treatment may sound a bit brutal but it is how the Japanese have grown these plants for hundreds of years and it works.
For more information on Hepaticas check out Ian Christie's Nursery Workshop on Hepaticas, accessed from the home page.

Fieldfares
All the time I was working in the garden a mixed flock of birds, mostly fieldfares with a few redwings and waxwings were devouring the last of the berries from our trees. The day before this cotoneaster tree was hanging with berries but 100 hungry birds soon devoured them all.
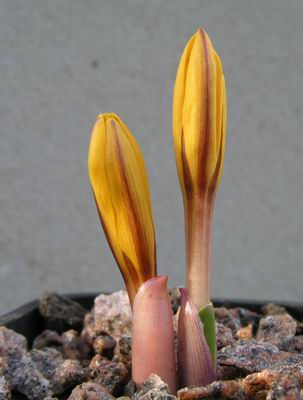
Colchicum luteum x kesselringii
There has been some discussion in the forum on germinating colchicum seed. I can say that colchicum seed has given me the poorest germination rate of all the bulbous seed that I have sown. Luckily some does do well like the cross above that I made between Colchicum luteum and C. kesselringii. I have since lost my Colchicum kesselringii and am heartened to read in the forum that seed of it has germinated well for some of our friends in NZ.

Eranthis pinnatifida seedlings
Another ace plant that attracted much oos and aahs on the forum is the small but extremely beautiful Eranthis pinnatifida. Look closely at this pot full and you will see some seed germinating. These are our own few seeds that I sowed at depth when I re-potted the corms last summer and they are germinating well now.
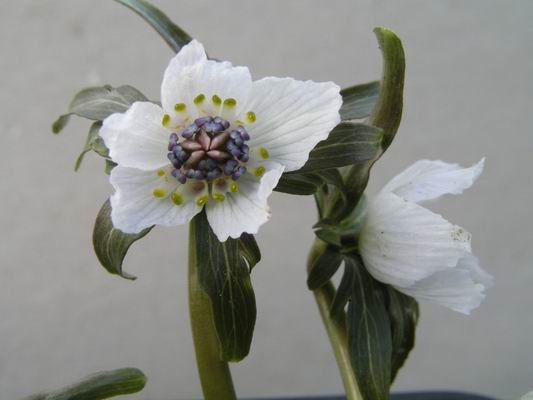
Eranthis pinnatifida 2
We do not have enough of this plant to try it in the garden and as it is so small it would be very easily swamped by the competition so I will continue to grow it in pots in an open plunge frame until I have enough to justify a fish box trough - I look forward to that day.
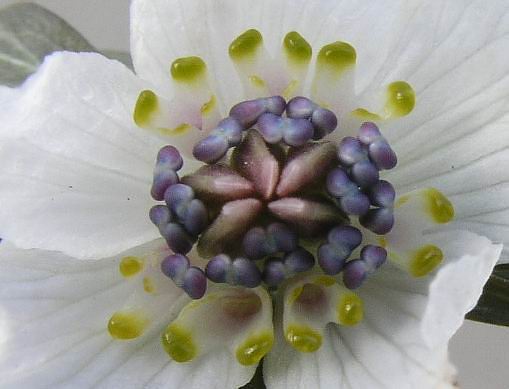
Eranthis pinnatifida detail
^ back to the top ^
|
