|
BULB LOG 03 ----- 19-01-05
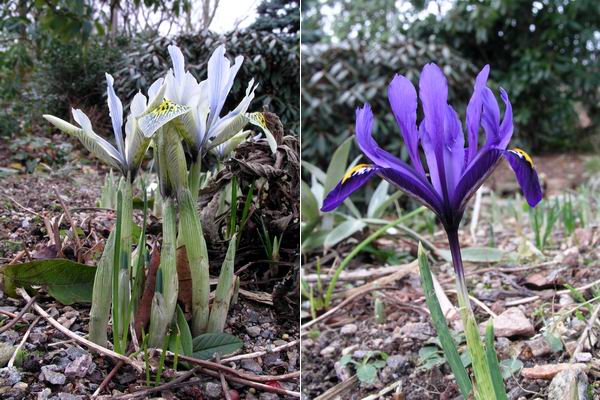
Iris x2
The sudden appearance of the first early bulbs in the garden reminds me that I am running out of time to spread the compost mulch onto the beds. We have hundreds of Iris 'Katherine Hodgkin' (left) all over the garden and the first few flowers have opened in the 'sunny' gravel bulb bed while the others are still at the bud stage, about two warm days away from flowering. On the right is an Iris reticulata form that does quite well in this same bed.

Spreading mulch
Much of our garden has what I can best describe as having a 'woodsy' soil; with a thick, humus-rich layer above our natural sandy soil. This nutritious, well drained, moisture retentive medium not only suits the many Rhododendrons and other ericaceous plants that we grow but it is also enjoyed by a huge range of bulbs such as crocus, corydalis and erythronium among others. We enrich this humus layer every year by spreading the composted hedge and shrub prunings. It is much easier if we get this mulch spread before the bulbs start to push through, as long as we choose a frost- free day to do it on.

Narcissus x2
Someone mentioned on the forum recently, the problem of getting a picture that represented the true yellow of some of the Narcissus. It is mostly the colour of N. romieuxii types with their delicate transparent substance that I have difficulty capturing accurately, The intense yellow of the likes of Narcissus 'Cedric Morris' from the last log comes out well. I took one picture with flash (right) and one without (left) to compare and I also included two colour forms of Narcissus. The form on the left is quite an intense yellow but this is not displayed well in this picture.

Plunge sand
The plunge sand in the Frit-house is looking a bit dry on the surface and I must be careful not to let the frit roots get dry. I leave a bit of slate lying on the sand and check underneath it to see if the sand is moist or dry - this is a good indicator of the moisture level lower in the sand plunge. I can see here that even though the surface of the sand looks dry, the sand under the slate is moist which tells me that I can wait a bit before I add more water to the plunge.
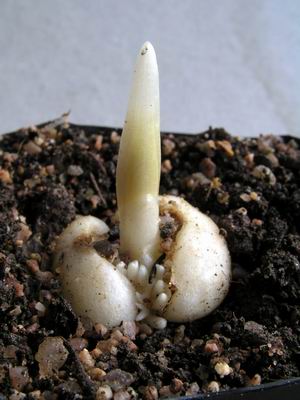
Frit bulb
We must remember that since we watered the frits in September they have been in growth. Even though we can see nothing above the ground the bulb has been slowly growing sending out roots and extending its shoot to just below the surface and this F. hermonis amana bulb is also forming rice grains, so it is imperative that we do not let them dry out entirely.

Frit buds x4
Many Fritillaria shoots are through the surface today and will come into flower quickly if we have a mild period and there is also plenty of water available. I do not want these to flower too early, as we will have a lot of cold weather to come, so I restrict the watering to the minimum amount needed to keep them ticking over for a few more weeks yet. If we get a mild period I will water the sand plunge only because I know that if it is mild and I water into the pots the frits will spring into fast growth and flower too early. It is a juggling act to try and balance these factors and control the plants natural instinct to rush into flower when it is mild and lots of water is available. In the natural environment of these bulbs, lots of water and mild temperatures signal that spring has arrived, but they do not in the vagaries of an Aberdeen stop-start winter.
One thing about embarking on the third year of the bulb log is that I can compare directly the stages of growth of the bulbs over these years. I have a great many more pictures than appear on the log, filed on a weekly basis, which makes it easy to check what stage the bulbs were at in the last two years and I can say that there is very little difference to be seen.

Frit seedlings
I have mentioned previously that I sometimes sow seed back in the same pot as the parent bulbs, in an effort to save space. This picture shows that these seedlings are germinating just ahead of the parent bulb appearing through the surface, I always find that if bulb seeds are sown at the optimum time they will germinate when the mature bulbs are coming into growth.
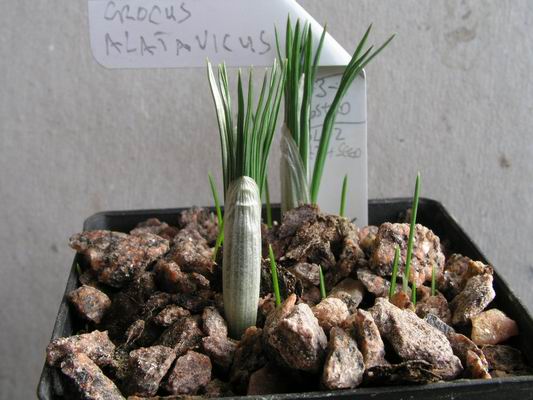
Crocus alatavicus
Here we can see both mature Crocus alatavicus shoots with the seedlings, sown last July when the corms were repotted, germinating at the same time. These seeds were sown at depth, half way down the pot, just above the level of the corms.
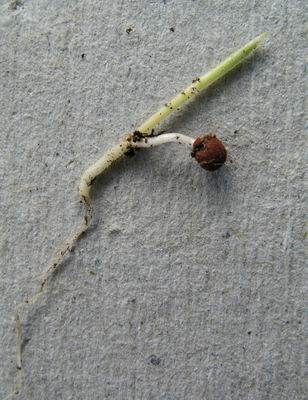
Crocus seedling
I always like to see how a seedling bulb germinates as the more we understand about the bulbs growth behaviour the better we are able to understand their requirements in cultivation and the greater chance of success. The single leaf rises from the seed and the corm will form just where the stem narrows and turns into the root. This seed was surface sown and shows that the young corm would not be very far from the surface, so by planting the seed deeper, the corm will have the advantage of a more stable environment to grow in.

Aphids x2
With all this fresh new green growth and mild winter days, aphids are never far away - we must be vigilant and tackle them before they get a hold. Simply rubbing them off and squashing them with your fingers is very effective but I will also spray with a systemic insecticide to back this method up.
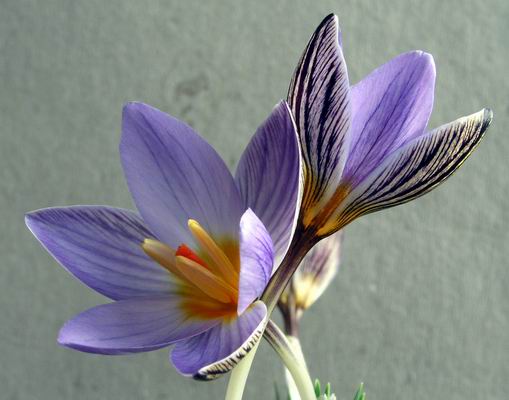
Crocus biflorus issaricus
I will leave you this week with a very nice dark and well feathered form of Crocus biflorus issaricus.
^ back to the top ^
|
