 |
SRGC Bulb Log Diary |
| Home Recommend This Site To A Friend |
|
BULB LOG 36 4th September 2003

Cyclamen in garden Cyclamen hederifolium is all over the garden just now. If you look closely you will see that some of the pink ones have a darker pink stripe up the petals, I suspect that this is as a result of the recent climatic conditions. 
Roscoea seed head We have to keep a constant eye on the Roscoea so that we can collect the seed, it is one of those plants that do not give much advance warning that the seed pods are about to open - they still appear green on the outside when they suddenly twist open shedding the seed. 
Crocus vallicola x3 A Crocus that enjoys cool moist summers Crocus vallicola, (I mentioned it in the last log as a possible parent of C. scharojanii flavus) is flowering now. The white tepals taper to a fine point which has always fascinated me since I first saw the painting used to illustrate it in Brain Mathew's wonderful monograph on Crocus. What you do not always see from the outside is the fine violet lines on the inside of the petals each with a two yellow spots at the base. I have been out with my paint brush picking up the pollen and carefully placing it on the stigma to give them the best chance to set seed - the only way to increase your stocks as most clones do not multiply vegetatively very often. Of course the main task of this week is to water the bulbs I always apply the first 'storm' on September the 1st - this is the start of the bulb year. 
Watering plastic pots 1&2 This is not as simple as it sounds as it is important to get the compost in the pots evenly wet. I use a small tap system on our hose pipe and flood every pot to the rim; the pots are now left to drain for a while until the surface water has drained away. 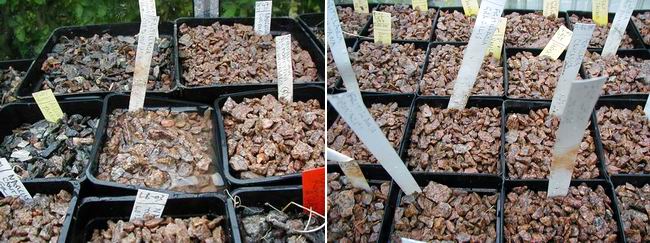
Level and drain It is important to get all the pots level on the sand bed that they sit on. You can see that in the pot, center left, which is not level, the water is all lying at one side -if this remains like this all season one side of the pot will receive more water than the other as most of the water will flow down that side. It is easiest to level the pots with your fingers while watering. After the pots have drained I go over them again flooding each one in turn this should ensure that they are evenly wet all through and also ensures that there is good contact with the sand bed which acts like a reservoir absorbing excess water and making sure the pots do not dry out too quickly. 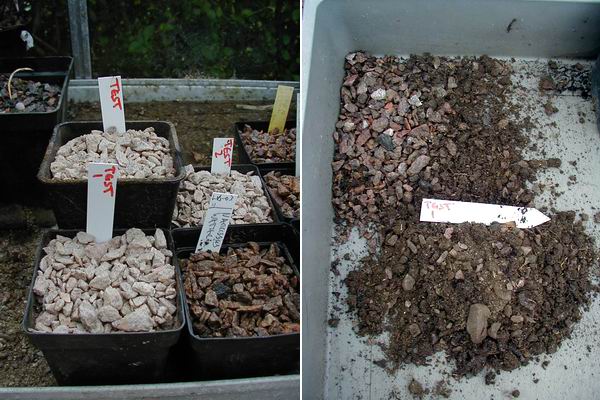
Test pots If you want to be sure that you have wet your compost thoroughly it is a good idea to have a few test pots filled with the same compost and top dressed, water them with the others and you can tip them out to see how the water has penetrated the compost. You can see on the right I have tipped out a pot that has had one watering and you can see, just below the label, the compost that was at the center, where your bulbs would sit, is still dry - after a second watering it was evenly wet all through. 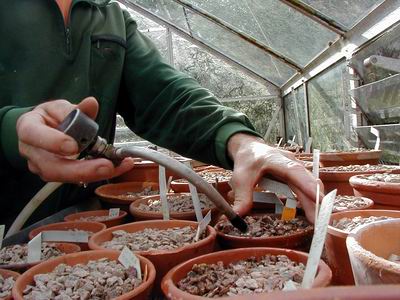
Leveling clay pots Our clay pots are all plunged in sand and the initial watering is much the same watering them until they are filled to the rim, leveling them with my fingers while watering the sand plunge around them. The sand plunge must also be well watered, especially around the pots, to ensure a good contact that will allow free transfer of water between them. They also received two good soakings to ensure even moisture levels 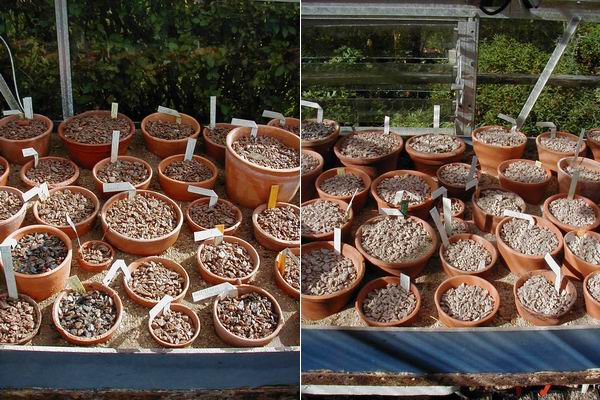
Clays before and after On the left all the pots are nice and level and the sand plunge is watered while those on the right are about to be done. It is a very important task this first watering and I know many people who have trouble with their bulbs because they fail to get the compost thoroughly and evenly wet which can result in a poor root system. 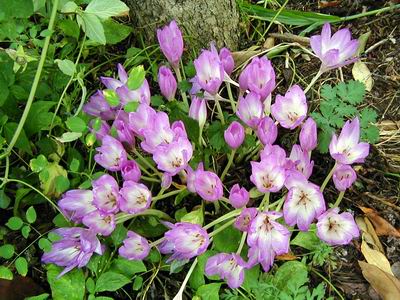
Colchicums Back in the garden the clumps of colchicums are spectacular, opening in the warm sunshine. I will leave you this week with a very beautiful old colchicum of uncertain origin. 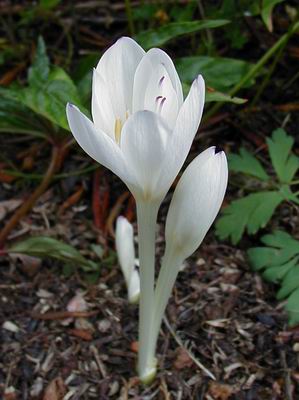
Colchicum byzantium album ^ back to the top ^ |